


Building the Enterprise-C
First ImpressionAssembly SequenceColor SchemeConclusion
AMT/Ertl was late to release the Ambassador class Enterprise-C four years after the end of TNG, but finally all starships with this illustrious name are available as model kits. I hope my review will provide some useful hints how to make the best of this model.
The following recommendations are based on usual tools and my average skills so I think anyone should be able to reproduce the result. You will need conventional polystyrene glue, some rubber bands and clothes pins, an assortment of files, fine sandpaper, a sharp knife, light gray spray paint, some masking tape, some fine brushes and a number of enamel paints listed in the table near the bottom of this page.
First Impression
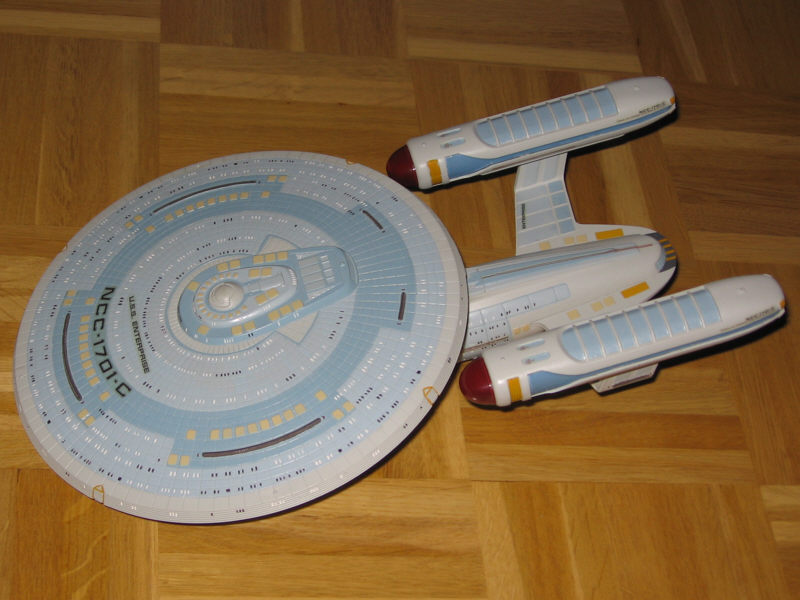
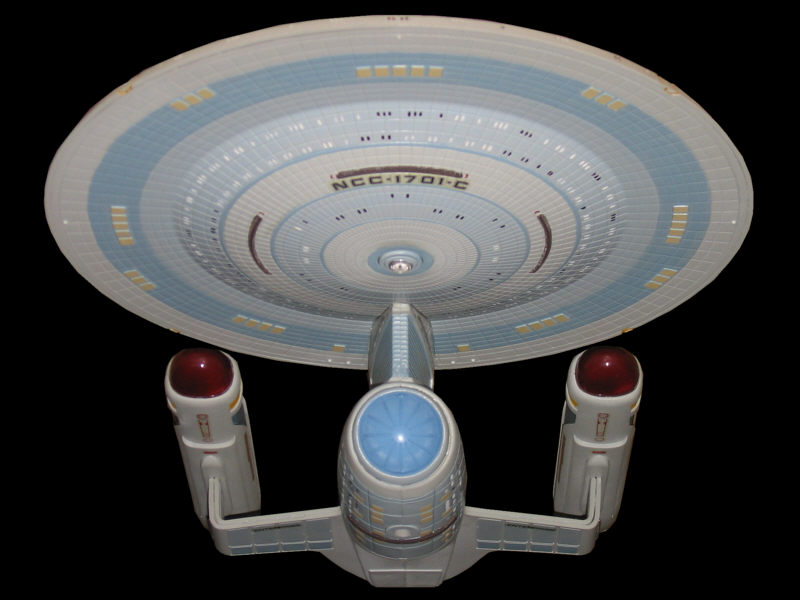
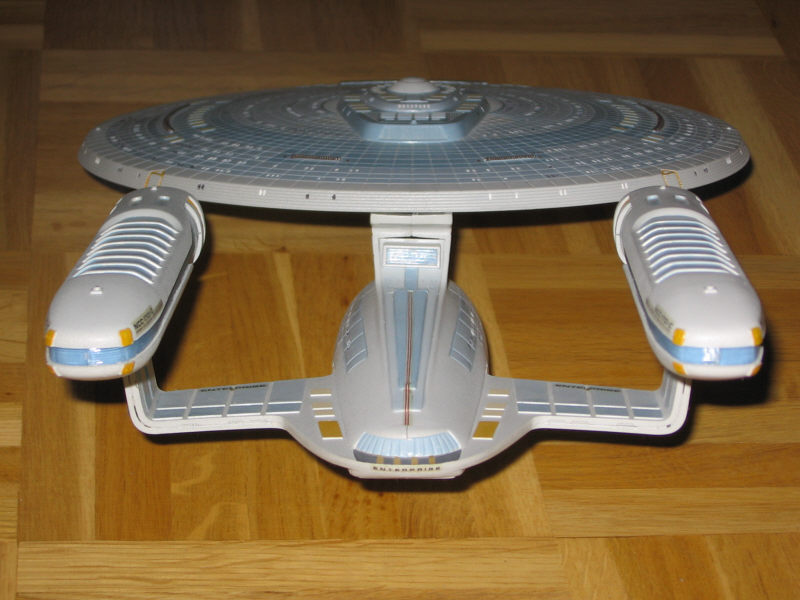
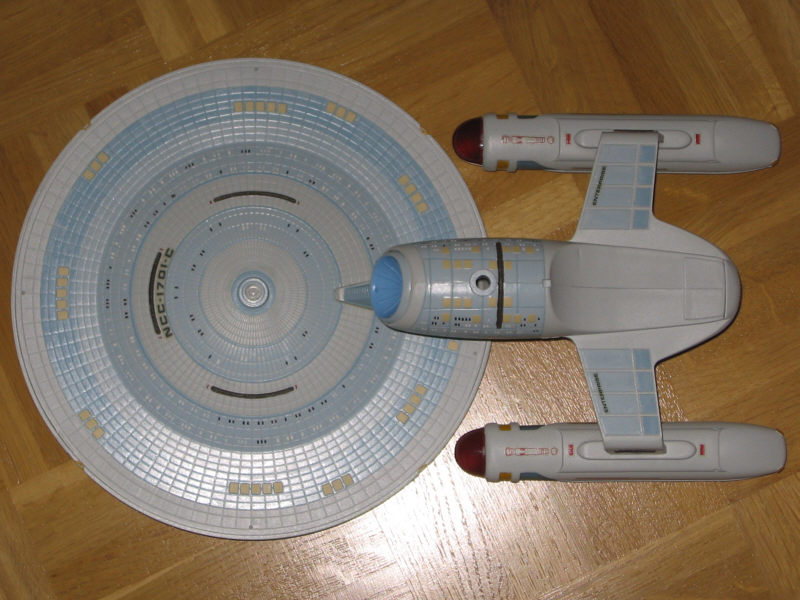
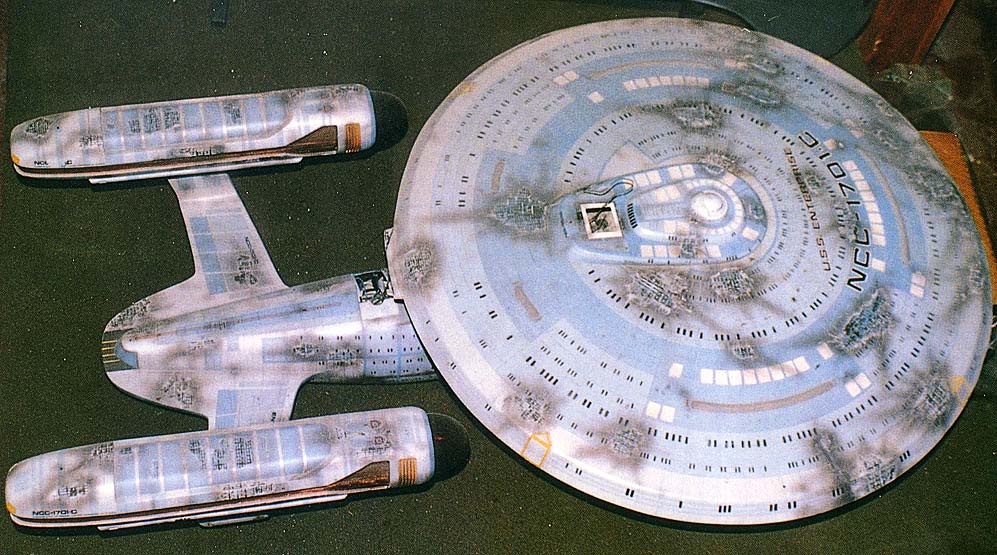
Despite being significantly shorter, the Ambassador-class Enterprise-C is more voluminous than the Sovereign-class Enterprise-E. Size comparison is easy, since the Enterprise-C kit is designed to match the 1/1400 scale of the Enterprise-D and Enterprise-E. The finished model is 375mm long, this corresponds to 525m (Star Trek Encyclopedia: 526m). The kit contains 26 parts required for completing the model itself, and 3 parts for the display stand. Most of them are molded in light gray. The deflector dish, Bussard collectors, plasma conduits and sensor dome are clear parts.
A number of additional parts are included, among them a separate shuttlebay. These bits are obviously intended for use with the USS Yamaguchi (DS9: "The Emissary") model kit, which was released by AMT/Ertl some time later. Fortunately the Enterprise-C kit takes into account most of the significant differences between the two Ambassador versions and reproduces the original version correctly, that is, without the second shuttlebay, with a different Bussard collector housing, deflector dish, sensor dome and bridge module. Even without paint the model shows fine detailing; the hull panel divisions are mostly correct.
There are three obvious differences from the studio model, however. Firstly, the lifeboat hatches, which are seemingly intended to have the same size as those of a Galaxy-class vessel, are correct in size in the area around the bridge, while all the other hatches are too small. Secondly, there should be no grooves in the saucer rim. Thirdly, the engineering hull top section is much too wide.
Assembly Sequence
The numbers refer to the sub-assemblies in the AMT instruction sheet.
- In the case of the Enterprise-C, I recommend to cement the whole model together and paint it afterwards, masking the clear parts with tape. The assembly of the saucer is not connected with any problems, but be careful not to remove too much excess plastic from sharp edges. The grooves do not correspond with the painted rings around the saucer of the prototype anyway, and this is the time to decide whether to remove them or not. Instead of filling the grooves it is more convenient to file down the raised rings, but this would require to renew the RCS quads and window deepenings. I admit I was lazy and retained the grooves.
- The clear parts (Bussard collectors and plasma conduits) have to be painted from inside prior to this step. The warp engines are better to assemble than those of previous ship models, because additional pins hold the plasma conduits in the right positions. Nevertheless, the port nacelle of my model was a bit tilted after its assembly.
- The clear navigational deflector may be painted from inside, but the result does not look very good. Moreover, the dish on the studio miniature does not appear to be transparent anyway. The additional part holding the impulse engine does not fit well into the engineering hull; this is one of the very few places where the model can be improved with some putty. It is correct that the neck juts out a bit, as the pictures of the studio miniature show. Unfortunately I had filed it down to the saucer edge before I first saw the images.
- see 3.
- It is possible to finish the complete assembly prior to applying the basic hull color. Masking the Bussard collectors and the plasma slots will take relatively long, but it is worth while to enable fast and homogeneous painting. I took spray paint (light gray, RAL 7035).
- The display stand is relatively durable. Nevertheless, it has to be reinforced with two-component glue at its top, because the two halves are torn asunder by the lever force of the model if only fixed with polystyrene cement.
Color Scheme
The AMT/Ertl painting instructions for the Enterprise-C reach an unprecedented degree of reliability. 90% is correct. Still, there are some errors in it:
- The RCS quads should have an orange outline and should not be completely filled.
- The top view on the instruction sheet shows 80% white and 20% gray for the darker areas. This should be blue instead of gray, of course.
- The bottom view depicts the sensor dome of the Yamaguchi version. The Enterprise-C sensor dome has a sky blue inner ring and a light blue outer ring.
- The lifeboats look better if they are painted beige instead of white.
The following table gives the appropriate colors for the major sections of the ship, mainly referring to the studio model image.
| Overall hull color | Very light gray |
| Contrasting panels I | Sky blue (Humbrol No. 47 + white) |
| Contrasting panels II | Light cyan/blue (Humbrol No. 89 + white) |
| Escape pod hatches | Beige + white |
| Phaser strips | Brown gray |
| RCS quad outlines | Orange |
| Impulse engines | Uncertain, probably red rather than blue |
| Bussard collectors | Red (when active) |
| Plasma conduits | Light blue |
| Deflector dish | Light blue |
| Lighted windows | White |
| Dark windows | Black |
Painting will require several hours. However, most of the work is rather easy, since raised details as e.g. the deck panels need no masking. Though the windows are very small, they can be painted using a very fine brush and thinned enamel paint. Instead of brush and enamel paint, you may employ a fine waterproof pen for the dark windows.
Conclusion
The Enterprise-C is one of the very few starship model kits that can be recommended to beginners. It is also one of the best researched kits by AMT/Ertl. Provided the model is carefully painted, it may look very close to the actual studio model. The most annoying flaw, which is unfortunately impossible to correct (unless you're a talented kitbasher), is the much too wide stern section and shuttlebay. Since this error also shows up in any available "official" Ambassador-class diagram, it is highly recommended to use only the studio model images for reference. Building the model requires about 19 hours, 1h for preparation of parts, 1h for cementing, 1h for masking, 14h for painting and 2h for decals.
|
Rating
Reproduction: 6 |
See Also
Ambassador Gallery - all variations
Ambassador Class Variants - a very detailed view at the existing variations


