


Appearances of the Ferengi Marauder
by Jörg Hillebrand and Bernd Schneider
Ferengi Marauder (Physical & CGI)Marauder Graphics and PartsSummaryAddendum
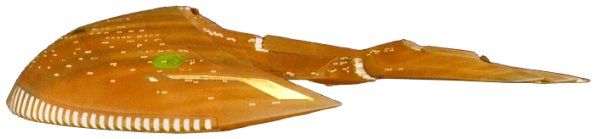
Although the D'Kora class Ferengi Marauder has only appeared in seven episodes altogether, of which two appearances only consist of stock footage, three models of the ship have been seen in all. When the ship was seen on TNG, two separate physical models were used. For its final appearance in the Voyager episode "Inside Man", a CG model of the ship was created.
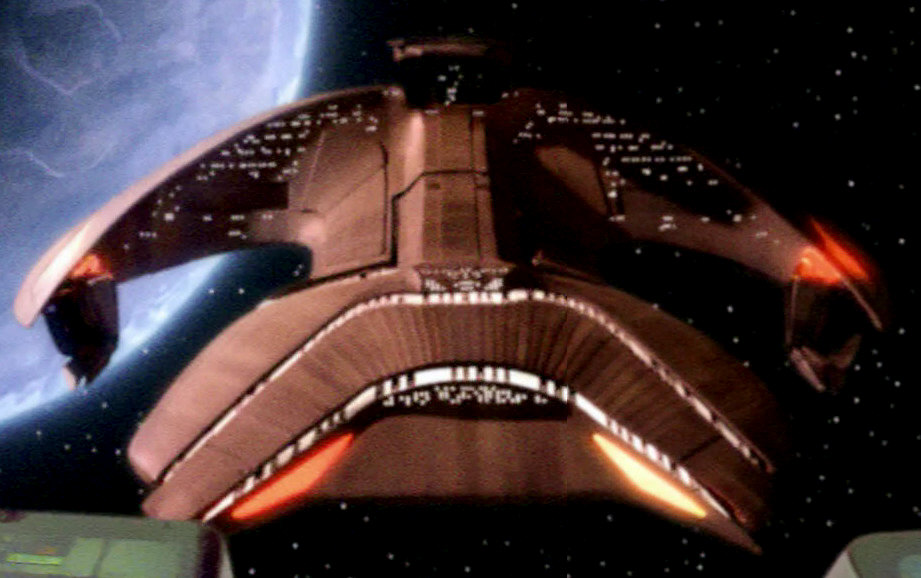
The Ferengi Marauder is also special because it is one of the few ships appearing on Star Trek (next to the Klingon Bird-of-Prey or the Species 8472 bioship, for example) that featured moving parts. In the case of the Ferengi Marauder, the ship could extend the forward section of its main hull, fold down the two weapons' arms on the sides of the ship and extend an additional piece of infrastructure on the top of the main hull. In the script of "The Last Outpost" this surrendering posture, which only appeared in that one episode, is described as follows: "the snake head-like prow's pushing out from the ship body," and "the Ferengi ship now extends gun-like arms from either side of the prow."
This additional "gimmick", however, also proved to have its disadvantages, as Image G's CEO Tom Barron stated in an interview with Star Trek: The Magazine in May 2002:
"The only person we could find who was willing to try to build it on our timeline was Greg Jein, who had been working on Star Trek forever. But on top of everything there was supposed to be this articulation - the arms were going to extend out into a threatening posture. Well, of course, we were trying to knock this stuff out in an incredibly short period of time. We're literally talking about a situation where hours made the difference. The Art Department came up with drawings, and Greg did exactly what was required; it was a motion control, articulated ship that had these arms that extended out, but, because of the timeline, that articulation was never really seen on the show. The model worked but it was too time-consuming to shoot it. I remember it had internal lighting, but when we went to articulate the arms it crushed the neon, so the lights all got knocked out right away! Because of the problem with the articulated ship, Greg knocked out an additional version that was literally just a casting that he did in a day. We slapped it on a stick, and that's what we used in the show more than anything else. We did end up with a shot where the arms moved a little bit. Then, when they finally cut the show together and put it on the air, there was almost none of that left either. Then, when they decided the show ran a little bit long, they cut another second; then, if there were any extra commercials, that cuts out the rest of the shot. From then on, we used this shell, and we never used the articulated one again."
Thus, a second smaller filming miniature was created. It is hard to tell when the original model and when the second model was used, as the pattern of lit and unlit windows matches in every shot in which the episode is seen. Normally, a different window patterns held to differentiate between two models, as is the case with the three models of the USS Enterprise-D and the two models of the Romulan Warbird. In one episode, "Ménage à Troi" the windows are not lit at all, so this might be an appearance of the second filming model, which was smaller and less detailed than the original one.
In the following article, we trace every appearance of any version of the Ferengi Marauder, list which model was used in a given episode, and identify any stock footage that was employed. Whenever possible, HD screenshots are shown.
Ferengi Marauder (Physical & CGI)
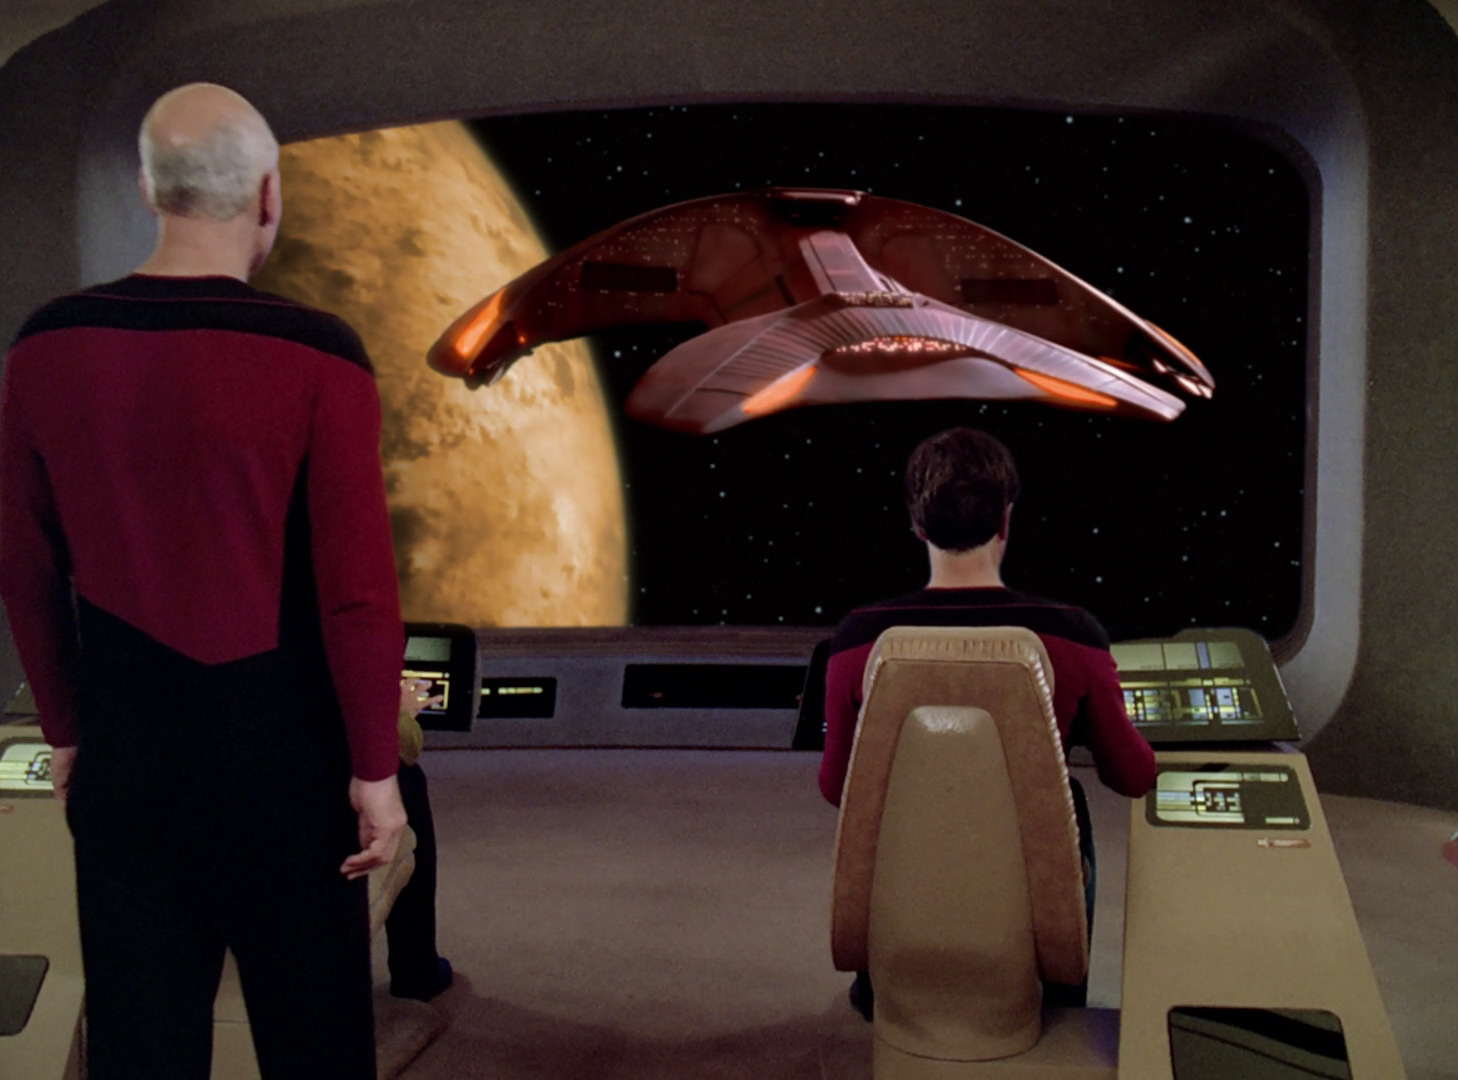
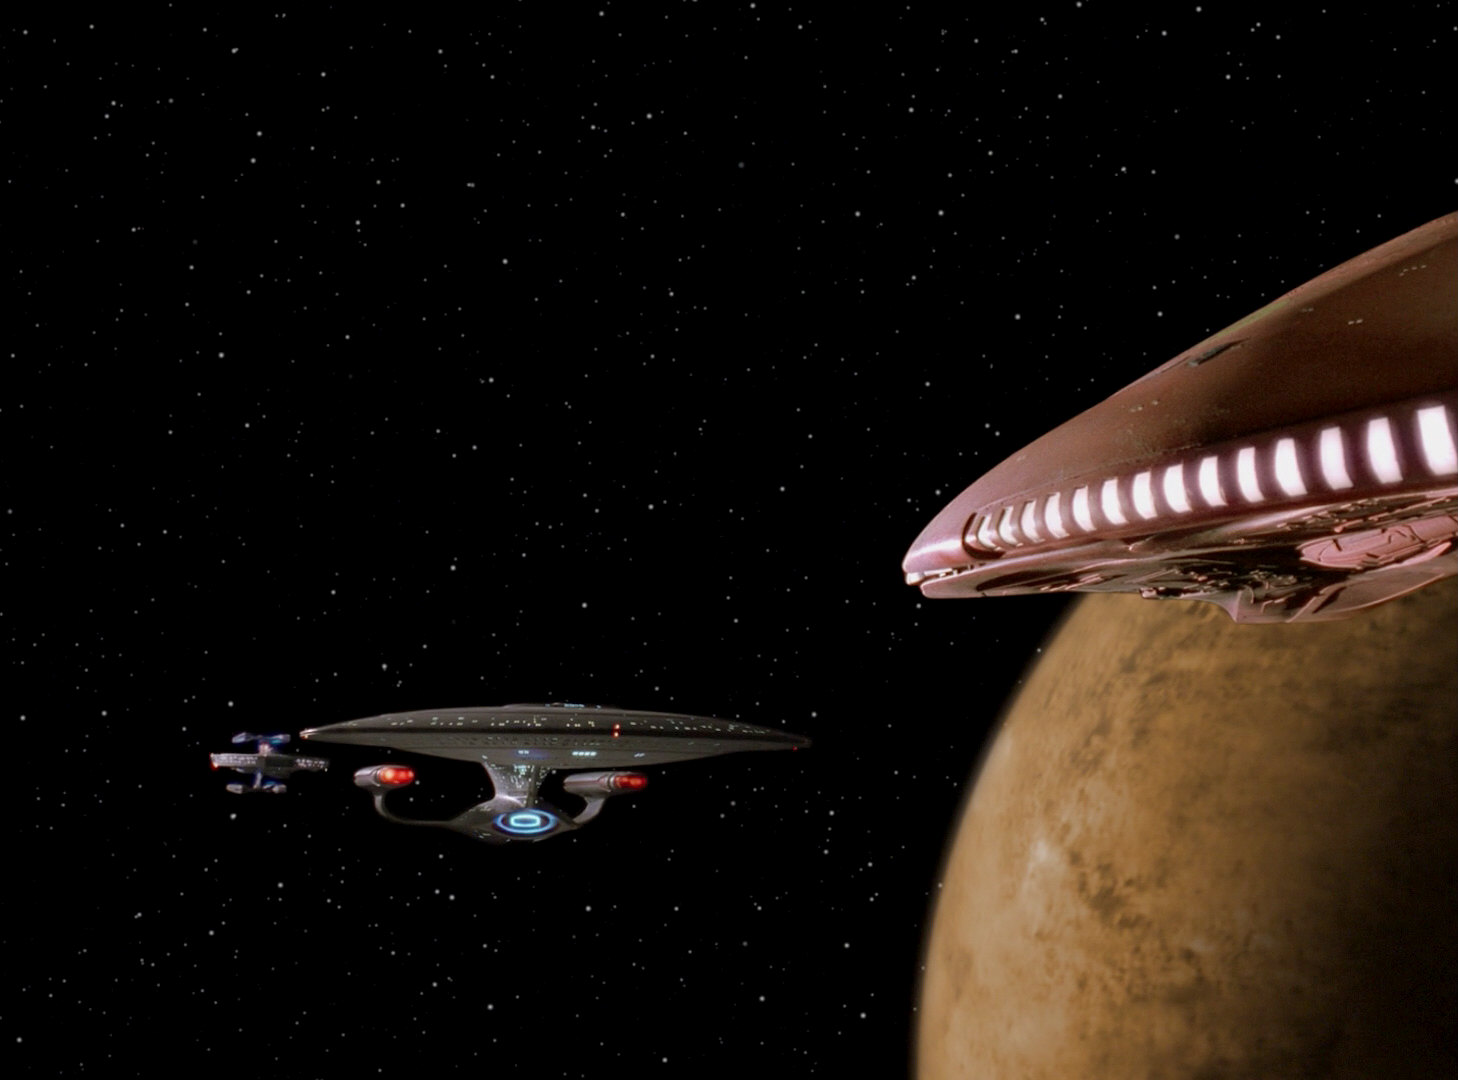
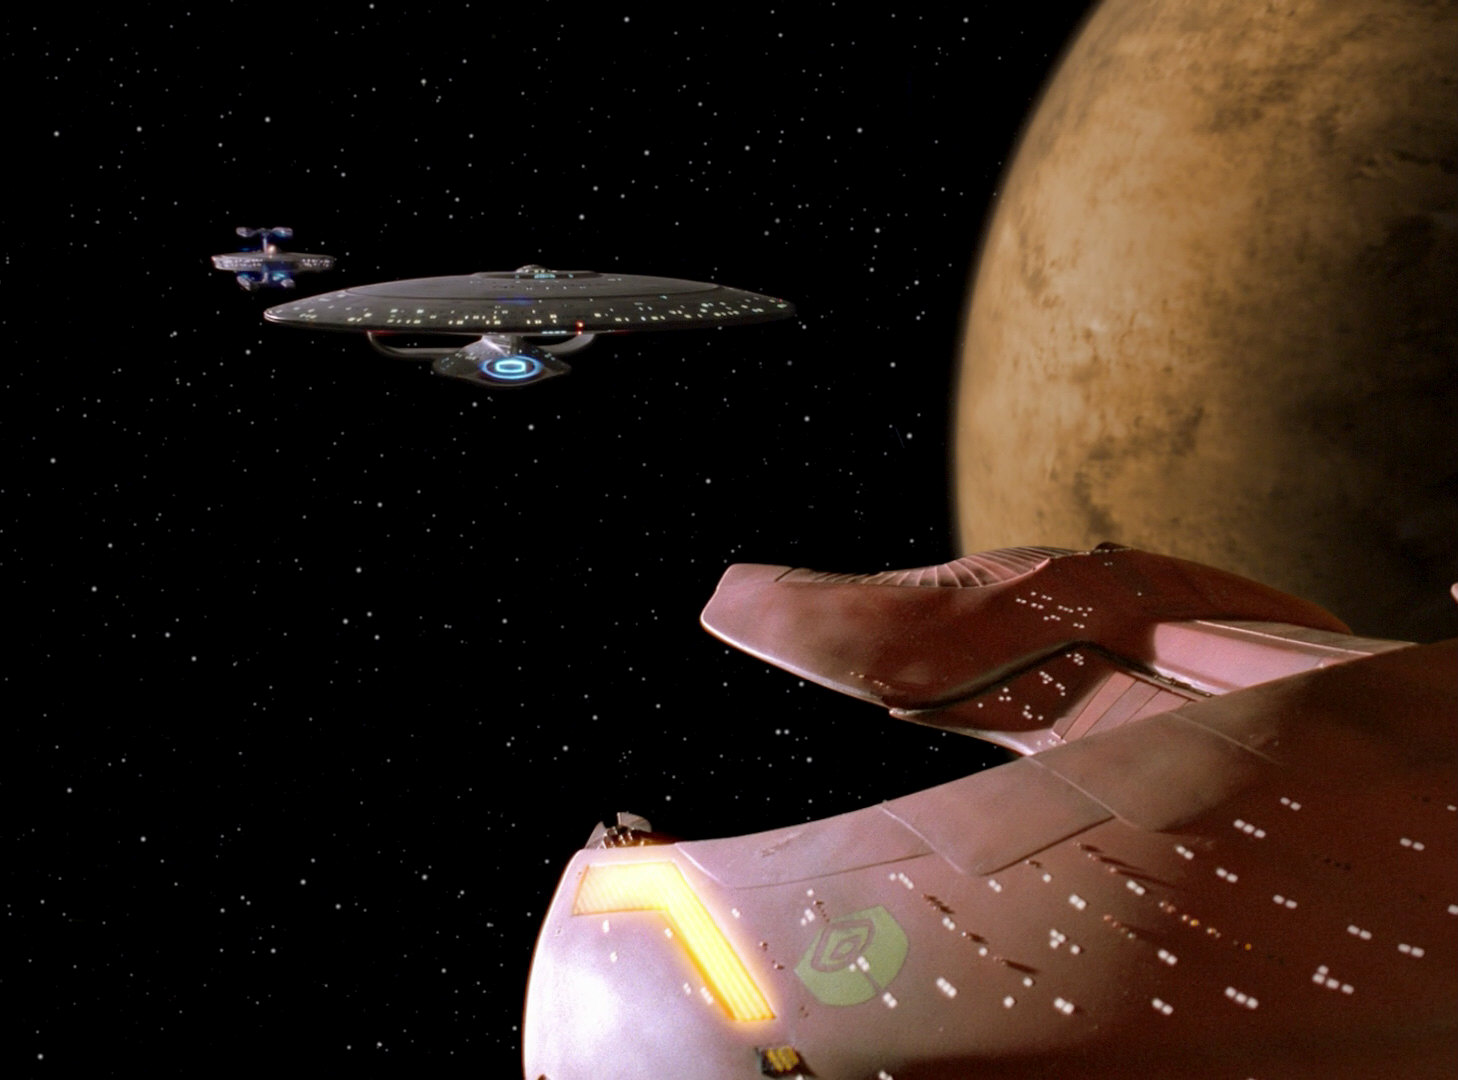
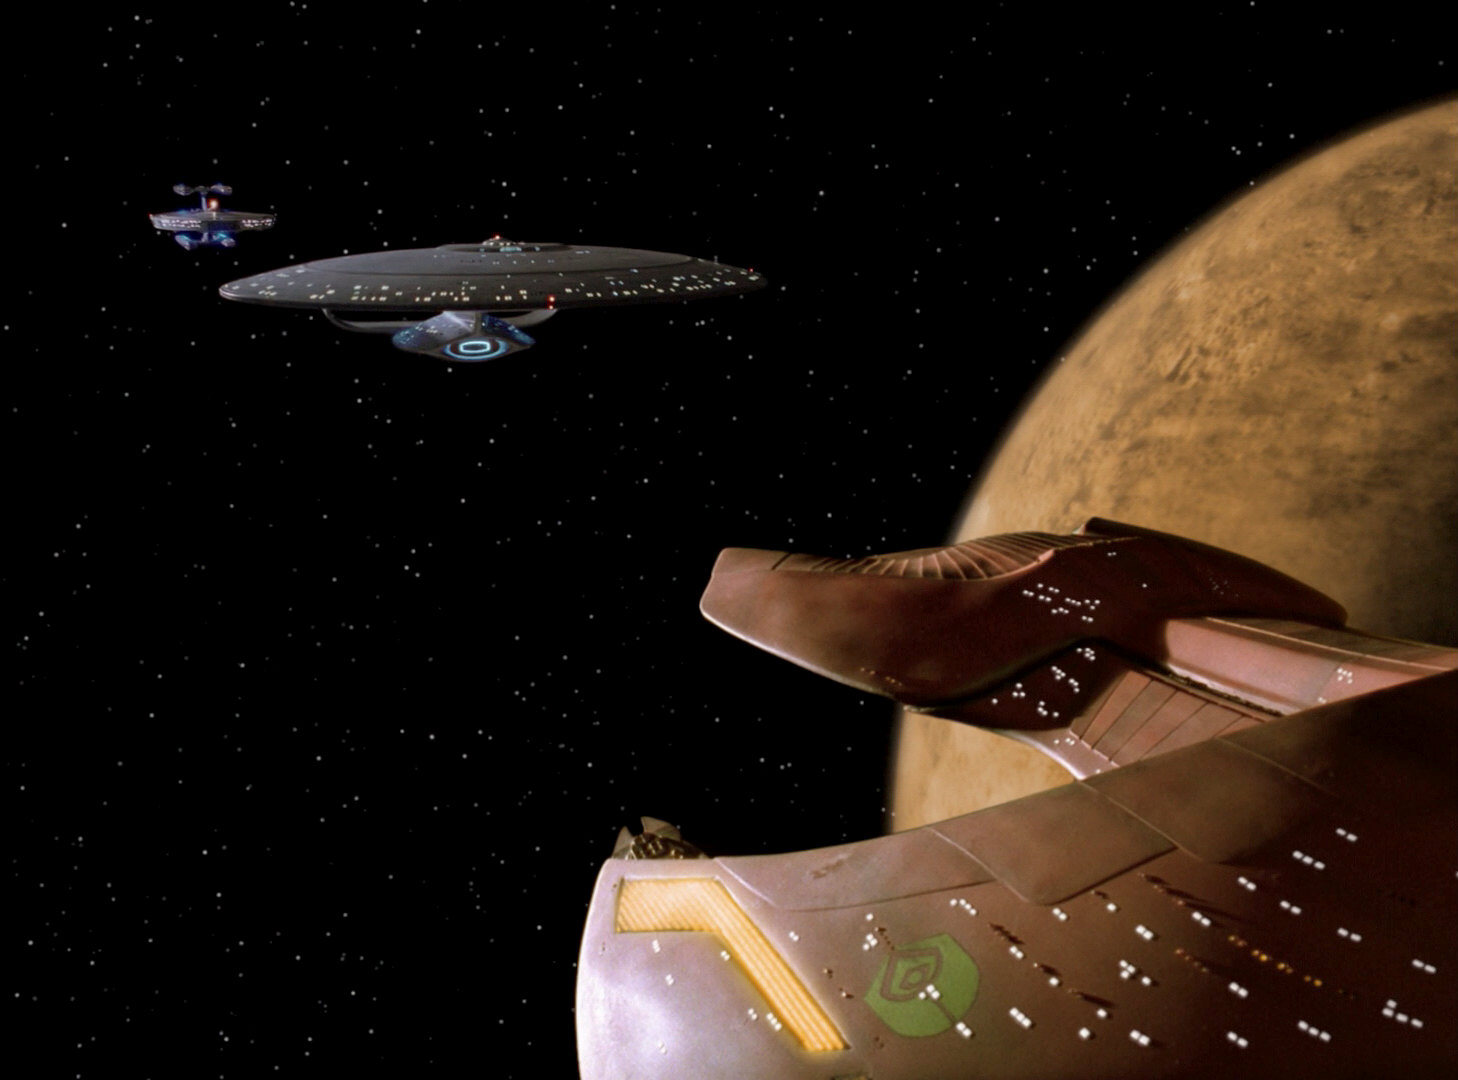
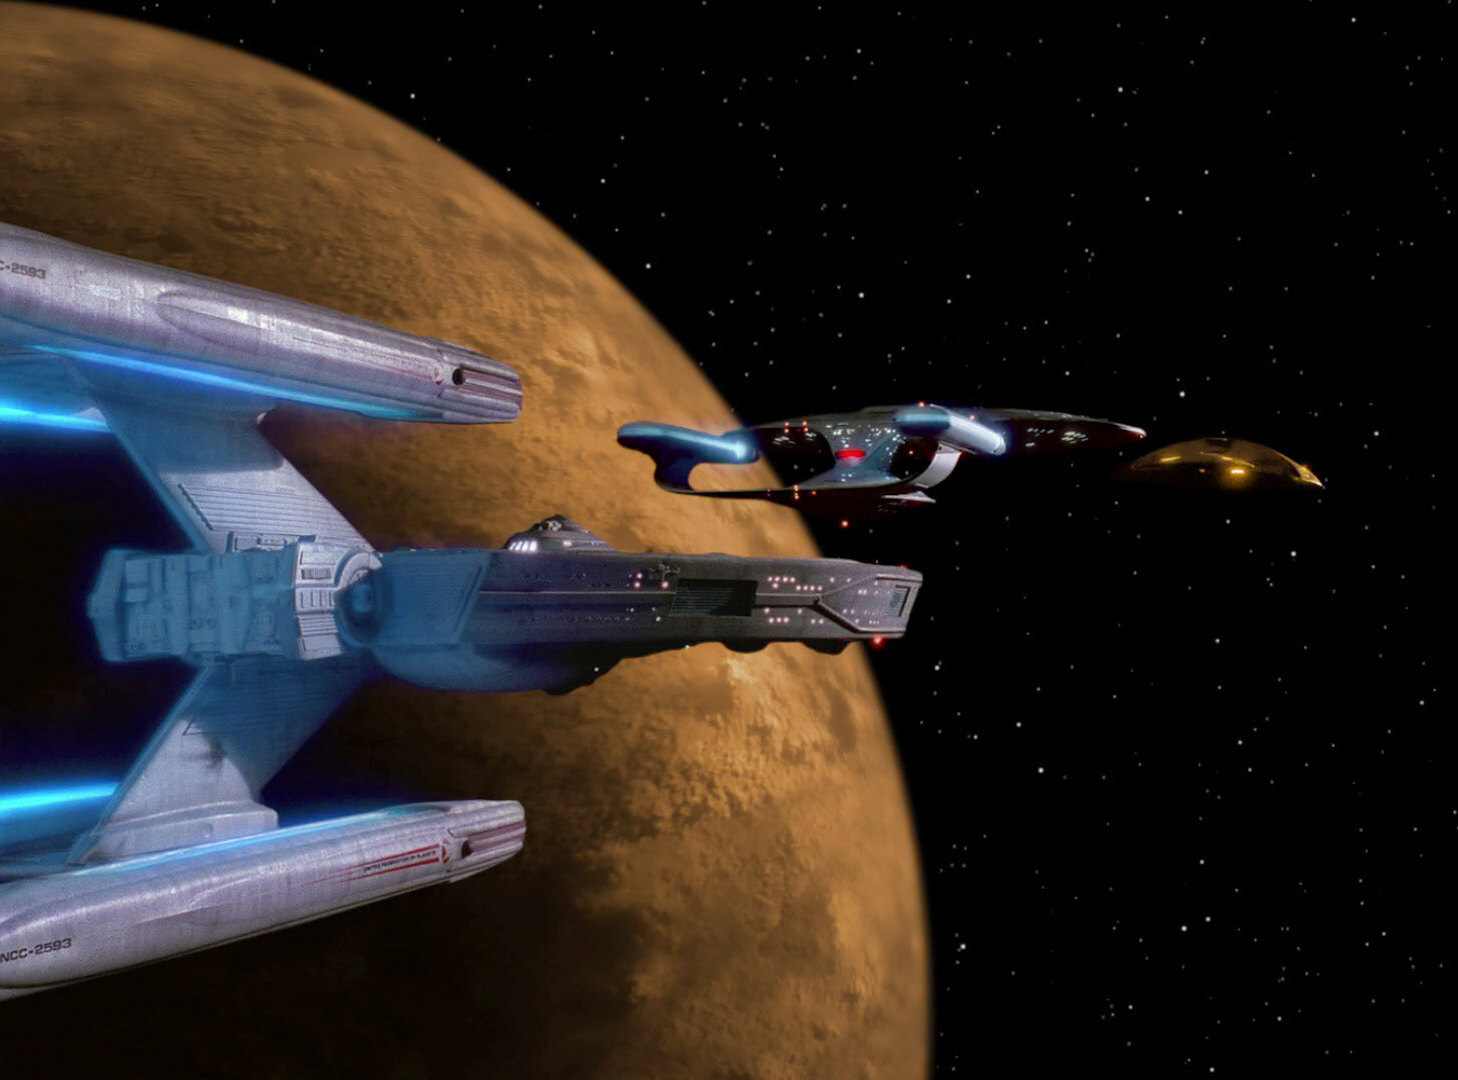
TNG: The Last Outpost
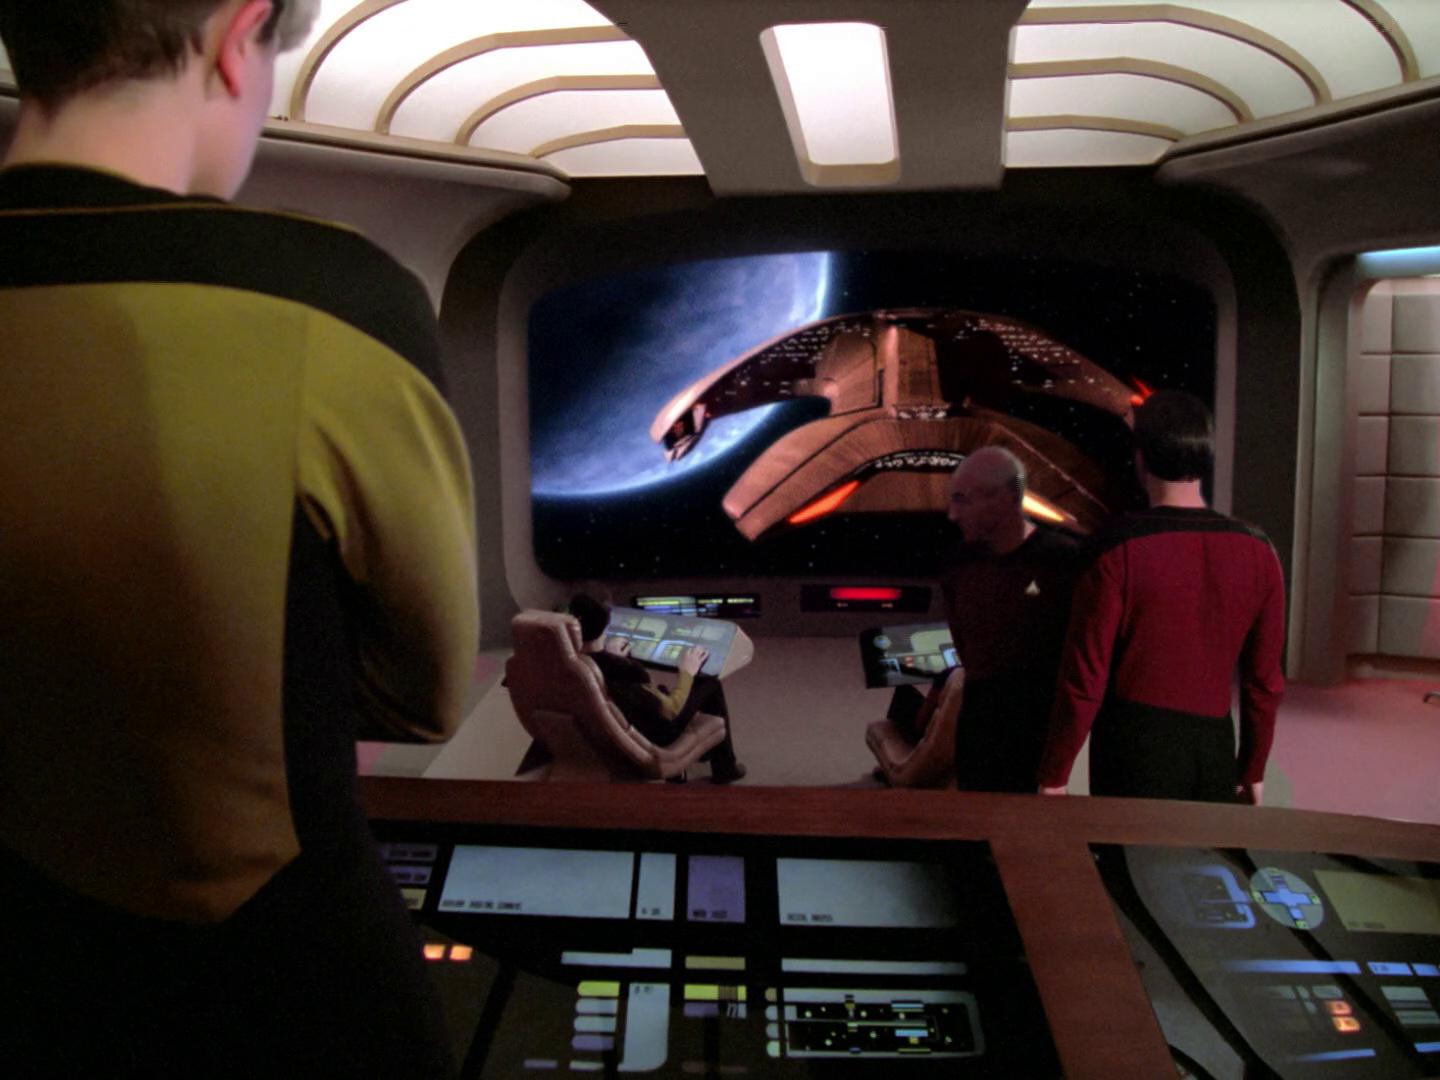
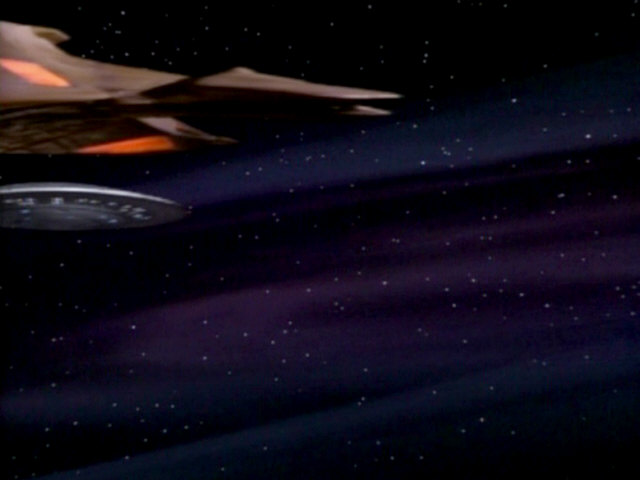
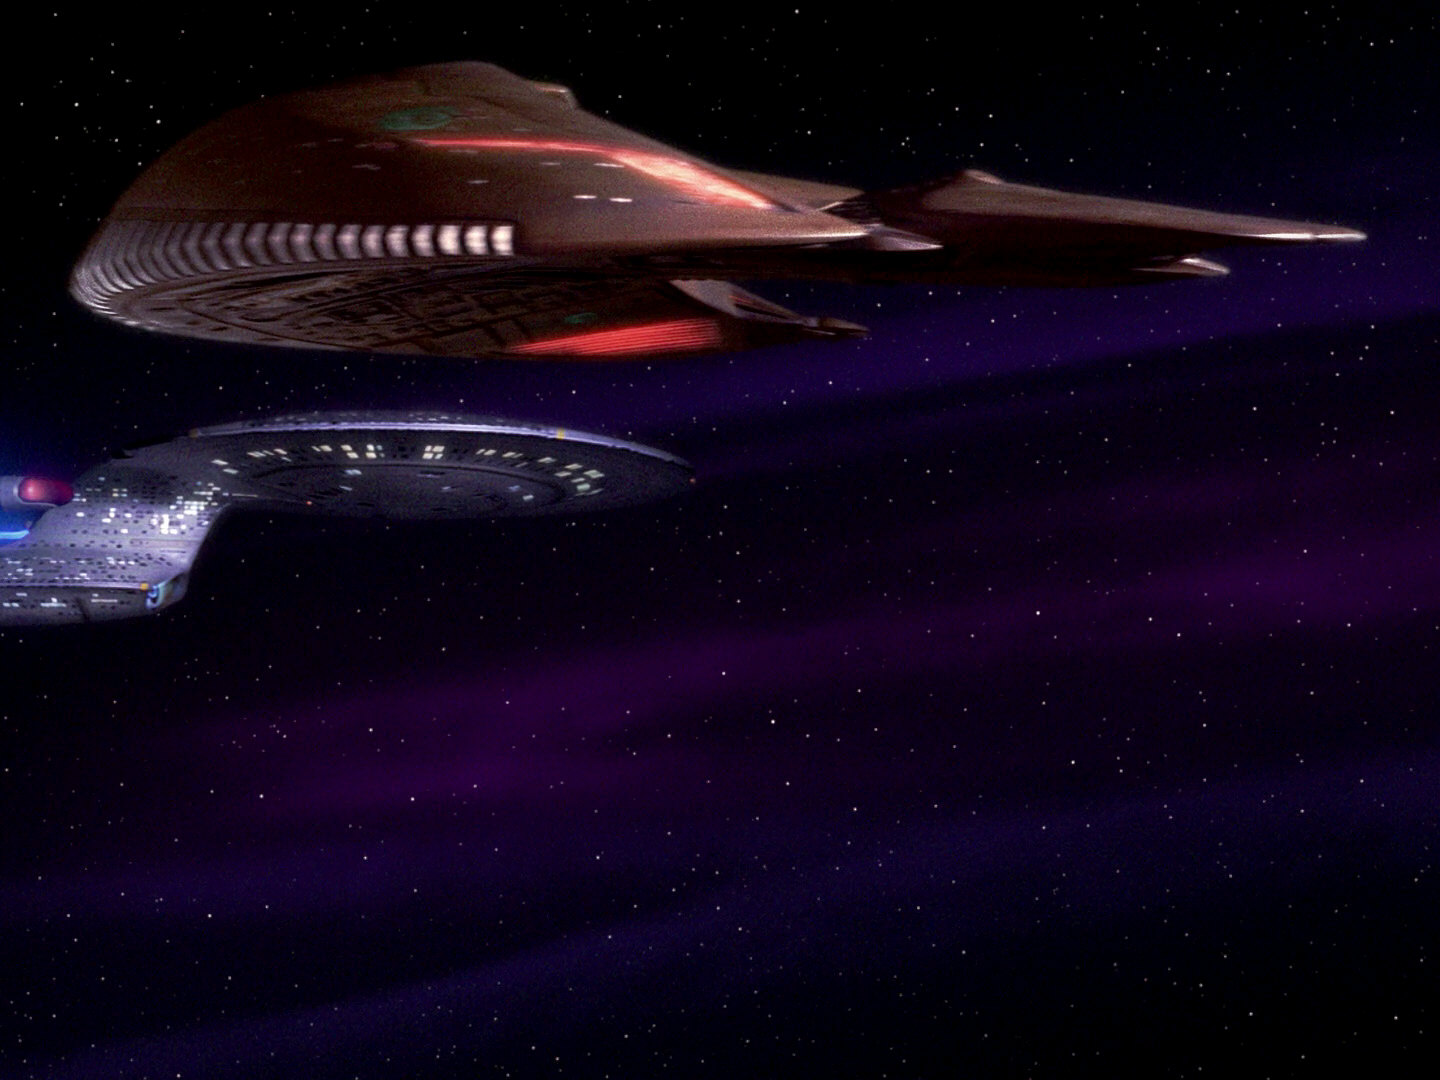
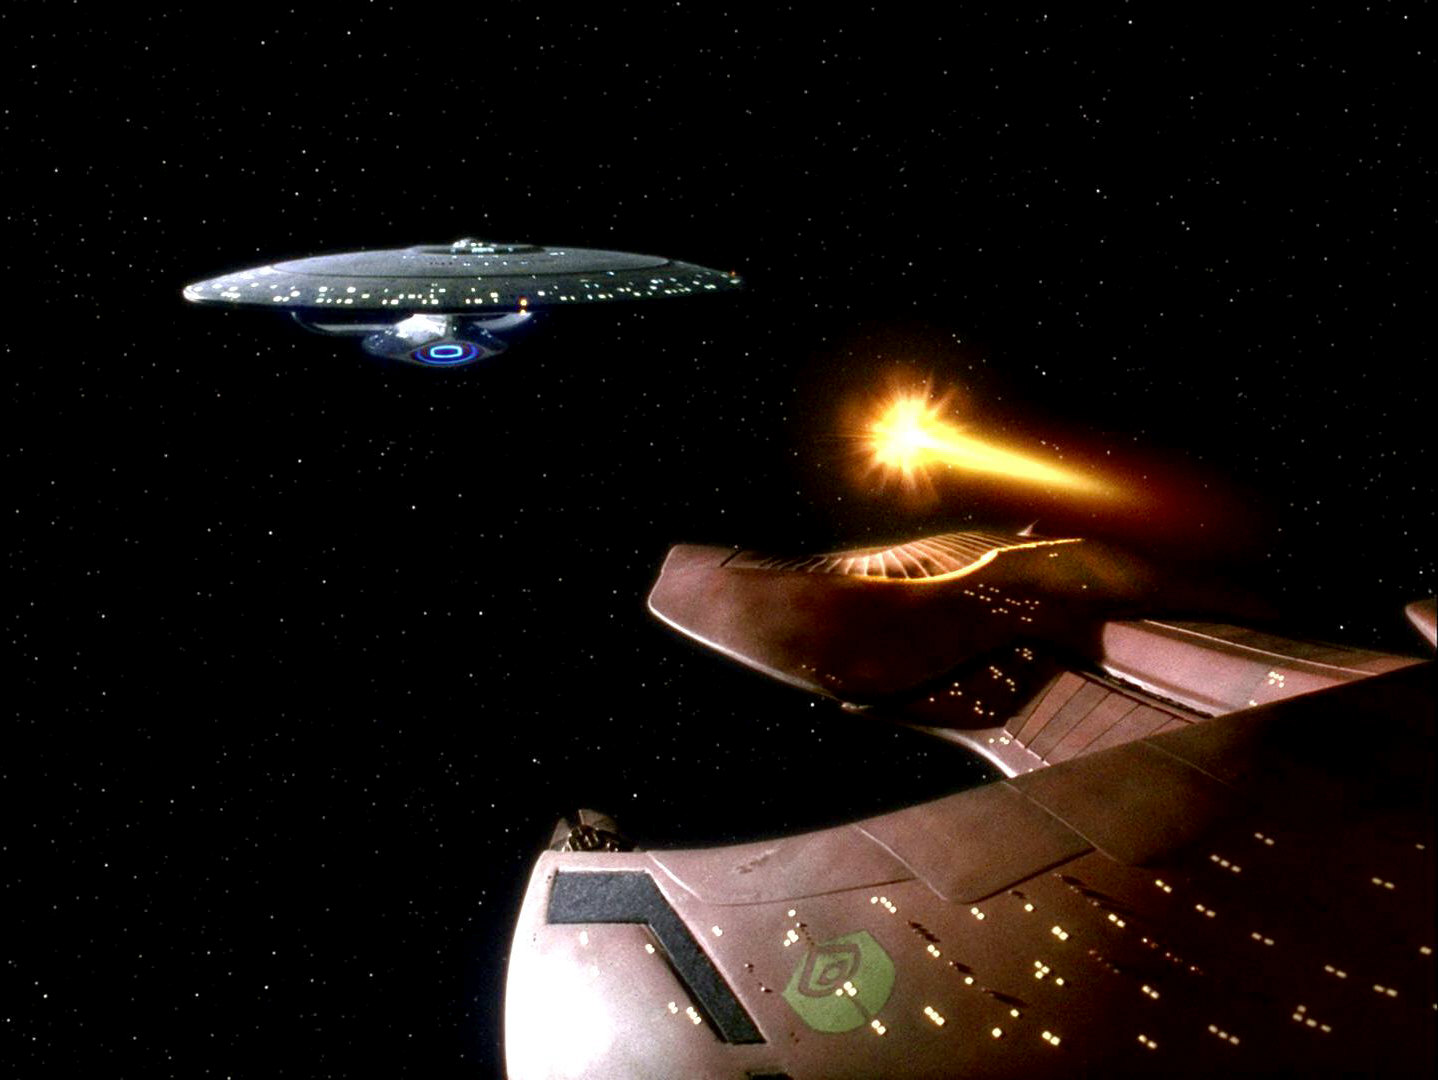
The ship makes its first appearance in this early season 1 episode. As mentioned above, this is the only episode in which the ship executes it surrender posture.
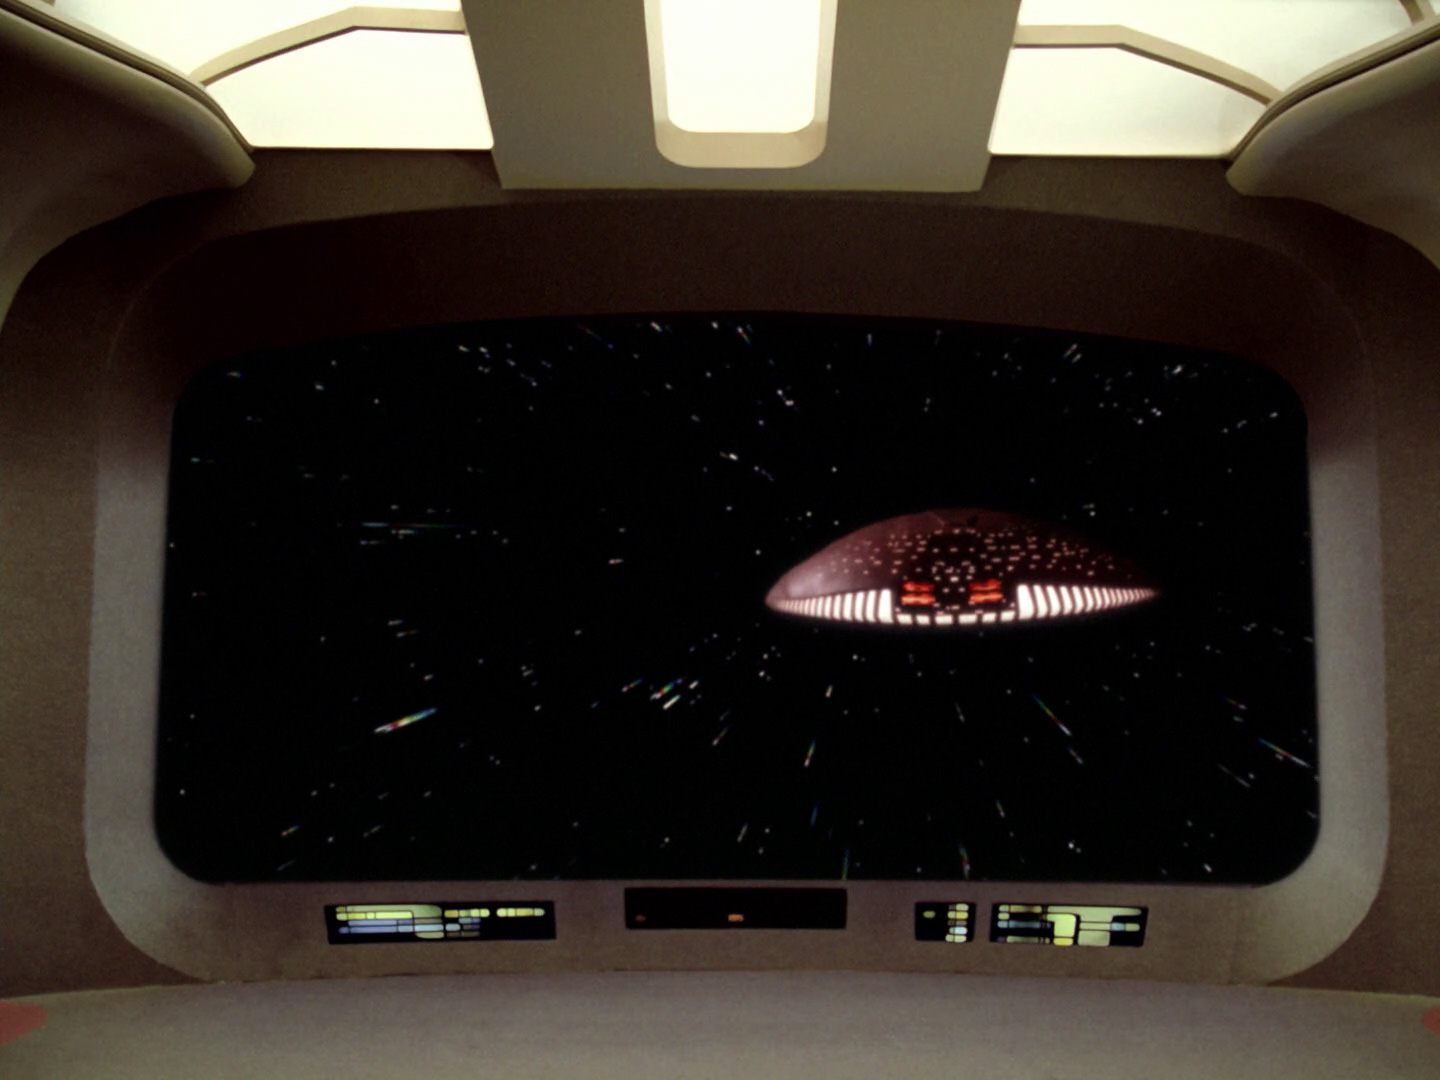
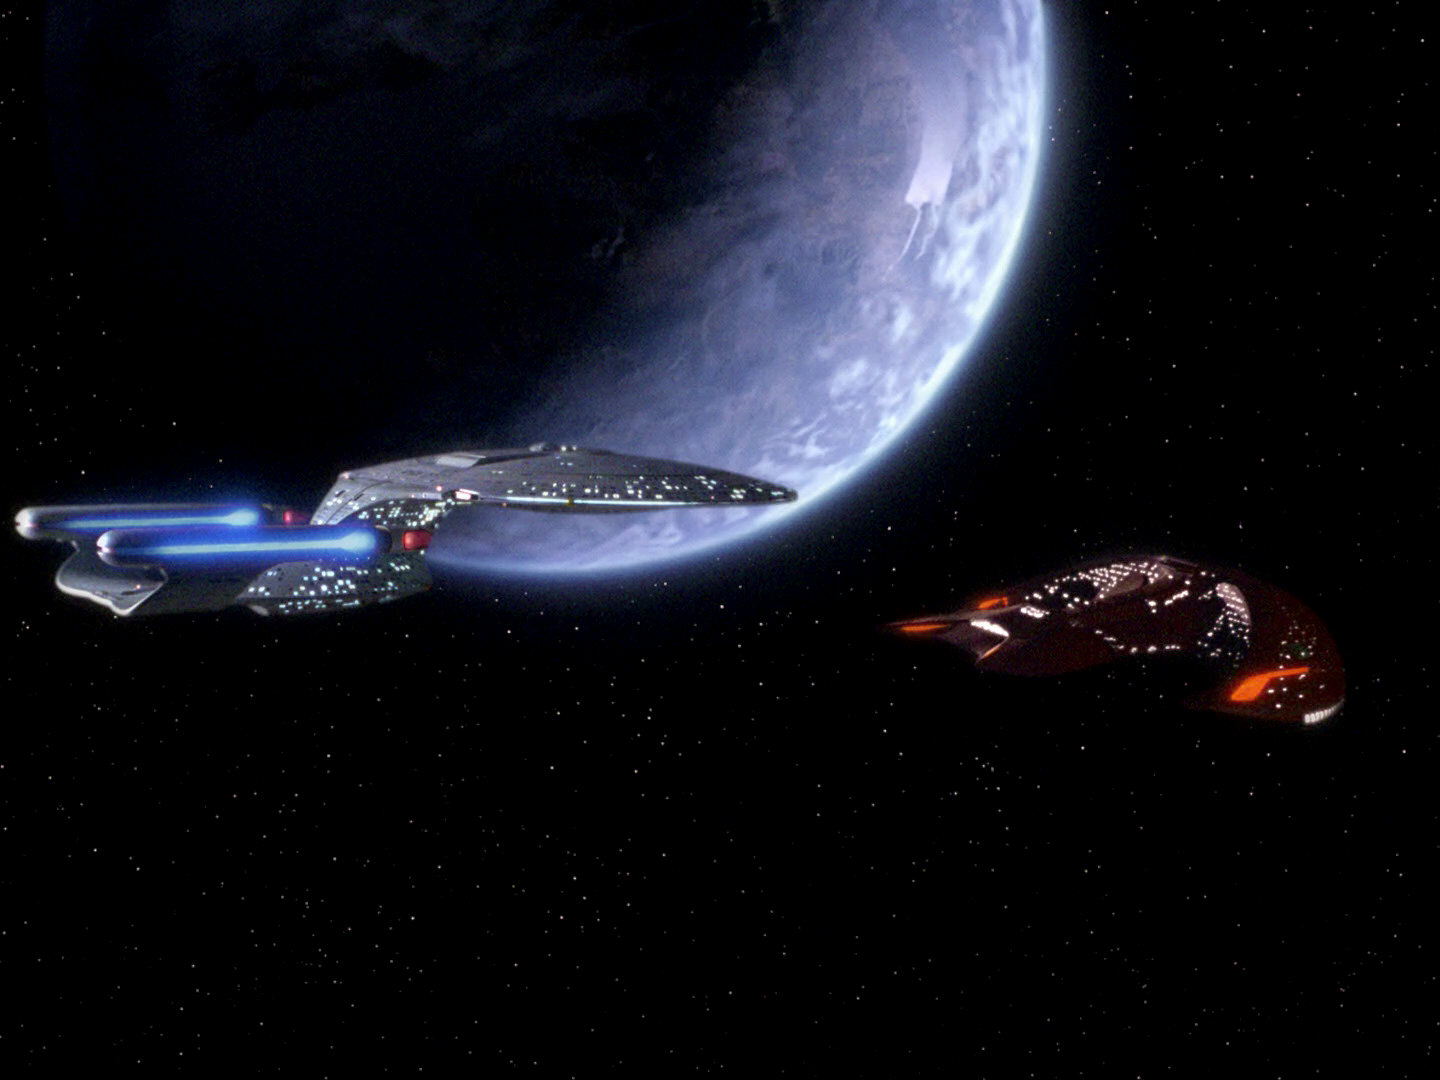
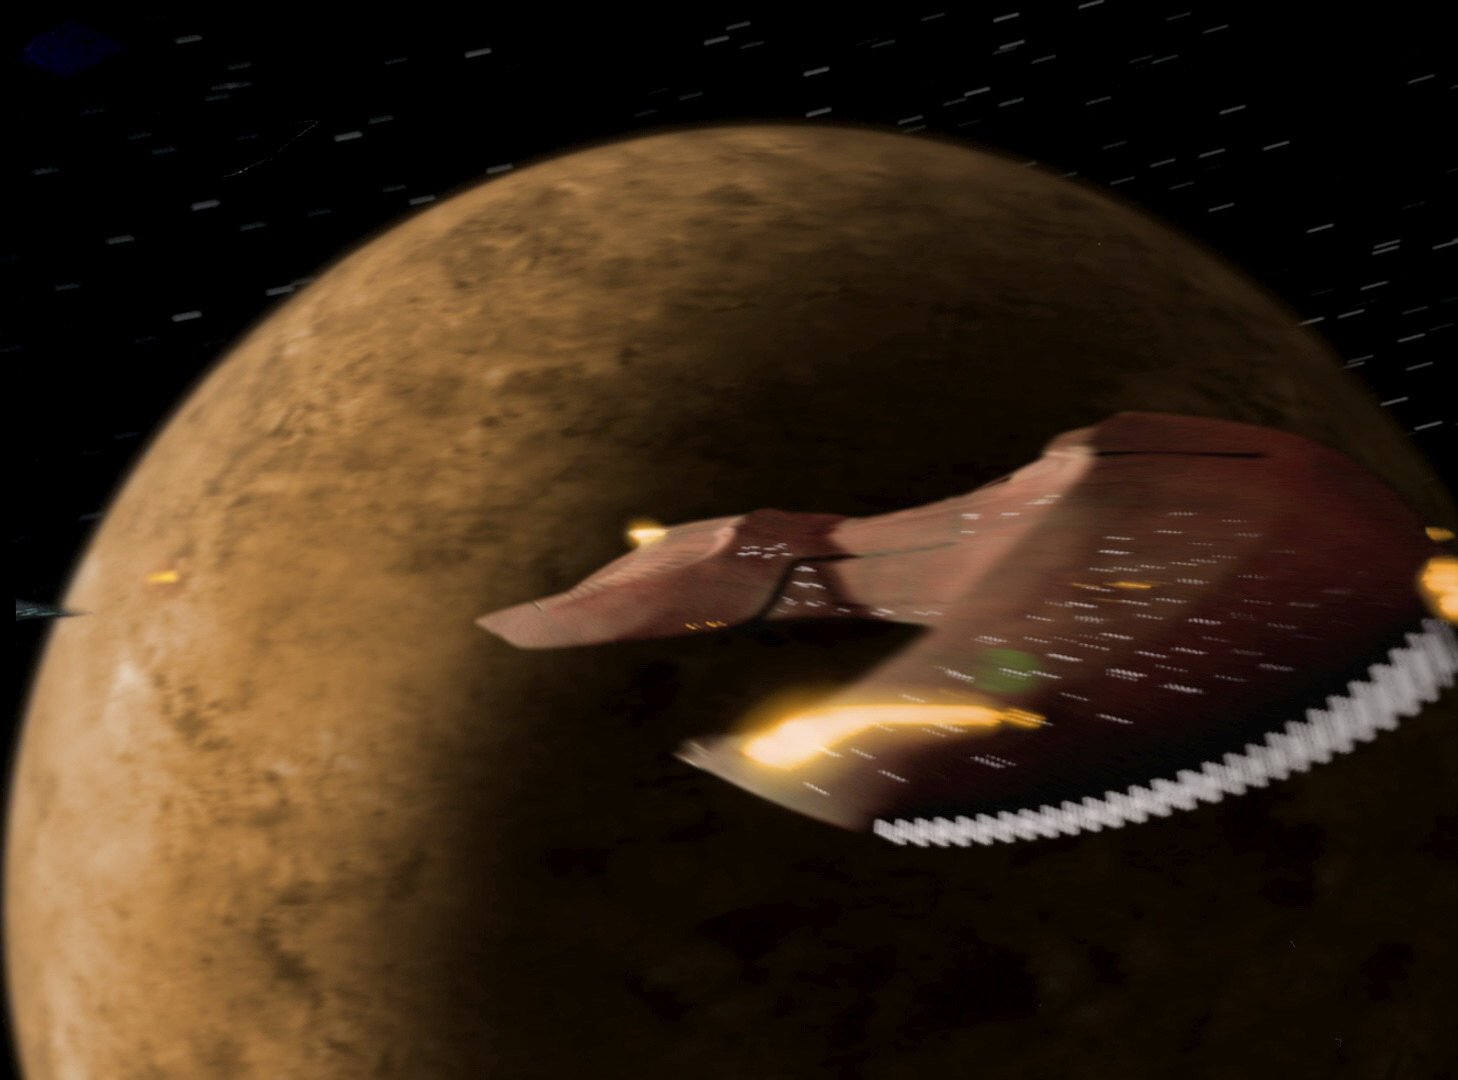
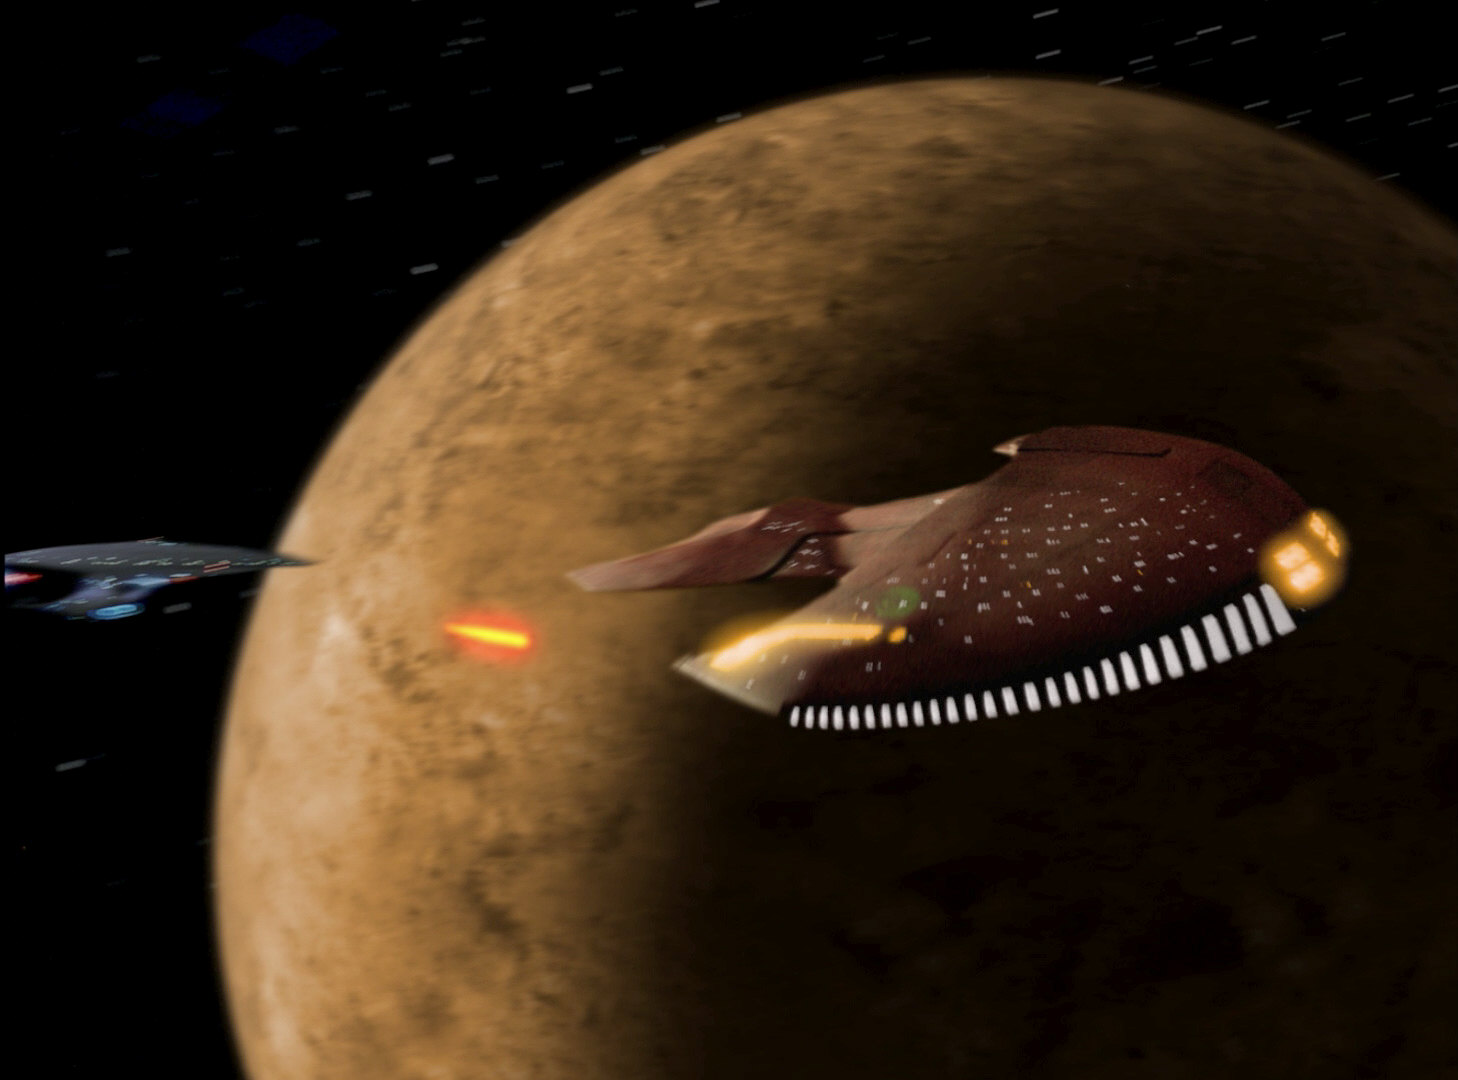
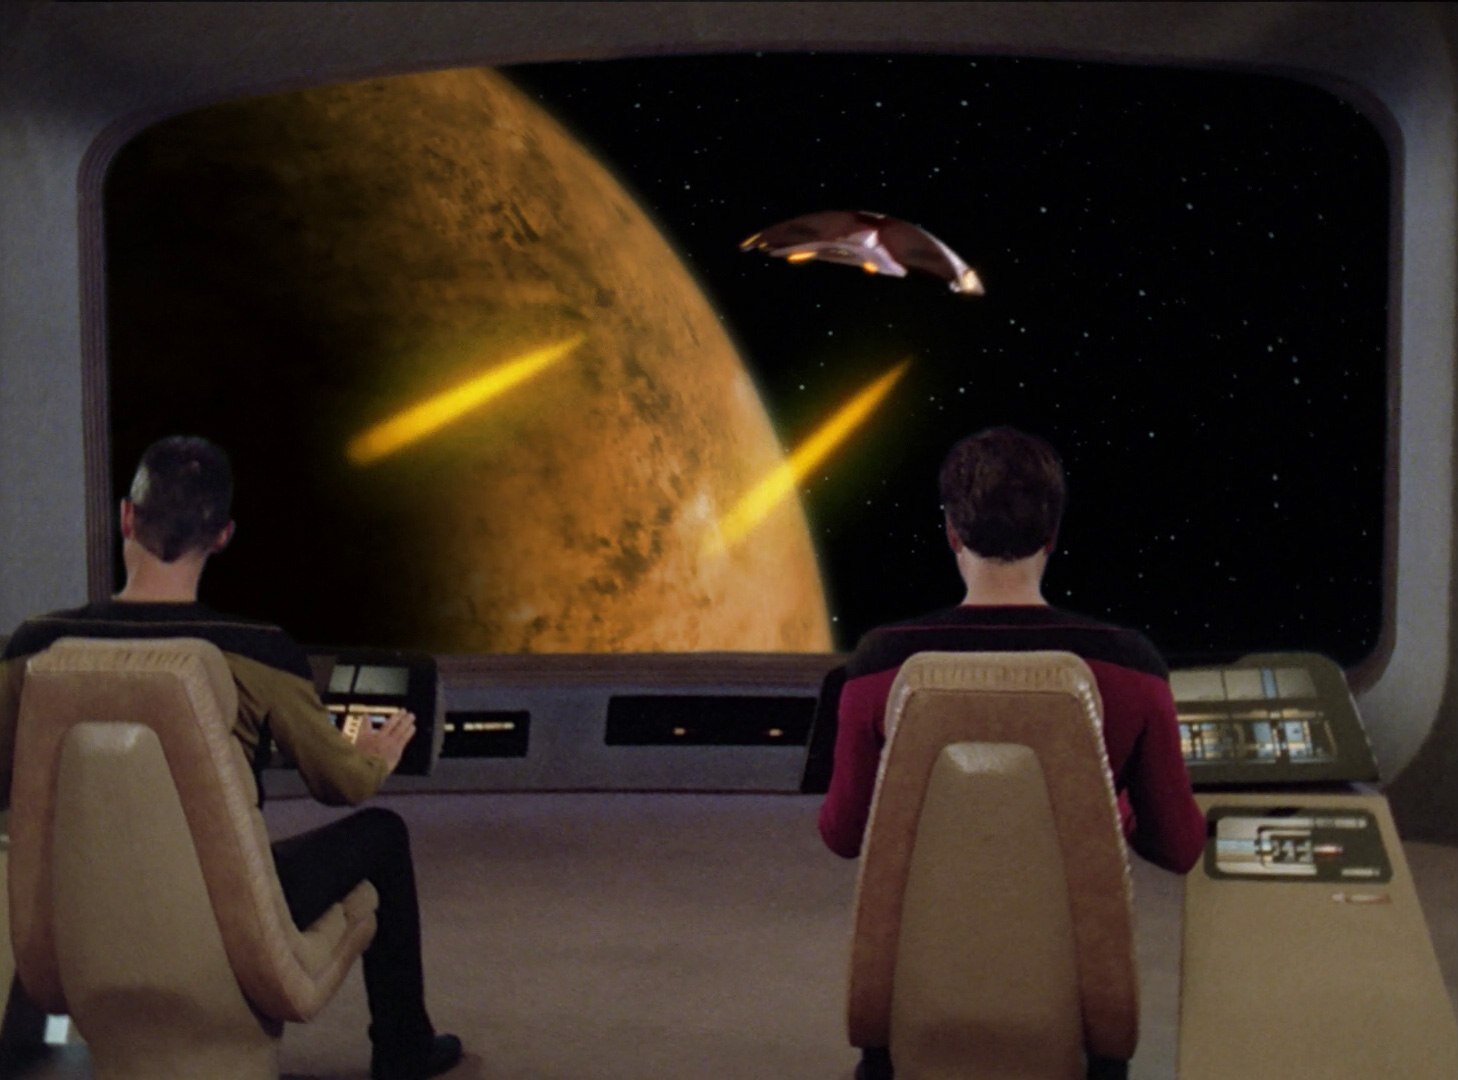
In the first few shots of the ship, it is only seen from the back, flying at warp (A) and stationary in orbit of Delphi Ardu IV (B). It is in this orientation that the ship is seen firing an electromagnetic pulse a little later in the episode (C).
Following this, the ship slowly begins to turn around (D). In this long shot, the underside of the ship can nicely be seen. It features an integrated auxiliary craft, similar to the captain's yacht on the underside of the USS Enterprise-D's saucer section.
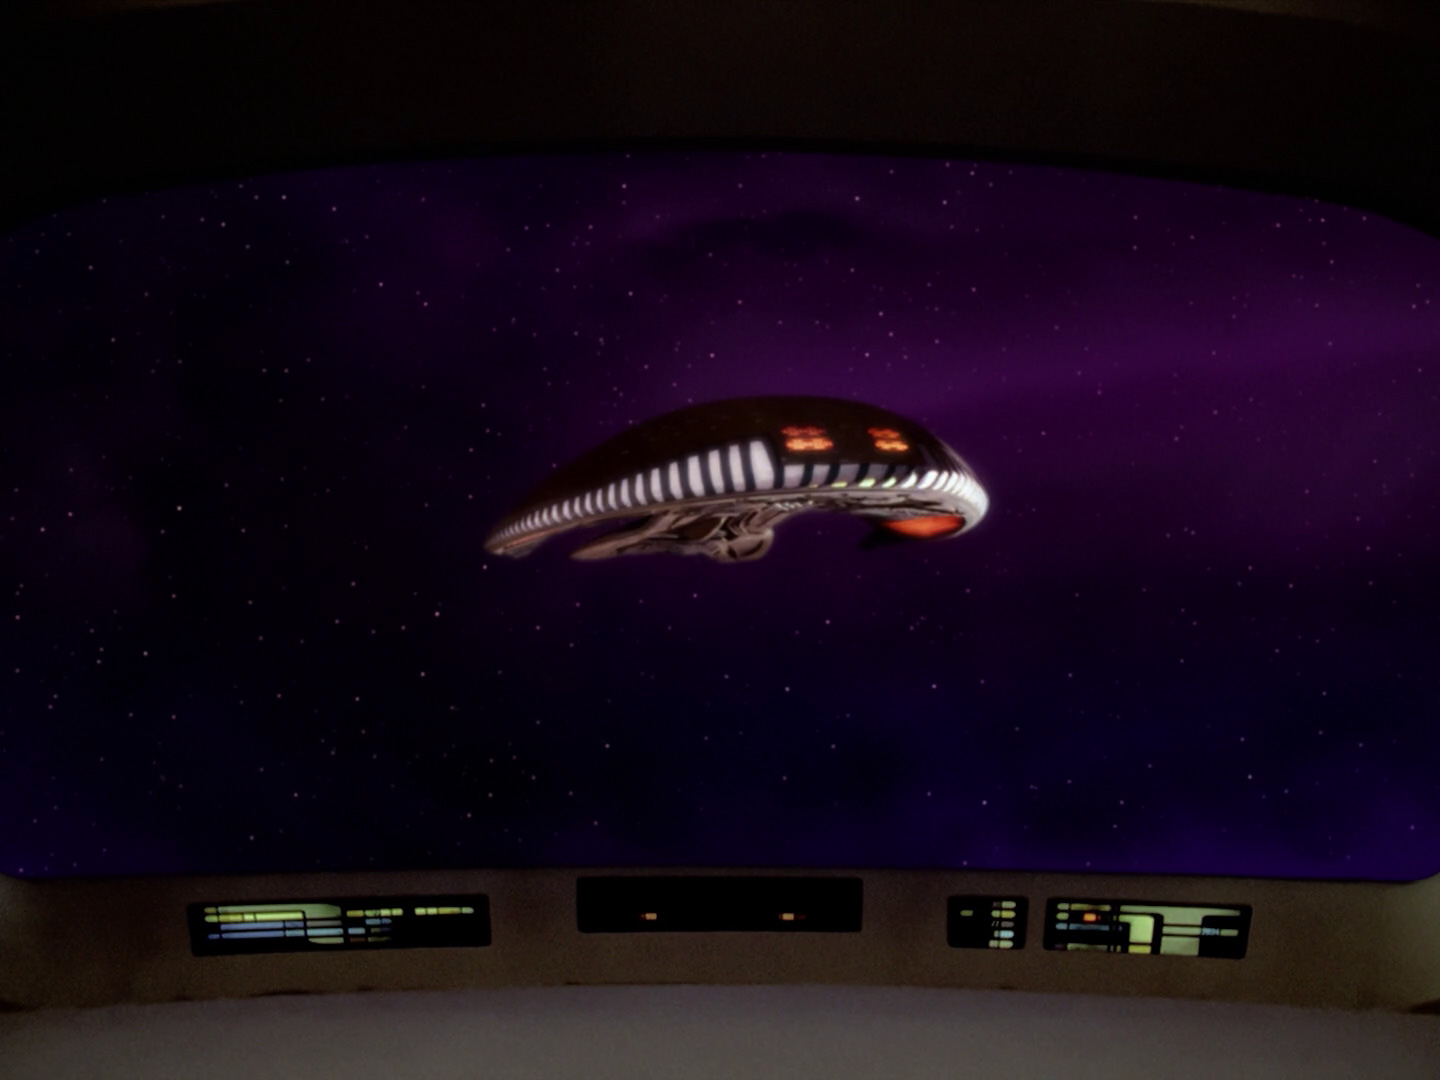
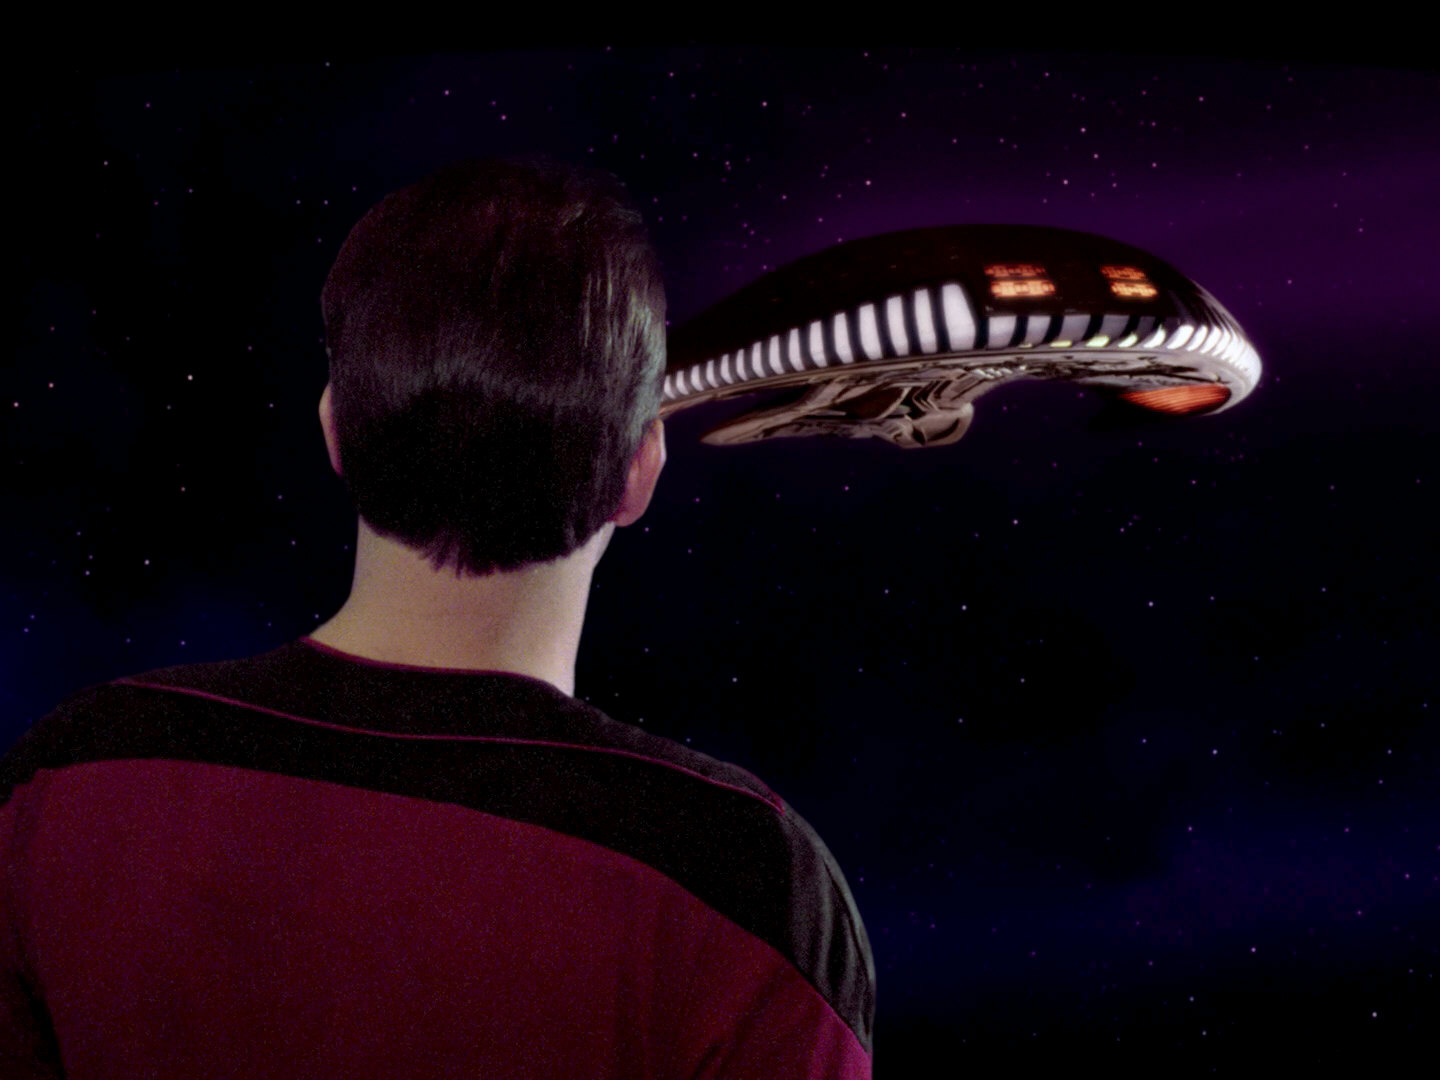
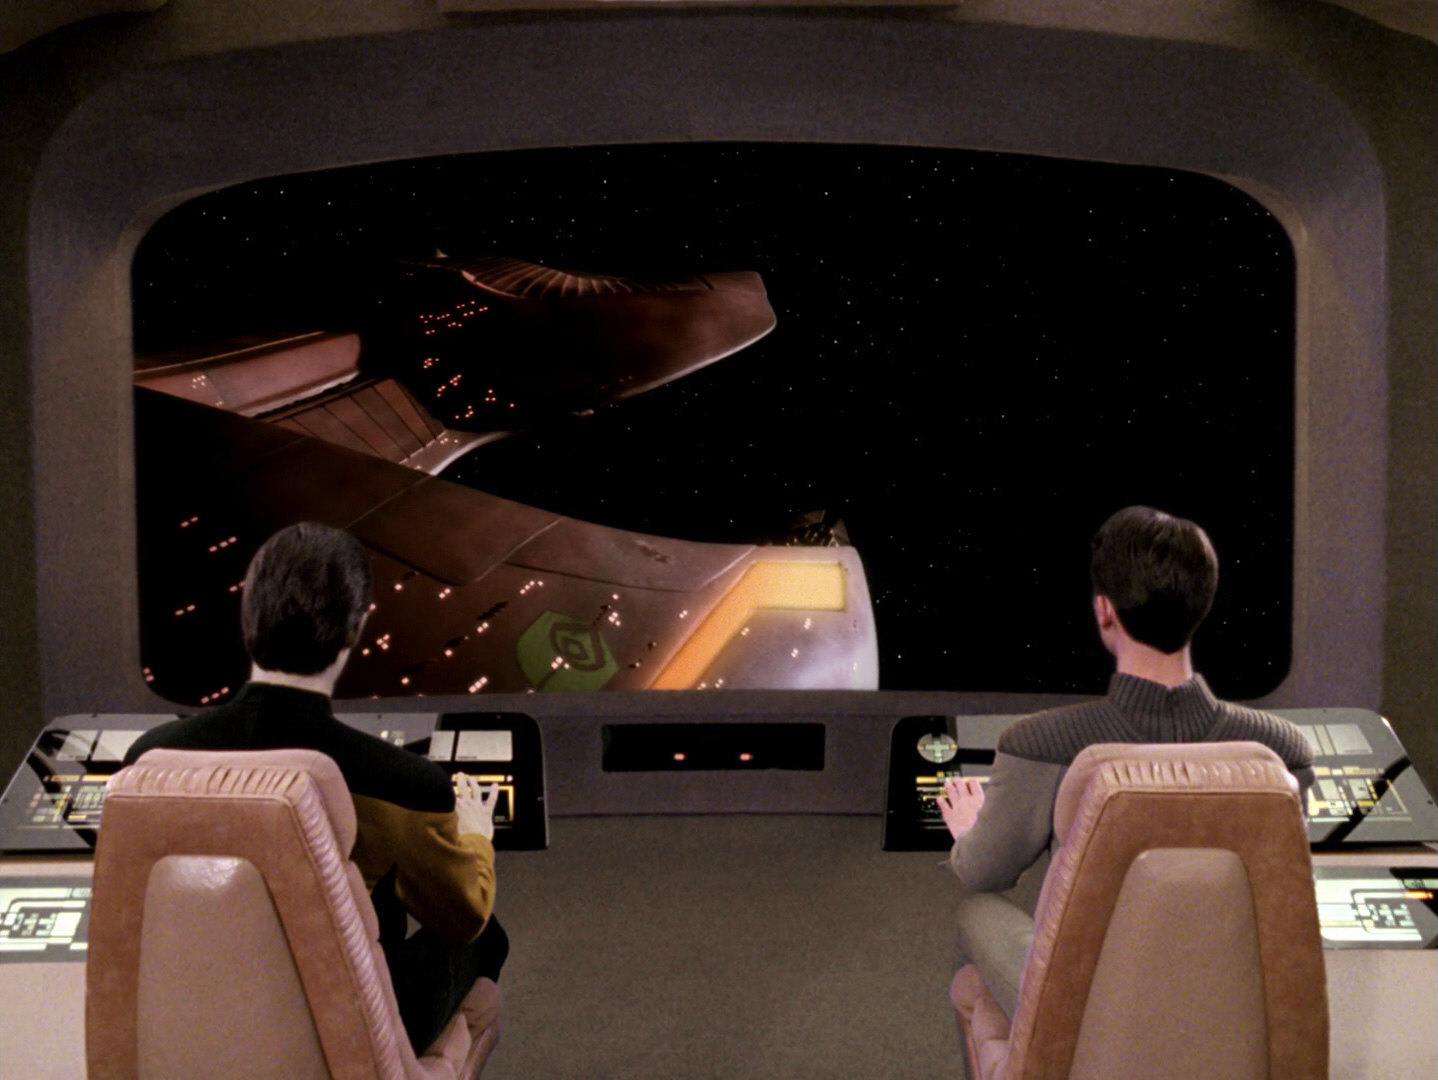
The final moments of the sequence are seen from the front, on the main viewscreen of the USS Enterprise-D (E), giving us a first good look at the bow of the ship.
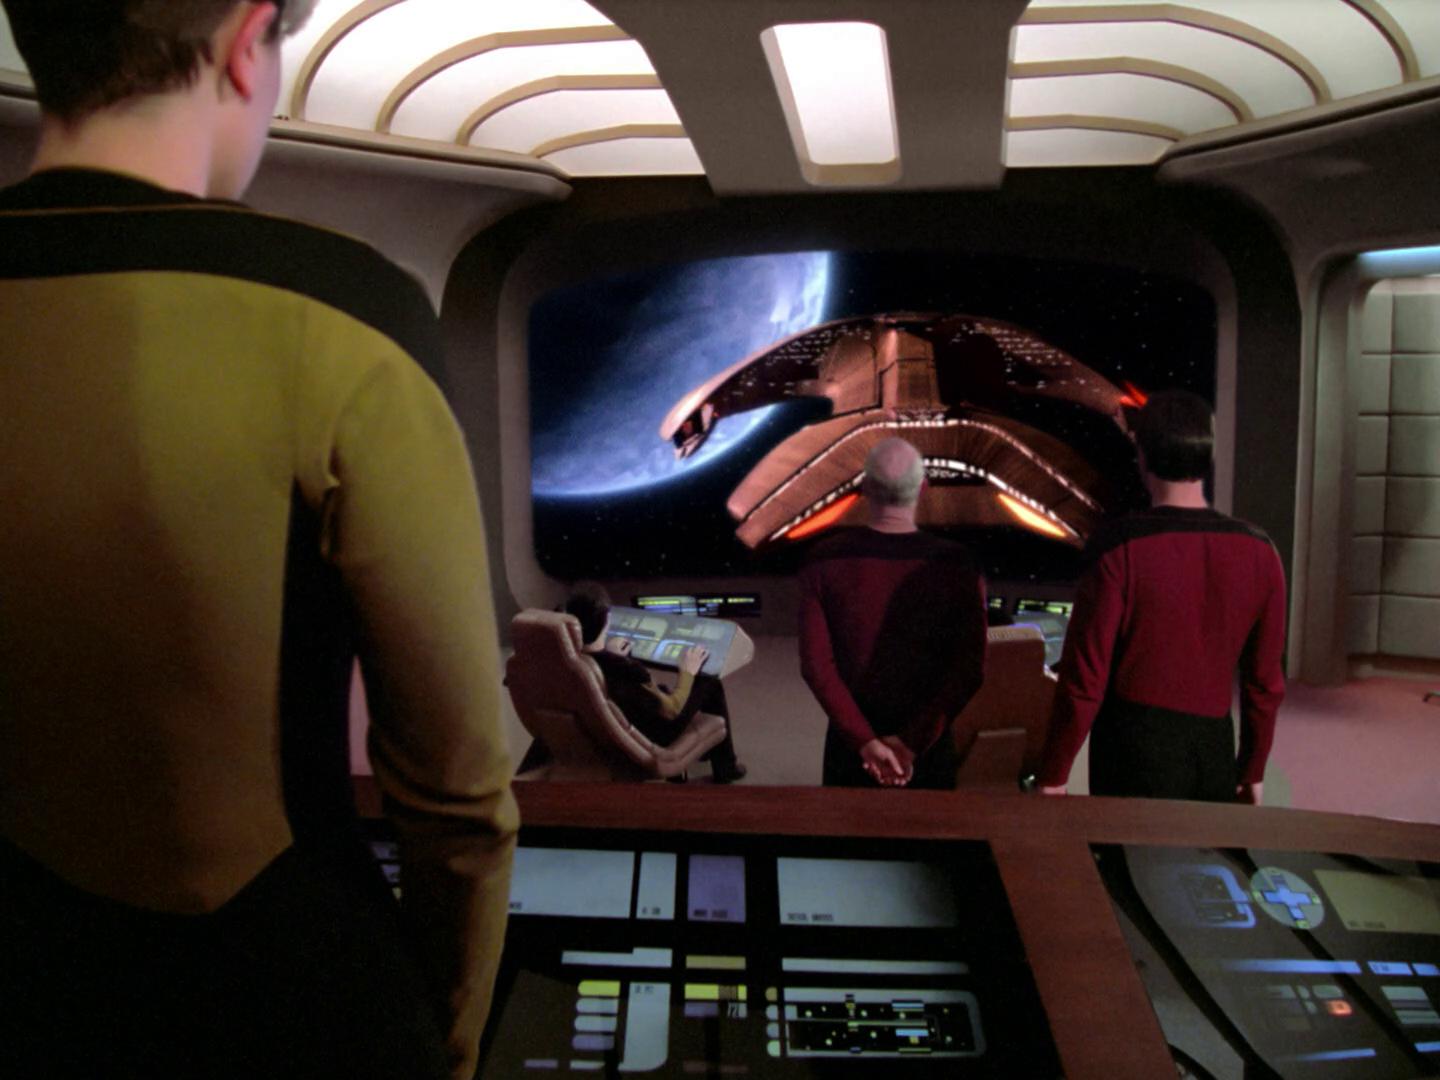
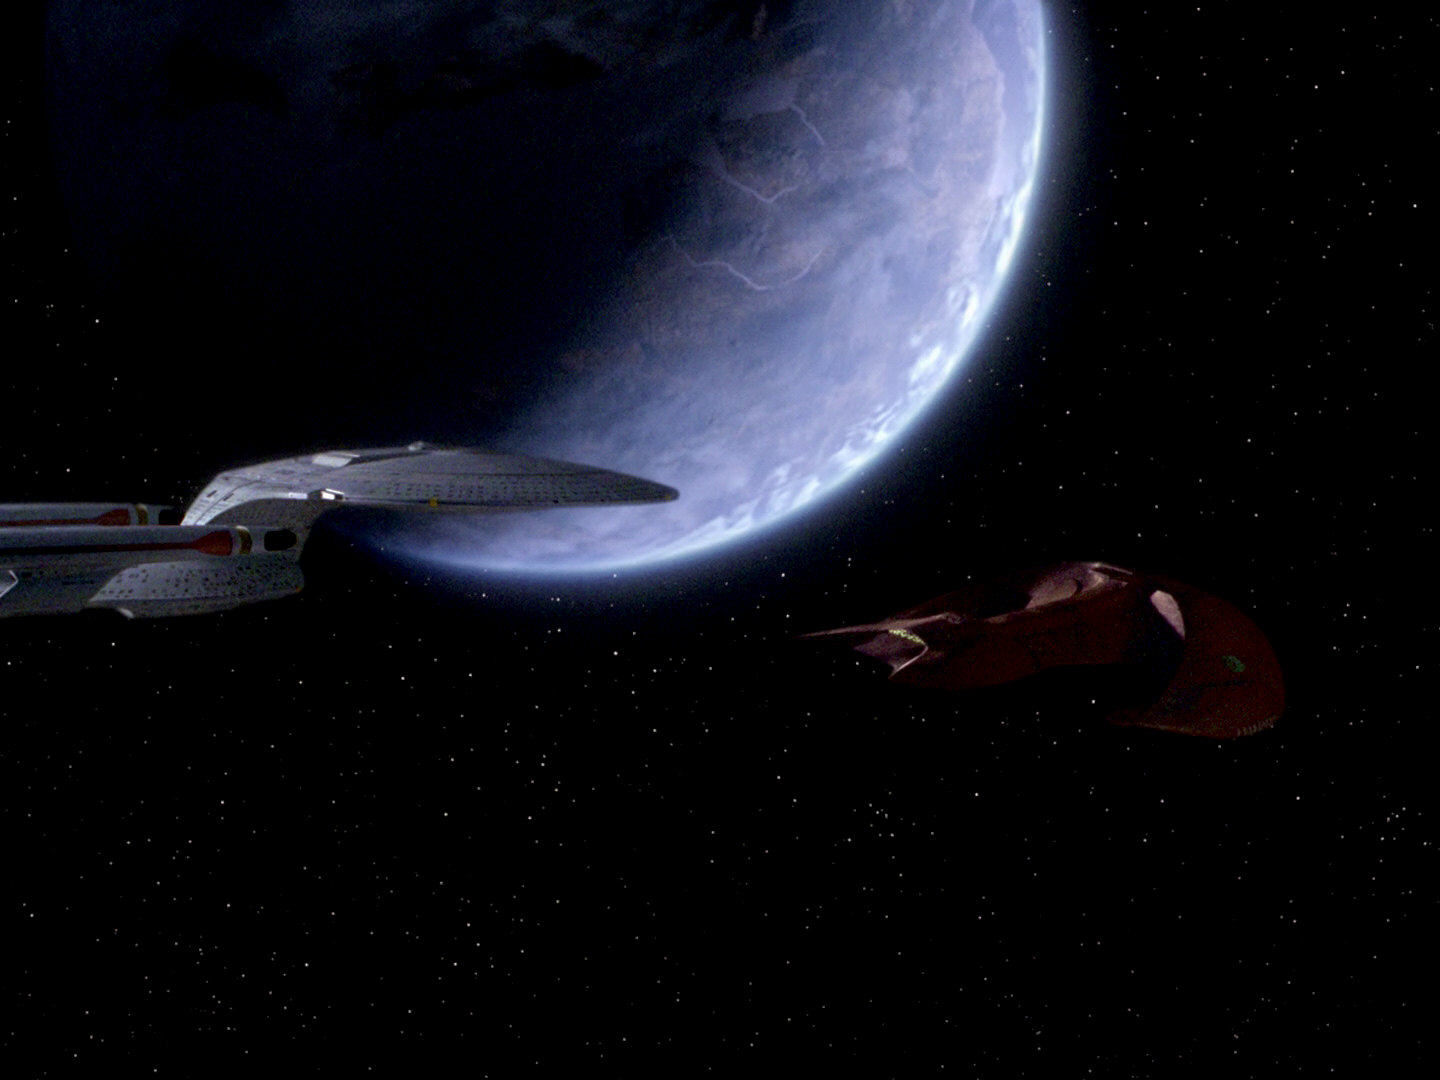
This is followed by a shot that appears several times in the episode (F). It shows the USS Enterprise-D facing the Marauder from the side.
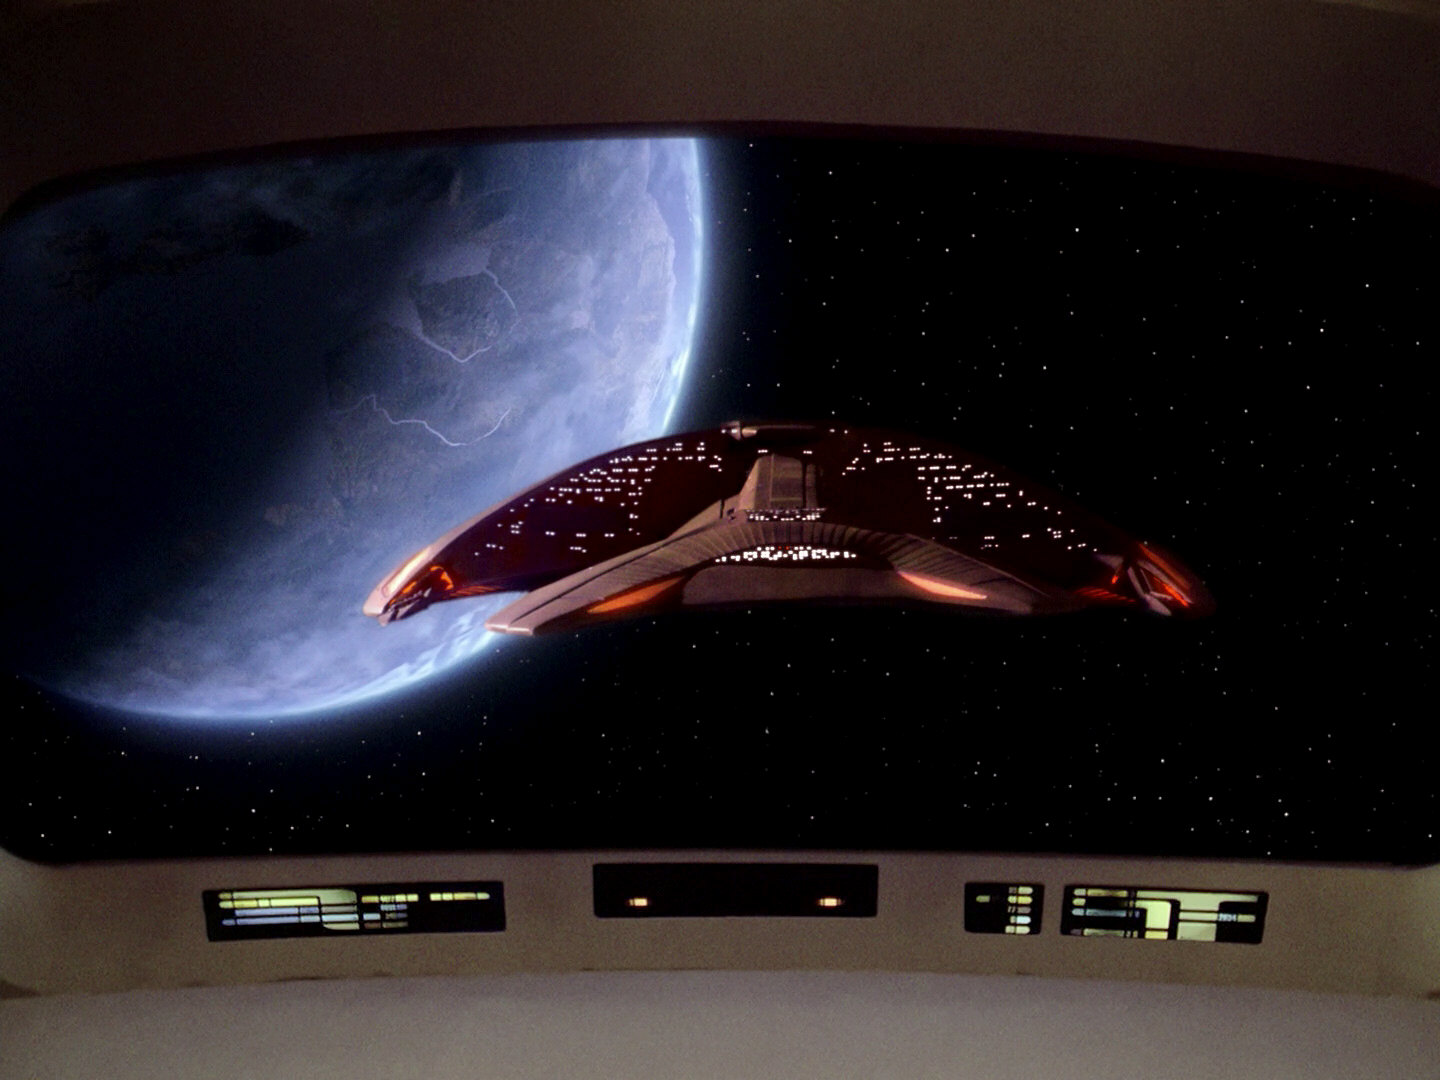
The next shot also appears several times in the episode (G). It shows the ship from the front, not angled to either left or right, as in many later shots featuring the ship.
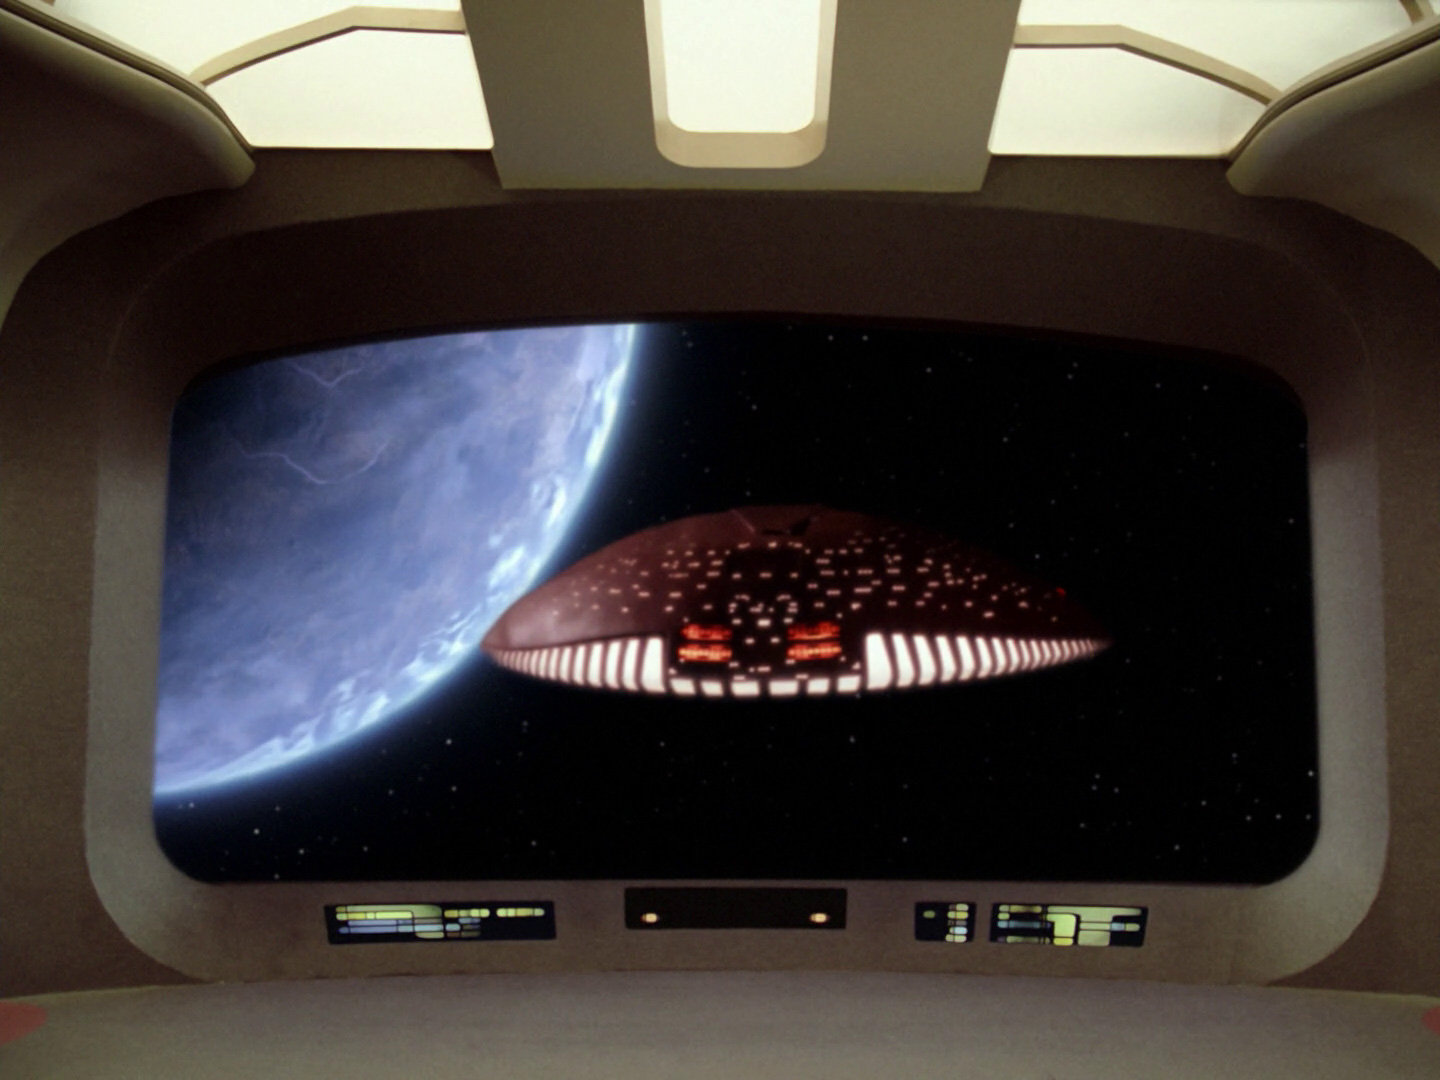
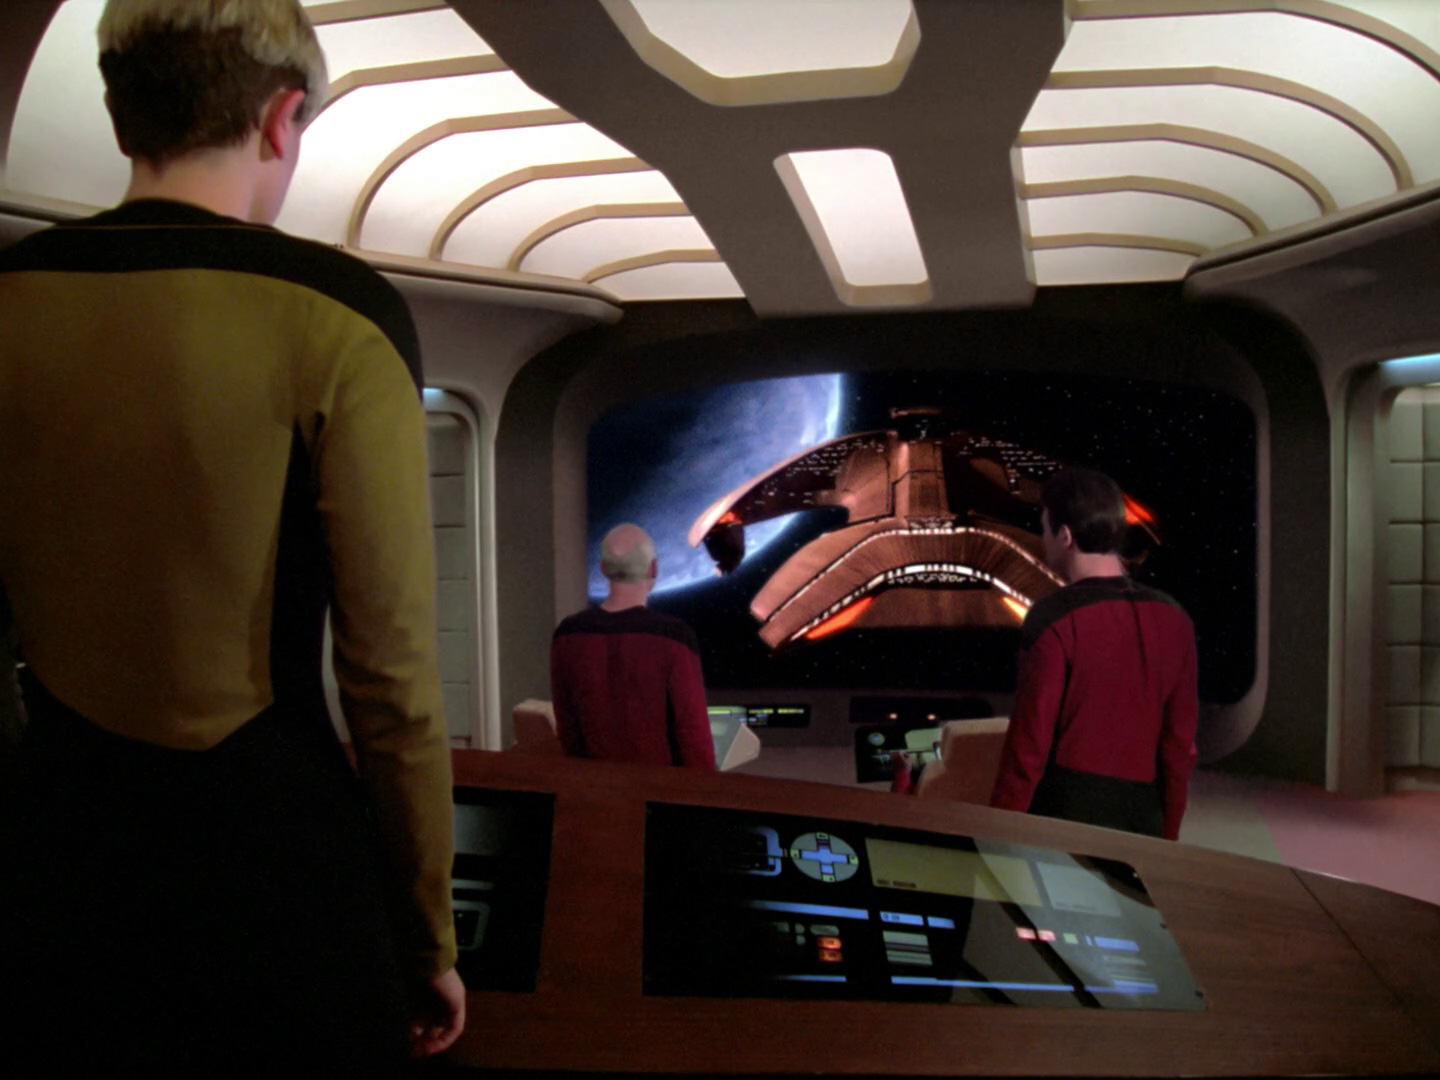
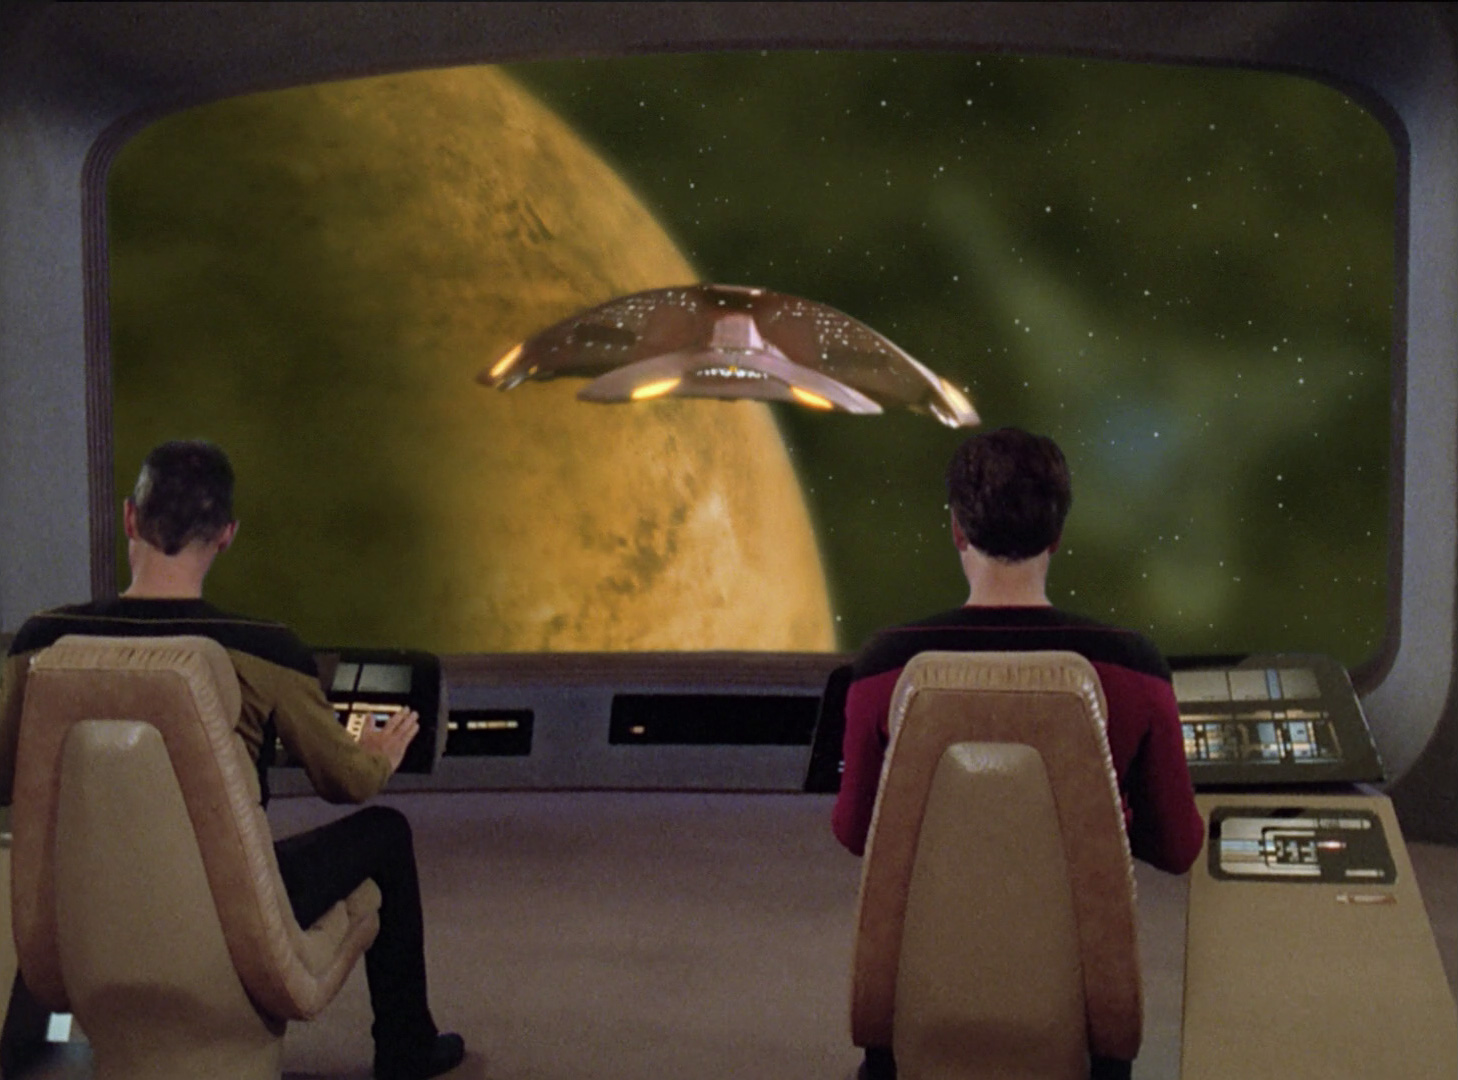
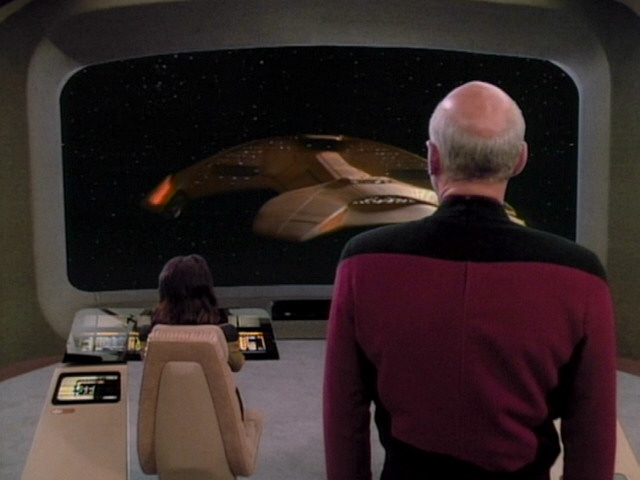
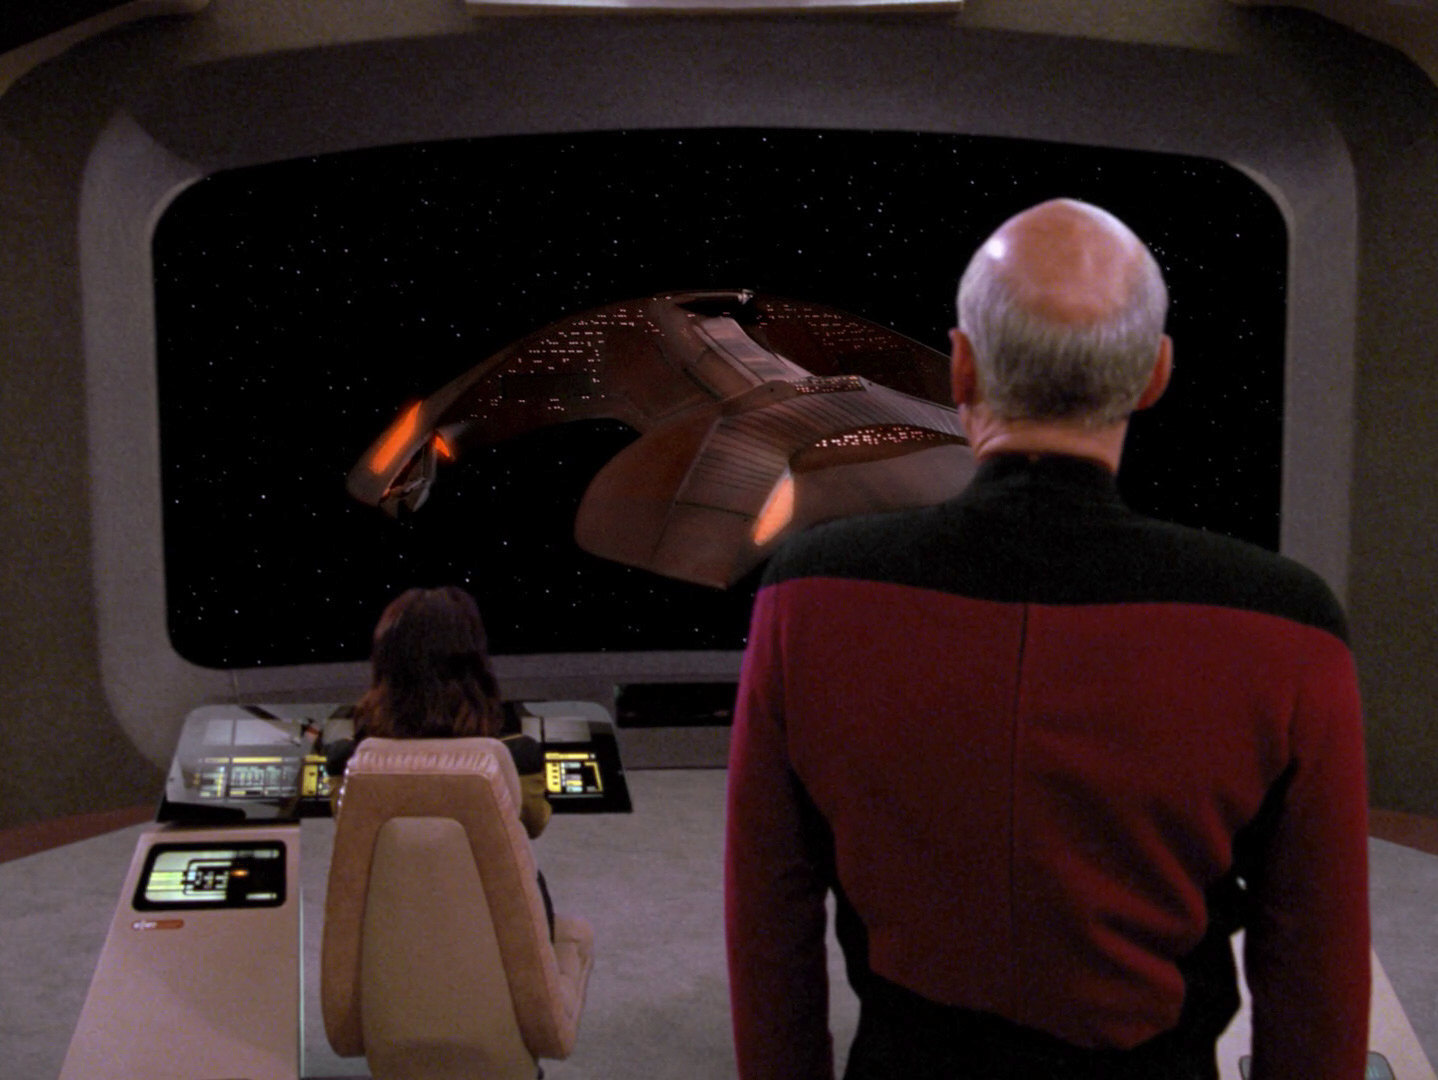
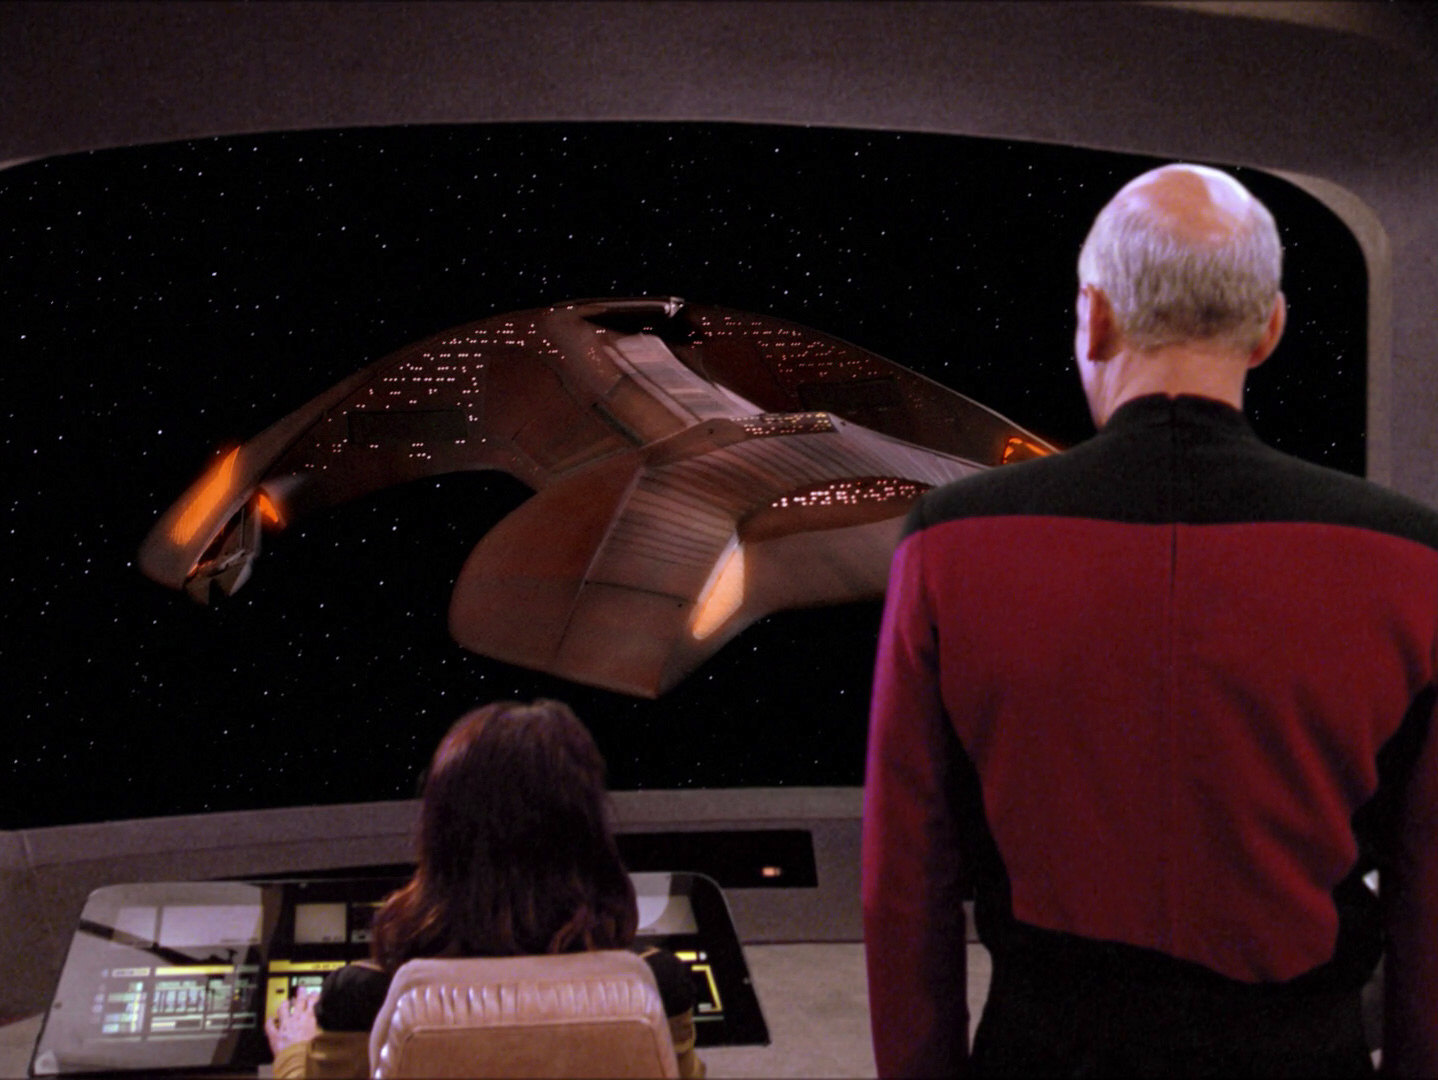
When the USS Enterprise-D tries to escape the force field which holds both ships in orbit of Delphi Ardu IV, a shot that shows the Ferengi ship from a slightly different angle is briefly seen on the main viewscreen (H). It seems the ship has tilted a little forward. When the ship is seen from space again, however, and a few moments later reappears on the main viewscreen, it has tilted back to its original position (I). This might have been an editing mistake, as the act of tilting forward is the first step in the surrendering posture, as can be seen a little later in the episode.
When the ship finally surrenders, the ship is seen tilted forward, as mentioned before. Then, on screen, the forward section of the hull slowly extends (J). A few seconds later, the ship appears on the main viewscreen again (K). Now, the weapon arms on the side of the ship have folded down as well and an additional section of the hull at the very top of the ship has been extended.
Shortly before Picard contacts the Ferengi ship, he walks past the main viewscreen and partially blocks the view of the ship in the surrender posture. Splicing two screenshots from this sequence together, however, provides us with a nice close-up of the ship in its surrender posture (L).
The ship is next seen from space again. It appears like it did before, earlier in the episode, so it no longer displays the surrender posture (M). This is further proven by the very next shot that shows the ship on the main viewscreen, again, in its regular, non-surrendering posture (N).
When Picard re-establishes contact with the Ferengi DaiMon, however, the ship suddenly seems to have switched back to the surrender posture, as evidenced by the brief shots of the ship seen on the main viewscreen right before and after the conversation (O). This must have been an editing mistake.
After these two shots, the ship is never seen again in the surrender posture, neither in this episode nor in any other episode of Star Trek.
The second to last new shot of the model seen in the episode appears several times. It is the same side view of the ship, seen earlier in the episode, only with all internal lights turned off (P).
The final shot of the ship appears at the very end of the episode. It is seen veering to the side and leaving orbit of Delphi Ardu IV, providing another look at the underside of the hull (Q).
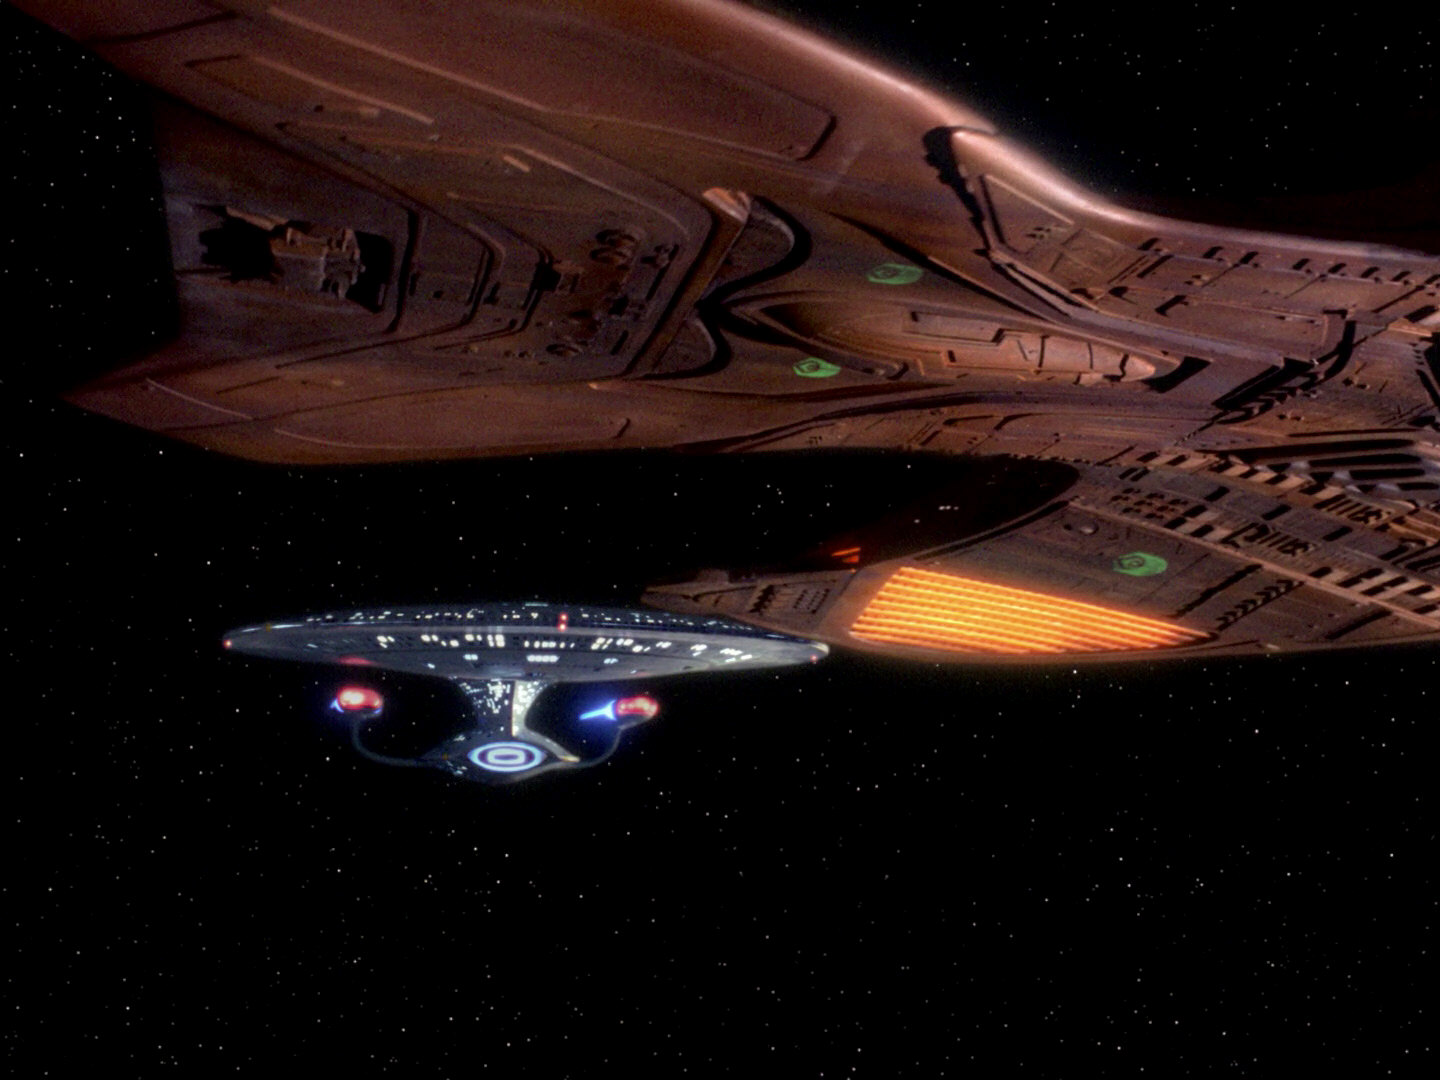


TNG: The Battle
The Ferengi Marauder next appears a few episodes later. Only two new shots of the model were filmed for "The Battle". One shows the ship slowly flying from the left to the right (A), the other shows the stern of the ship (B). Both shots appear several times in this episode and the second one is exclusively seen on the main viewscreen. Due to the lighting of the model, the windows on the back of the ship can only barely be seen. Dim window lights are visible, however.

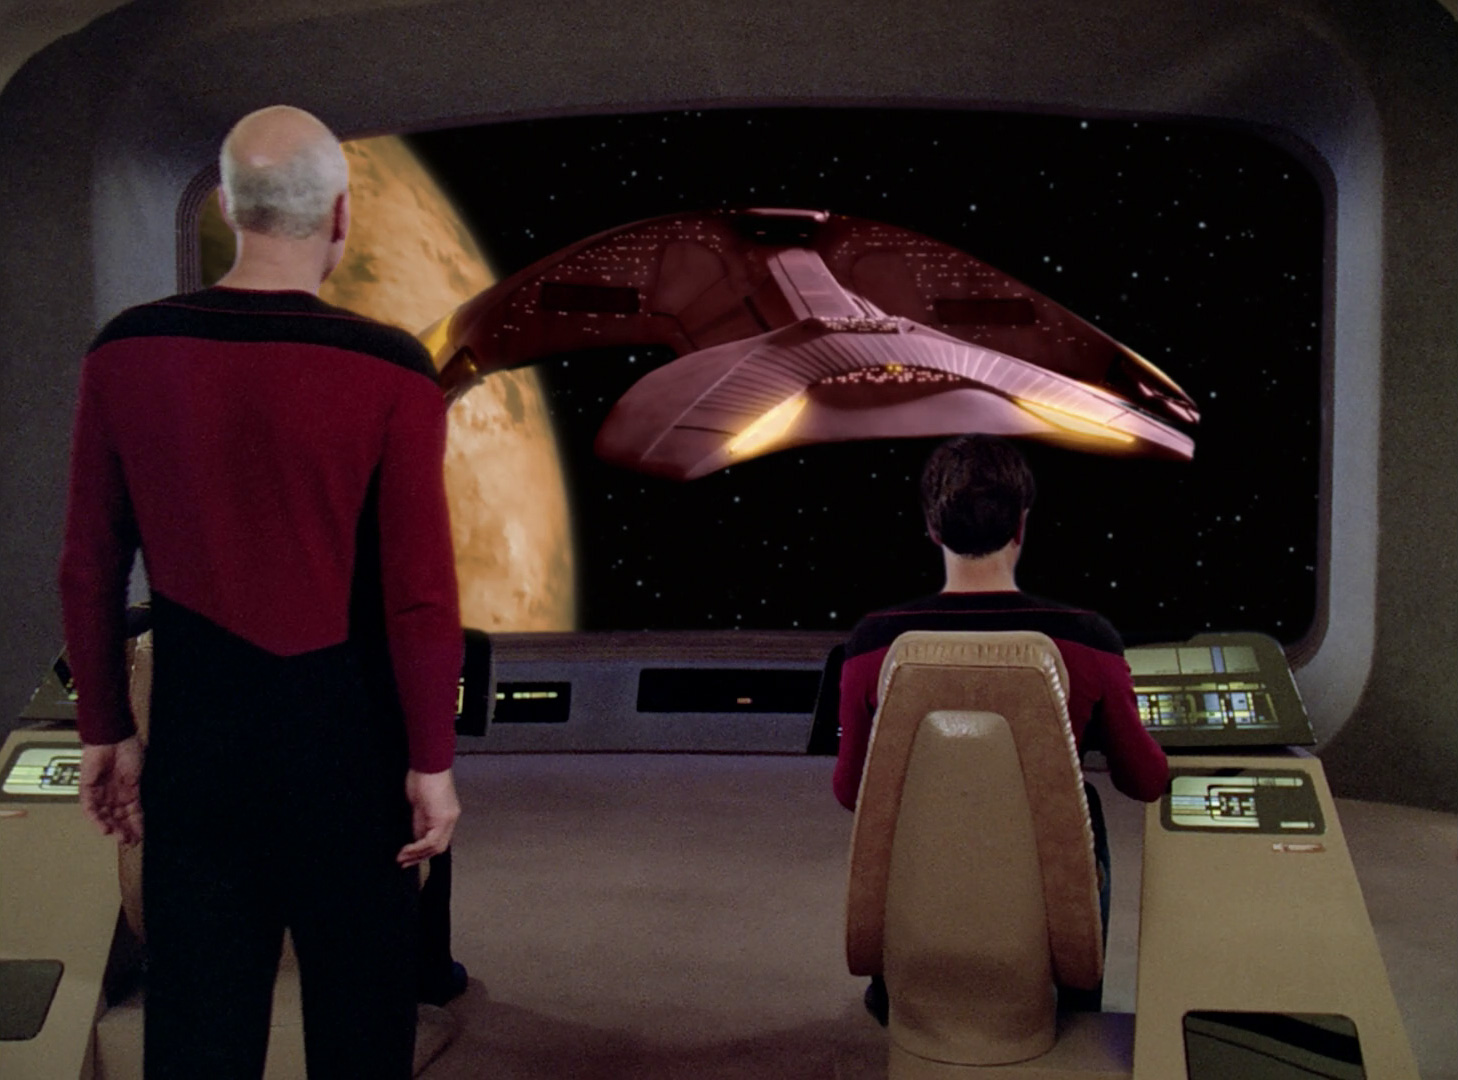
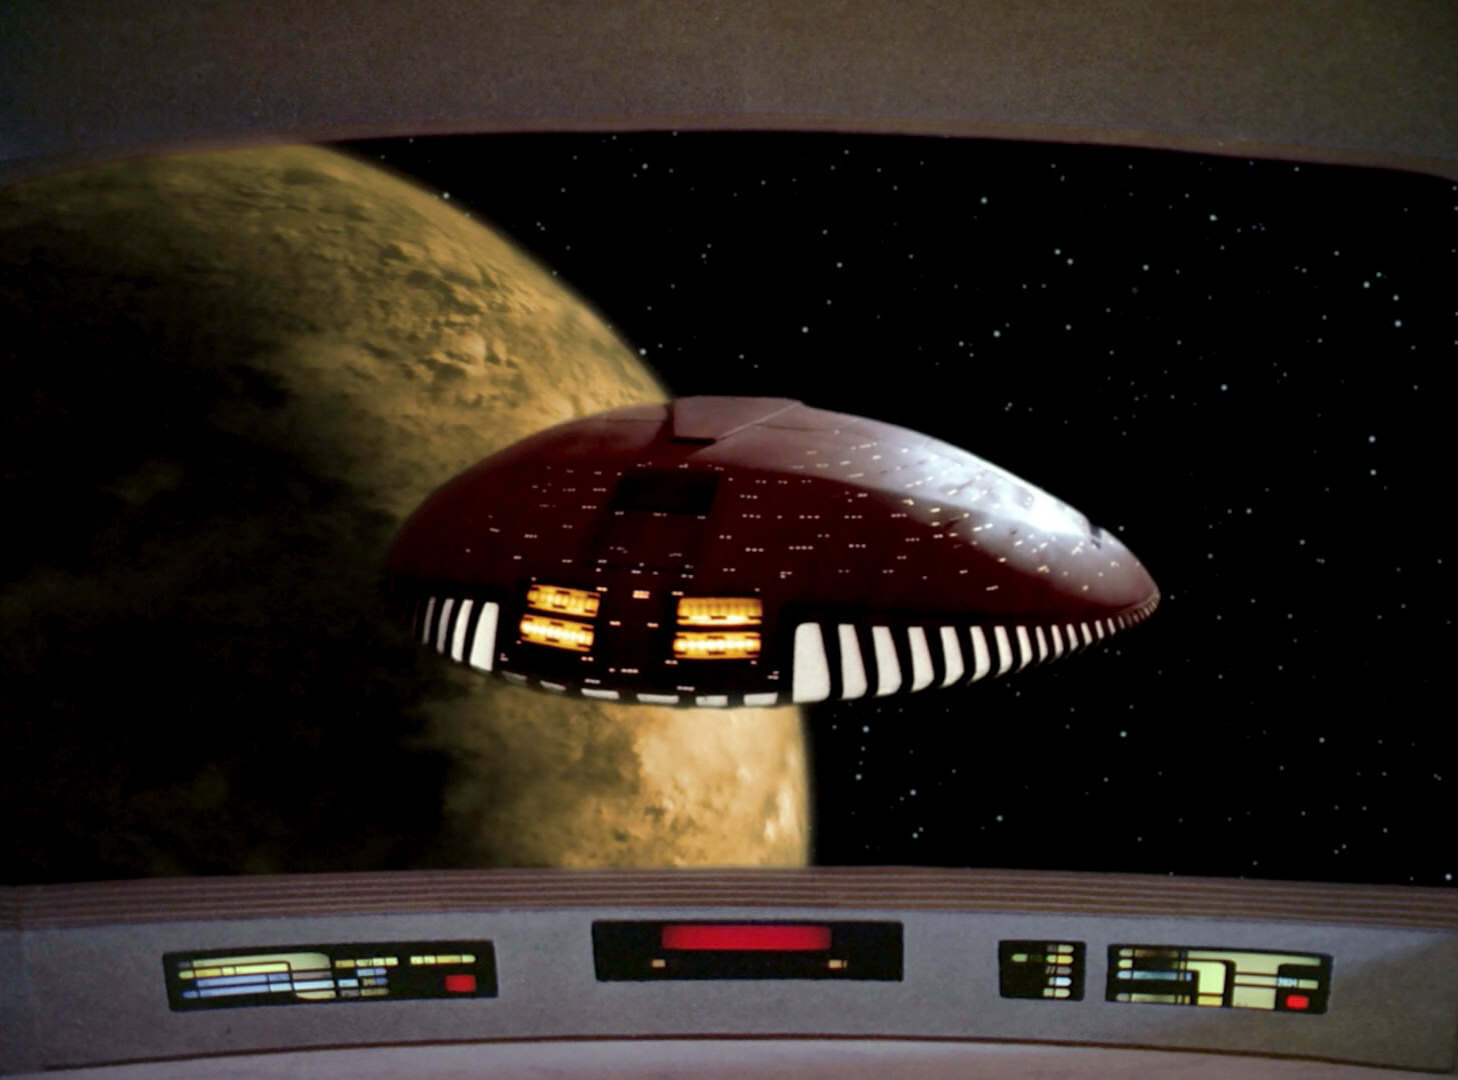
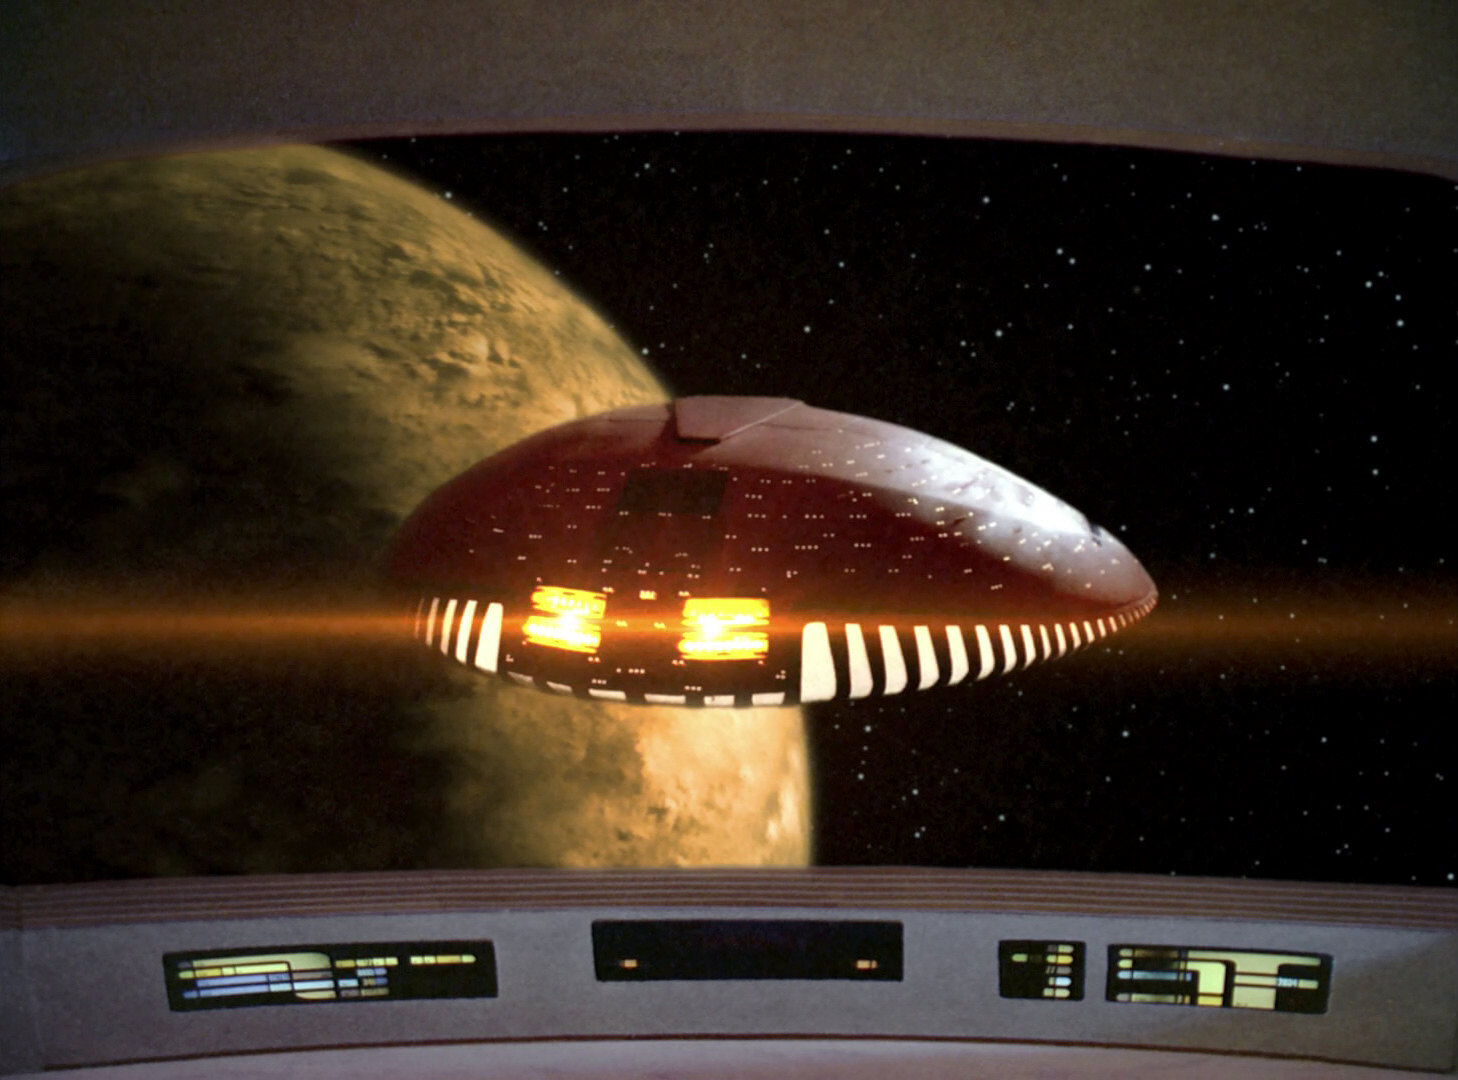
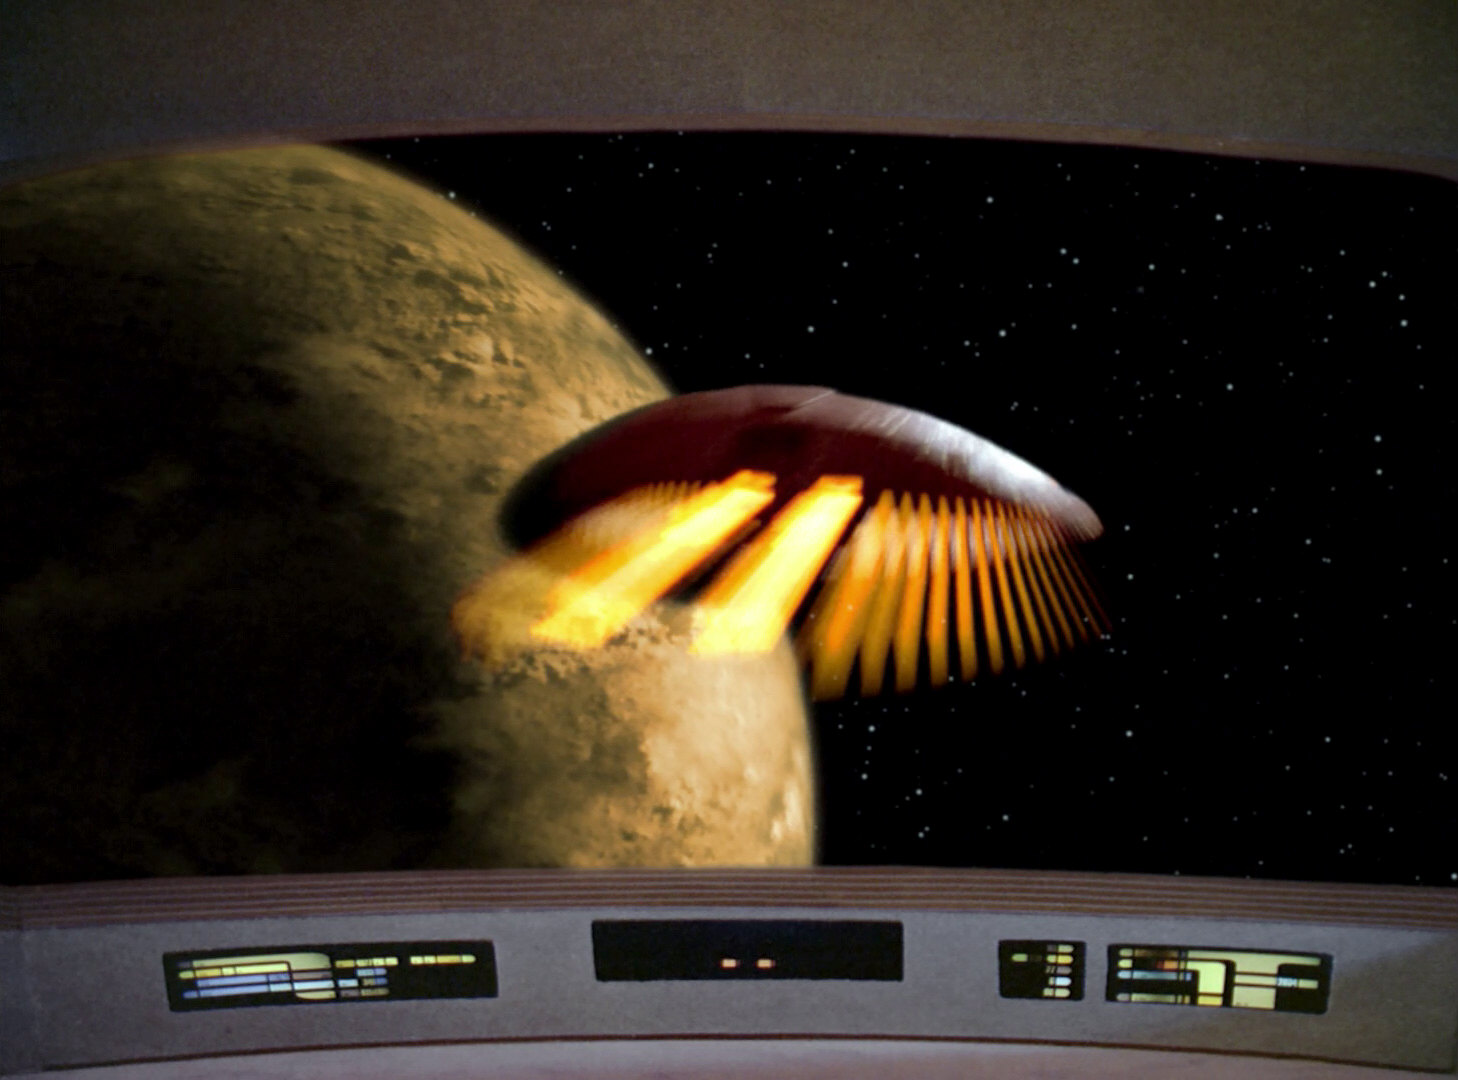
TNG: Peak Performance
This late season 2 episode features several new shots of the Ferengi Marauder. Several of these shots would go on to be re-used in later TNG episodes.
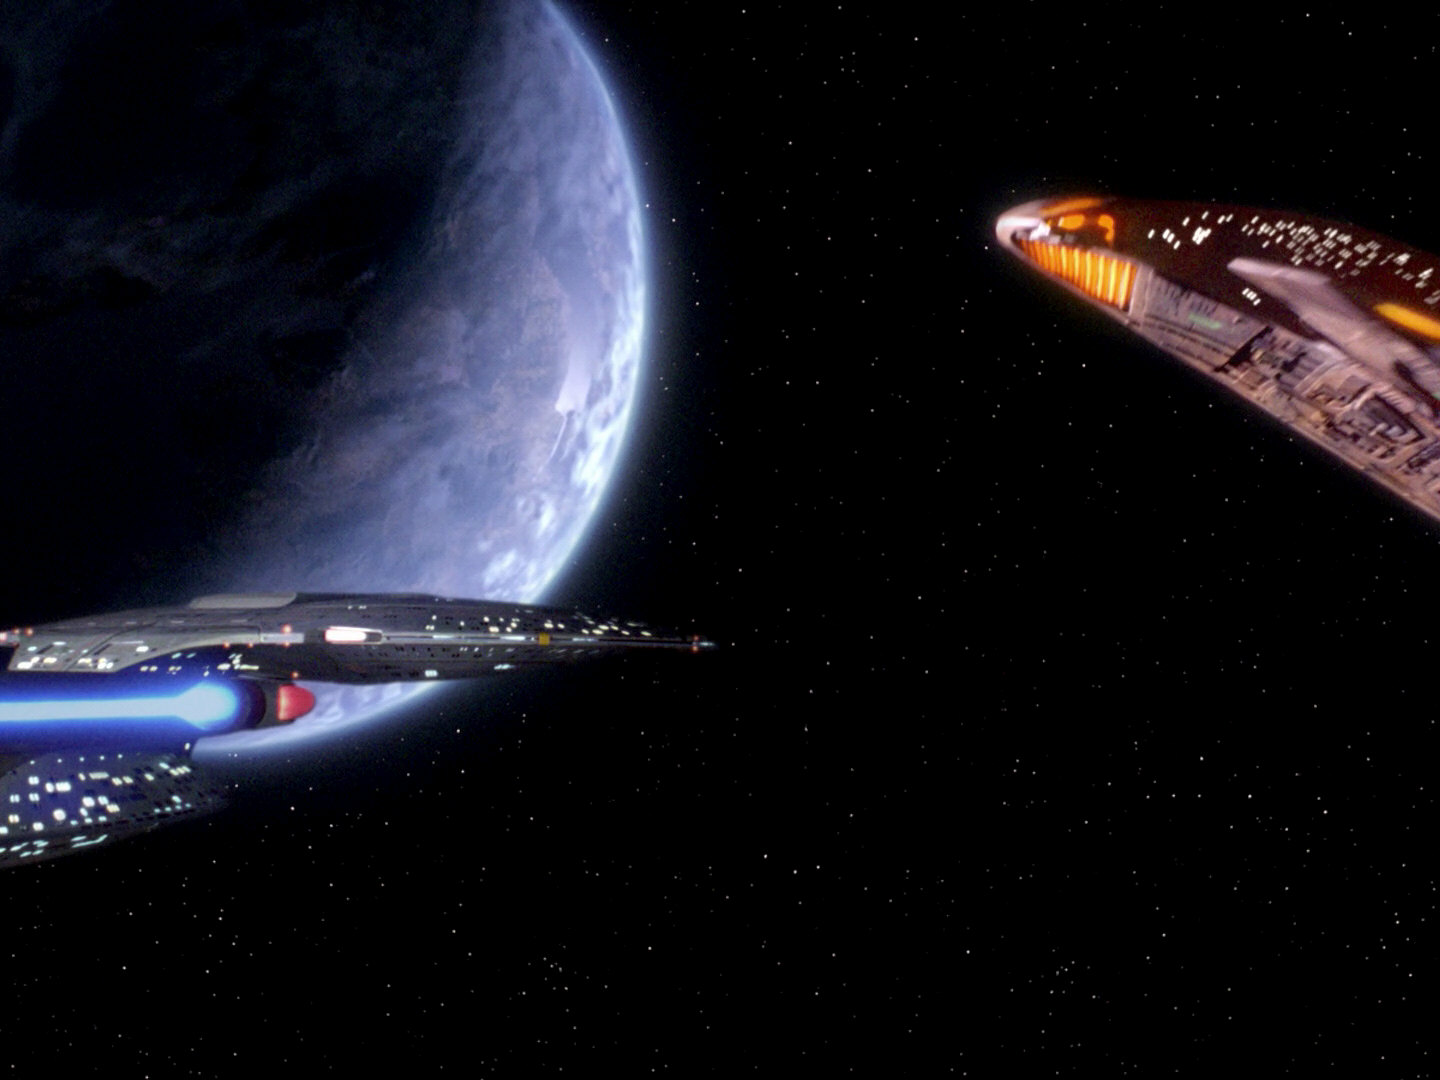
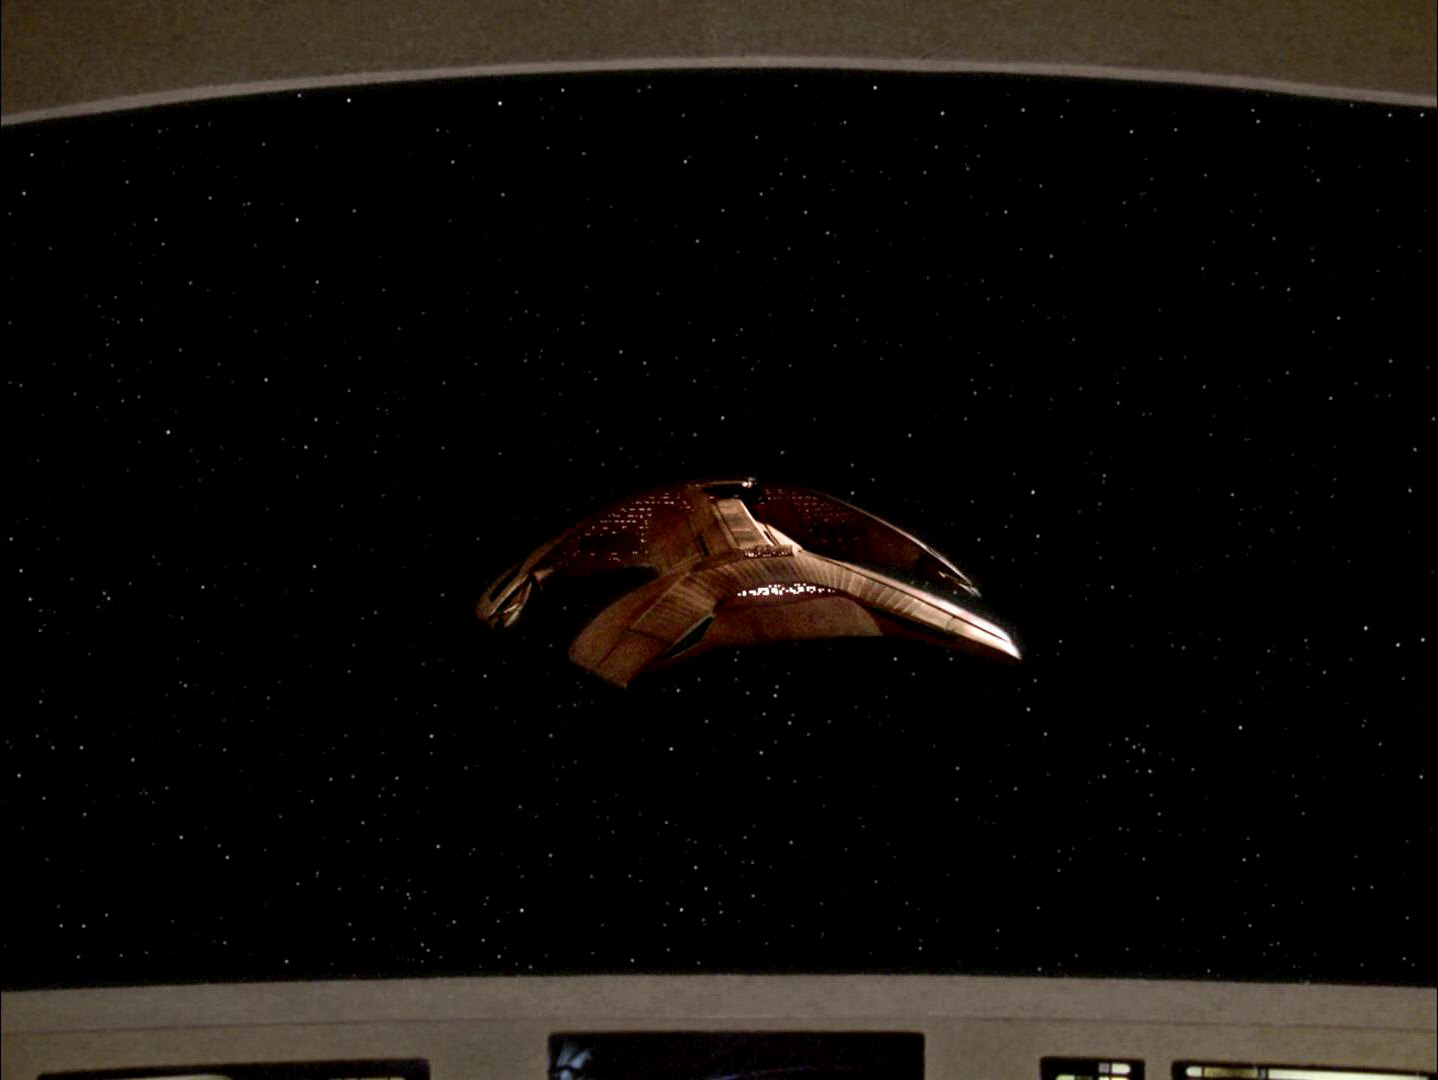
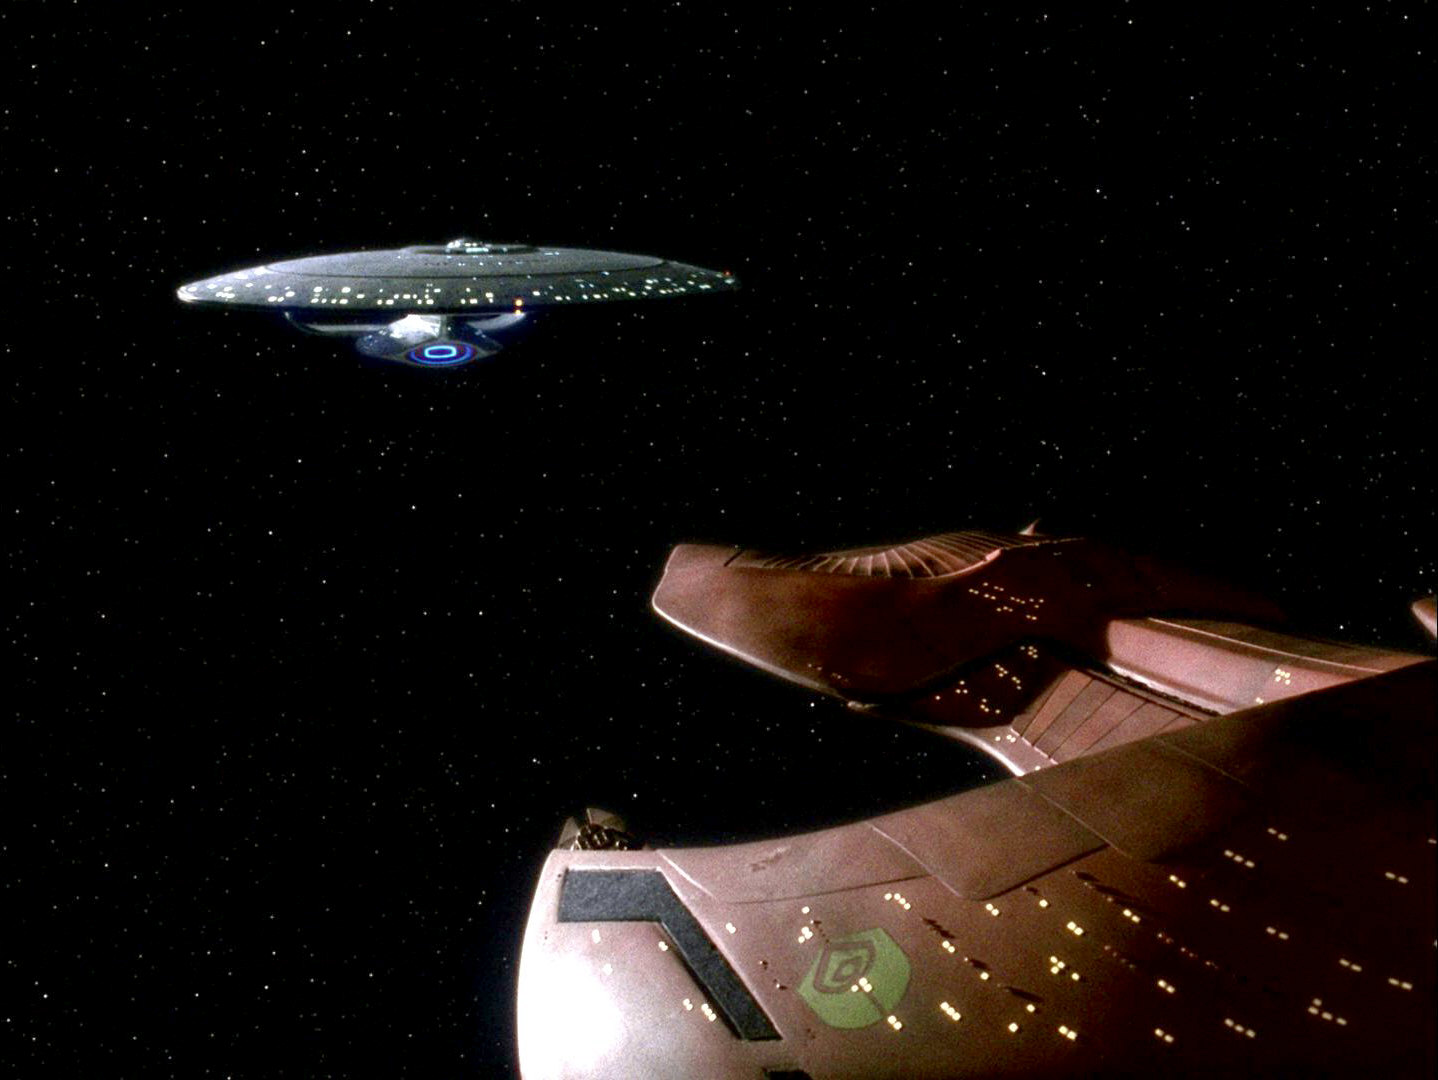
In the first shot (A), the Ferengi Marauder is seen quickly flying towards the USS Enterprise-D, firing at the Federation vessel. Even though the shot is a little blurry, one interesting feature of the Marauder can first fully be seen here: While most windows are lit white, there are also some orange windows.
In the next shot, the ship is still seen flying towards the USS Enterprise-D, firing its weapons (B). At first it seems as if the window lights are not turned on, but as the ship flies closer to the camera, the lights can clearly be made out.
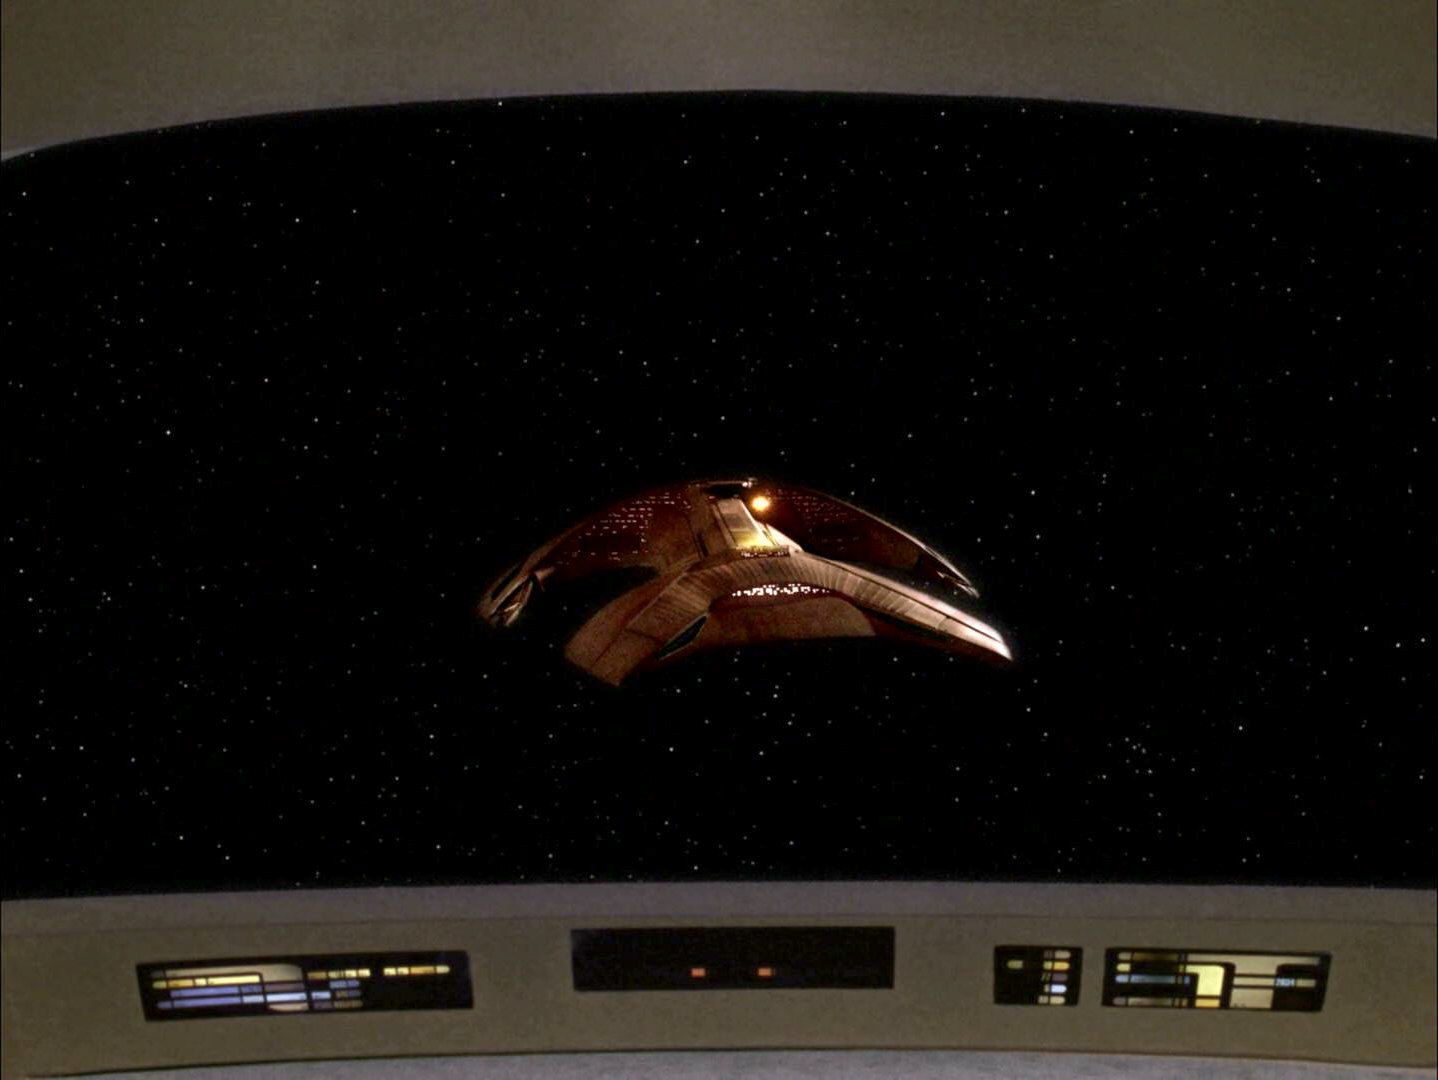
At the end of this maneuver, in a new viewscreen shot, the ship is seen slowly flying towards the USS Enterprise-D (C). This is followed by a shot which is seen twice in this episode (D). In the shot, the ship slowly turns a little to the left. This shot will be re-used in later episodes. When it appears for the second time, and only in the original version of the episode, it was forgotten to add in all the window lights of the ship in post production. This error was fixed when the episode was remastered.
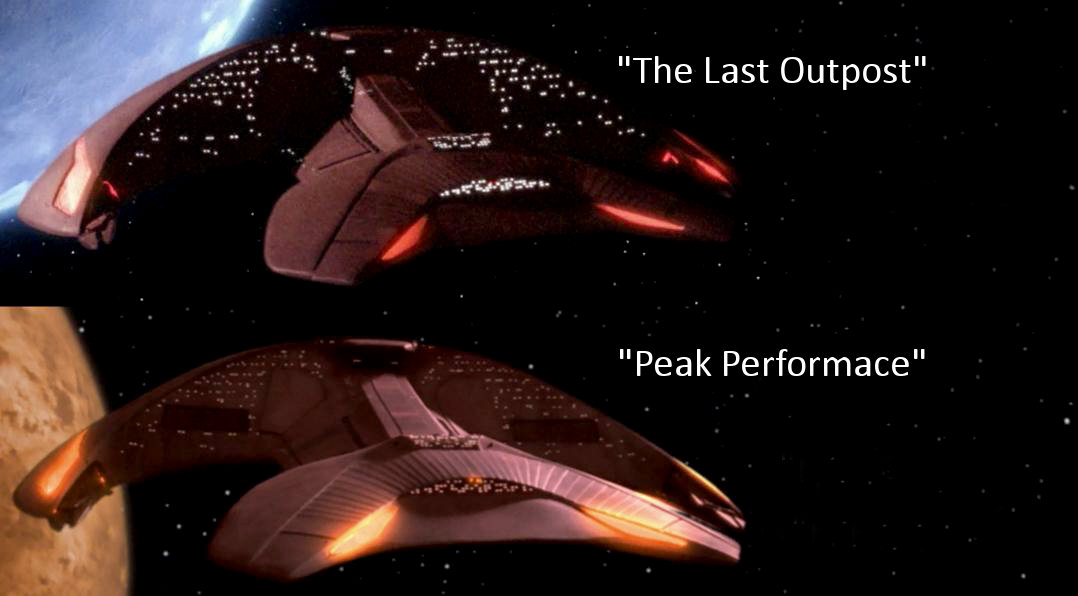
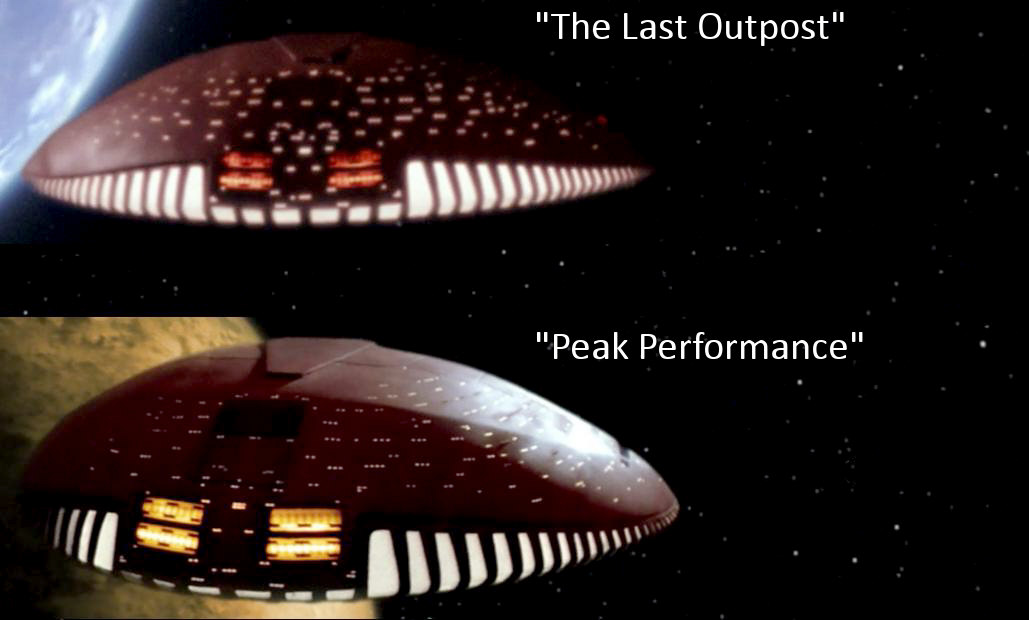
Comparing the window lights of the ship in this episode and the way the model appeared in "The Last Outpost", it becomes clear that this is still the same model (Marauder comparison 1).
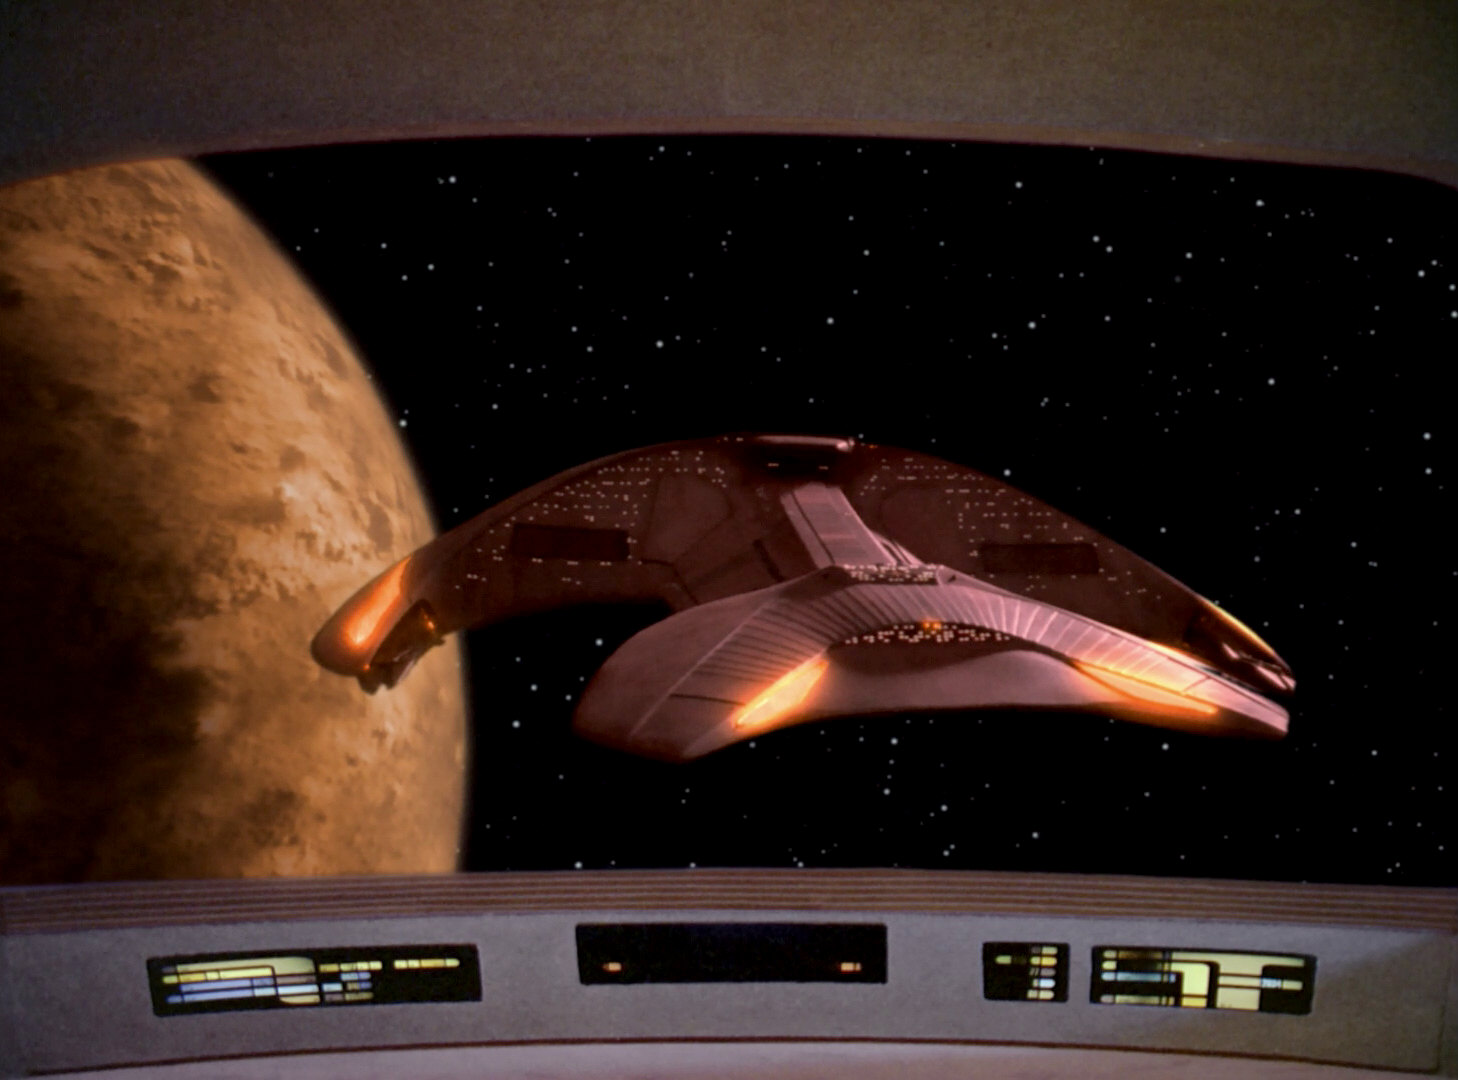
In the next shot (E), the camera slowly moves upwards, giving us good look at the stern of the ship, both from below and above. One thing that can clearly be seen in this shot is the seam in the front section of the hull, where the neck extends during the surrender posture. The additional orange window lights can also be seen well in this shot.
The next new shot is very similar to the last frame from the previous shot. Here, the ship slowly drifts to the left and, even less noticeably, turns to the right (F).
In the next shot, the Ferengi ship is seen in the distance. Because of this, the window lights cannot be made out (G).
In the final new shot filmed for this episode, the Ferengi Marauder is seen from the back again. When it engages its warp engines, the white sections of the hull glow orange and leave behind a warp streak as the ship flies away. A comparison with a similar shot from "The Last Outpost" reveals that this is still the same filming miniature, as the patterns of window lights are identical (Marauder comparison 2).
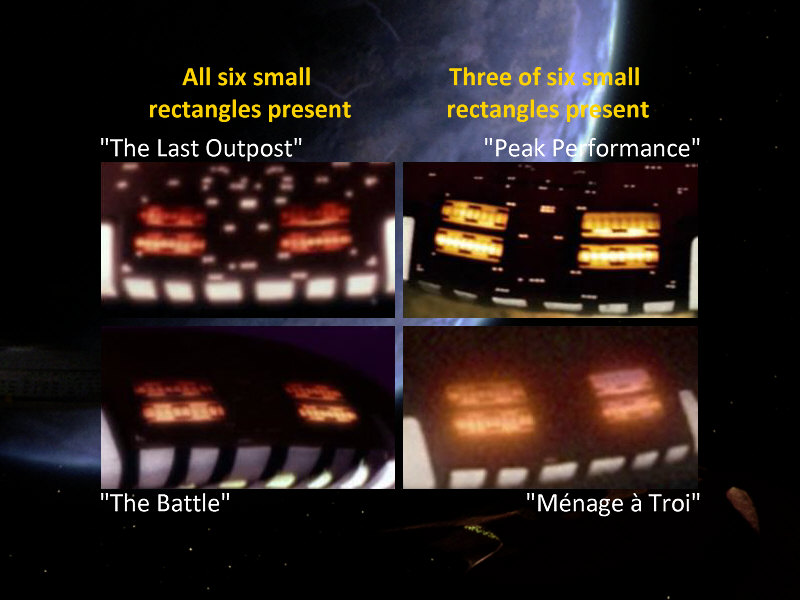
One small difference can be made out here, however: Four orange rectangles can be seen at the aft of the ship. Within each of the four rectangles, there are six smaller black rectangles. In "The Last Outpost" and "The Battle", the top right orange rectangle still features all 6 black rectangles. In "Peak Performance" and in "Ménage a Troi", however, the top three black rectangles are missing here (Comparison of the rectangles inside the engines).


TNG: The Price
This is the first episode in which only stock footage of the Ferengi Marauder, filmed for "Peak Performance" appears. The shot of the Ferengi Marauder turning a little to the side as seen on the main viewscreen appears twice in this episode. This is clearly stock footage from the previous Ferengi episode. The footage looks slightly different in the remastered version of the episode. In both shots, the ship has turned a little further to the side, so in the second shot, the orange engine glow on the right (the port side of the ship) is clearly visible, whereas it was always hidden behind Picard in the original version of the episode. Either the sequence in the remastered episode was taken from a little further in the filmed take or a completely different take was used here. In "Peak Performance", the exact footage was used, as can be seen when comparing the SD and HD versions above.

TNG: Ménage à Troi
This is the last time new footage was filmed using a physical model of the Ferengi Marauder. The ship appears in three new shots filmed for the episode and in stock footage from "Peak Performance".
In the first shot, the ship is seen from the aft, flying by the camera (A). As the ship is flying at warp, the white stripes on the aft section of the ship are tinted a little orange, like at the end of "Peak Performance", when the ship engages its warp drive. When the ship was seen at warp at the beginning of "The Last Outpost", however, the stripes appeared white, like when the ship is stationary.
In the second shot, another warp flyby, the ship quickly approaches the camera and flies by it (B). Both flybys appear several times in the episode.
The final new shot of the model appears towards the end of the episode (C). The ship is seen from the back, flying slowly alongside the USS Enterprise-D. In all three shots newly filmed for this episode, the ship is completely missing any window lights. This could be blamed on the fast movement in the first two shots but in the last shot, the ship is moving forward only gently and yet, no window lights are seen. This can only have two reasons: Either the window lights in the first filming miniature were broken or this is the only appearance of the second smaller filming miniature which did not feature functioning window lights.
One argument that speaks against the second theory is the fact that the top right orange rectangle at the back of the ship still appears like it did in "Peak Performance"; hence, it still misses the upper three black rectangles (Comparison of the rectangles inside the engines).
In the remastered version of the episode, the final new shot also contains a visual mistake: as can be seen when looking at the left side of the model, the orange engine glow of the ship was not inserted in post production, instead, the engine glows blue here (compare with the first screenshot from sequence A). The original version of the episode did not feature this mistake, in the SD version, the section of the hull that features the glowing orange light is not seen, however as the footage is framed a little differently.
The final shot of the Ferengi Marauder, seen in the episode, appears twice on the main viewscreen, at the beginning and end of the conversation between Captain Picard and DaiMon Tog (D). This is stock footage of the Ferengi Marauder filmed for "Peak Performance", only flipped horizontally.


TNG: Force of Nature
This episode only features stock footage of the Marauder from "Peak Performance". As the warp drive of this Marauder was disabled by a verteron pulse, the orange engine glow is missing in all shots. The vessel is identified as a "D'Kora class" ship for the first and only time in dialogue in this episode.
In the first shot (A), the ship is seen firing its weapons. Even though this is stock footage from "Peak Performance", the new element of the torpedo was added, including the reflection of the light on the hull of the Ferengi ship.
The second shot (B) is also a re-use from "Peak Performance". Like in the previous shot, the engine glow is missing but a Ferengi torpedo, including its reflection on the hull of the ship, was inserted in post production.
The third shot (C) is identical to A. This is the first time this shot (created for "Peak Performance", also re-used in "The Price") does not appear on the main viewscreen, however. Like the previous two shots, the new element of the phaser beam and its effect on the hull of the Ferengi Marauder is new and was added to the existing stock footage in post production. This is the last time the filming miniature is ever seen on screen.

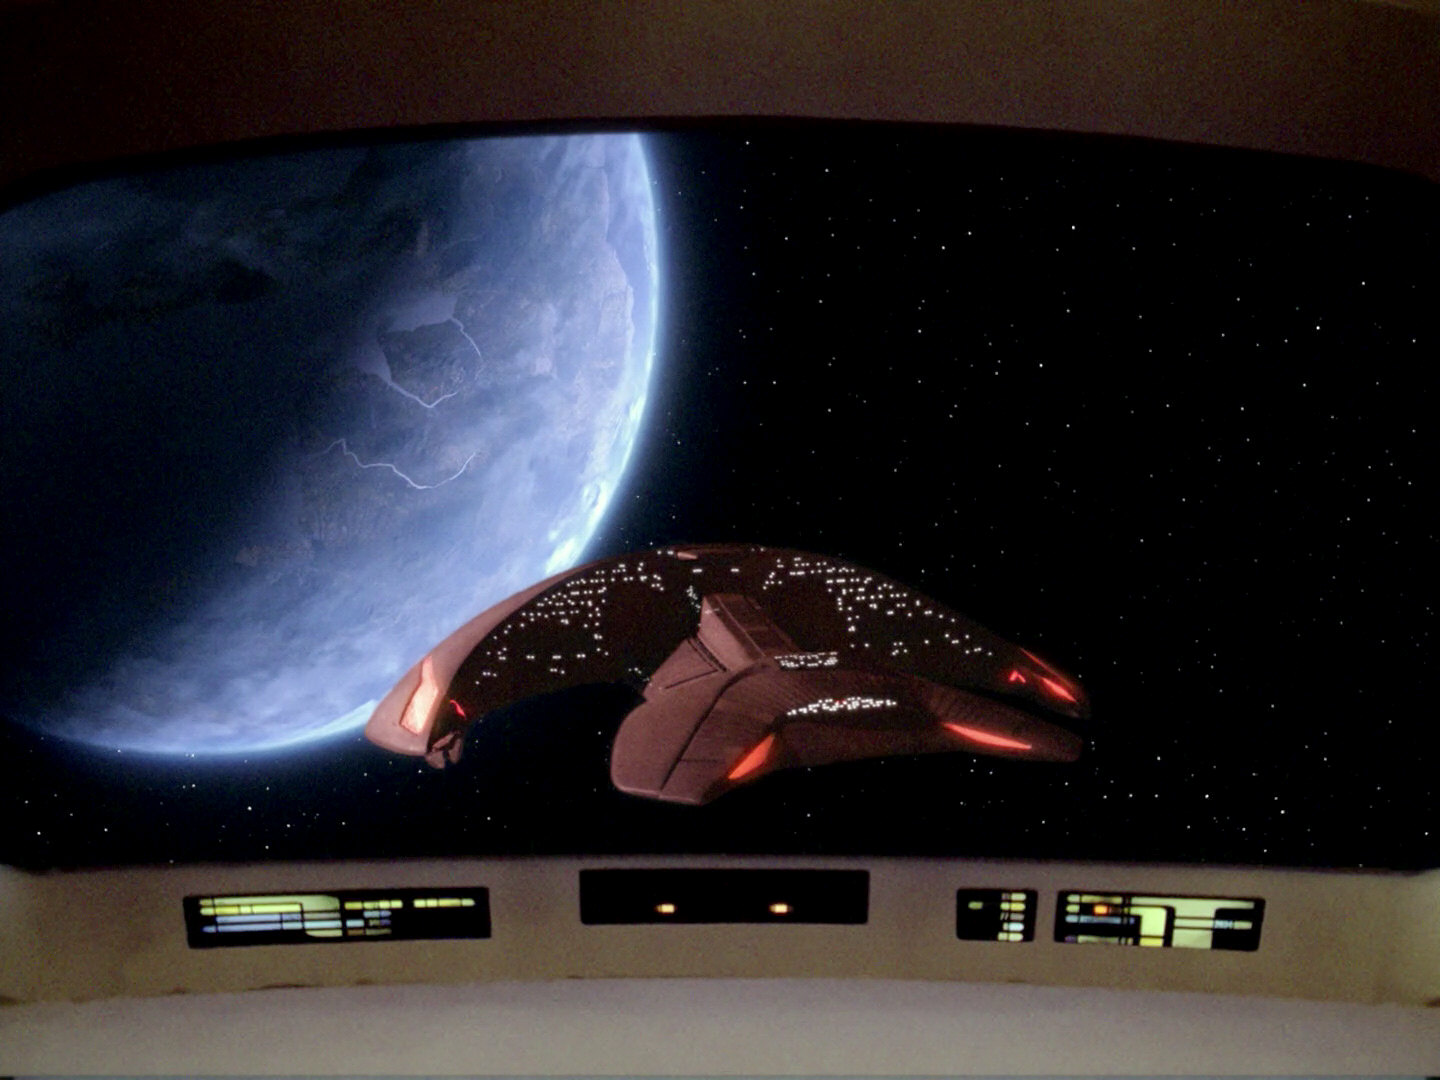
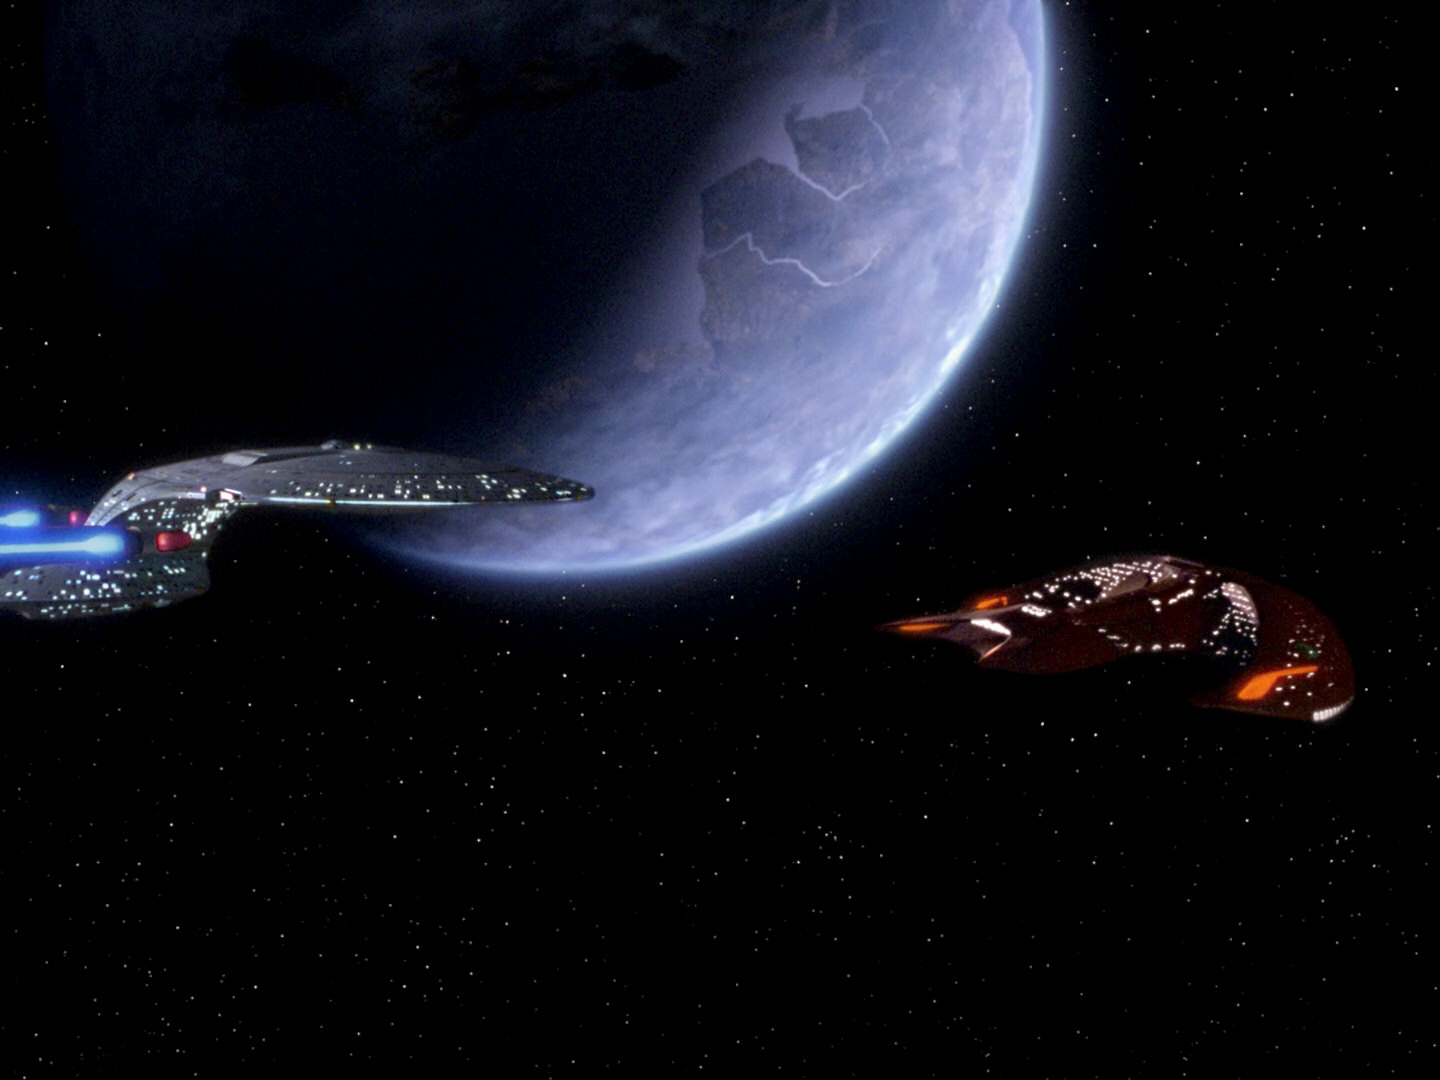
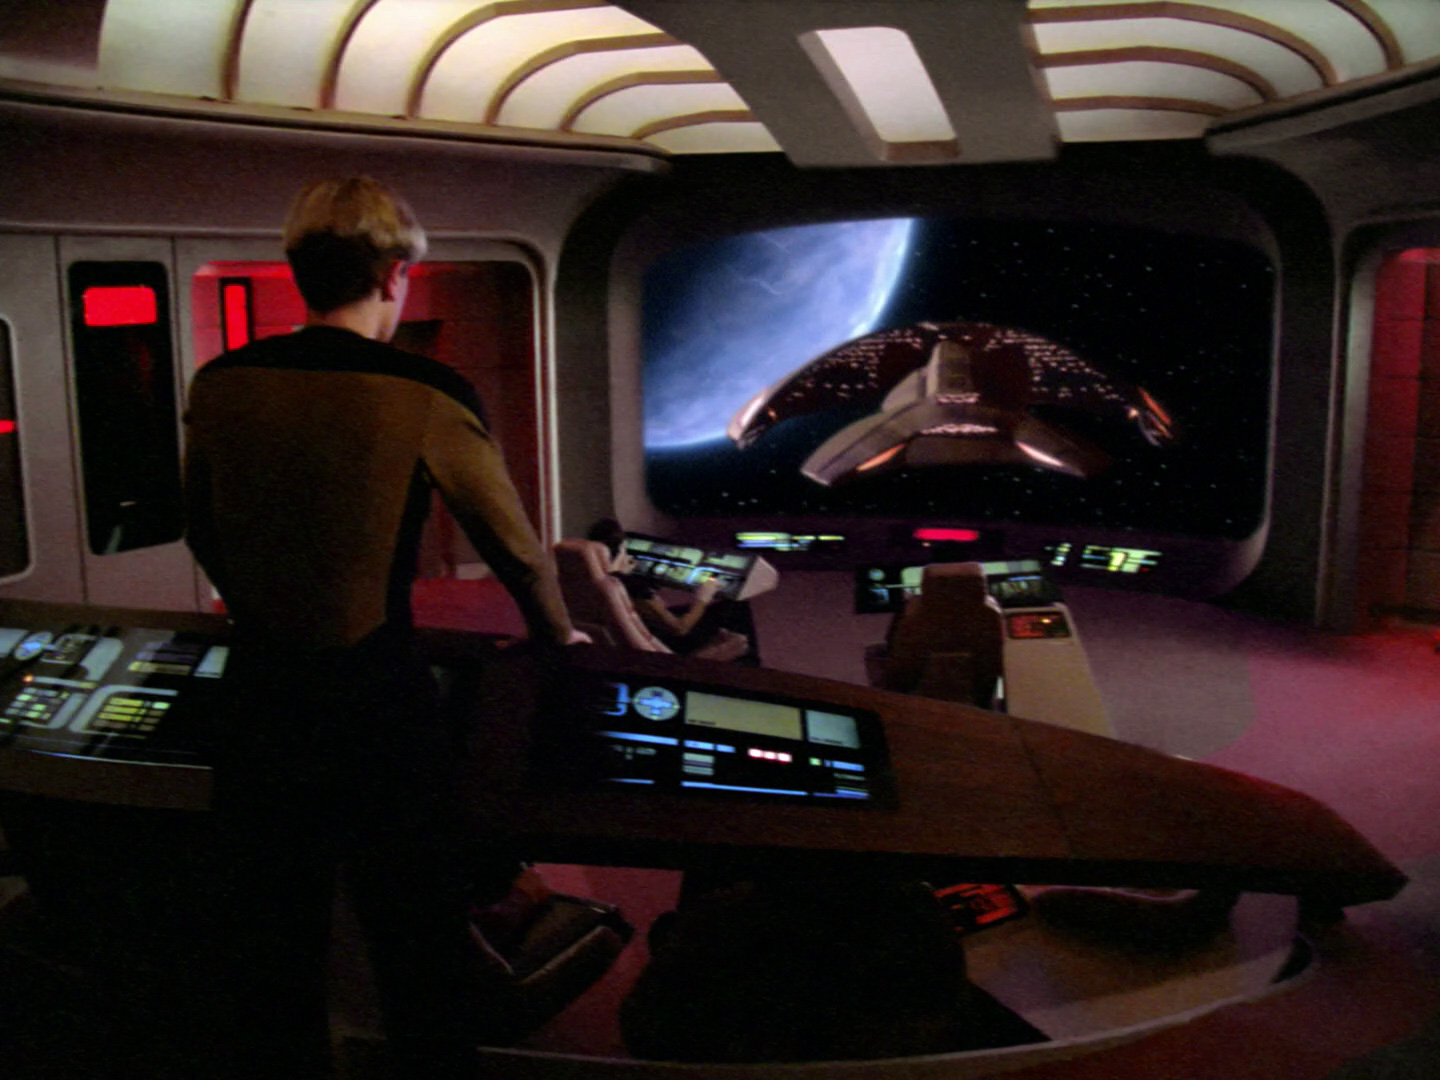
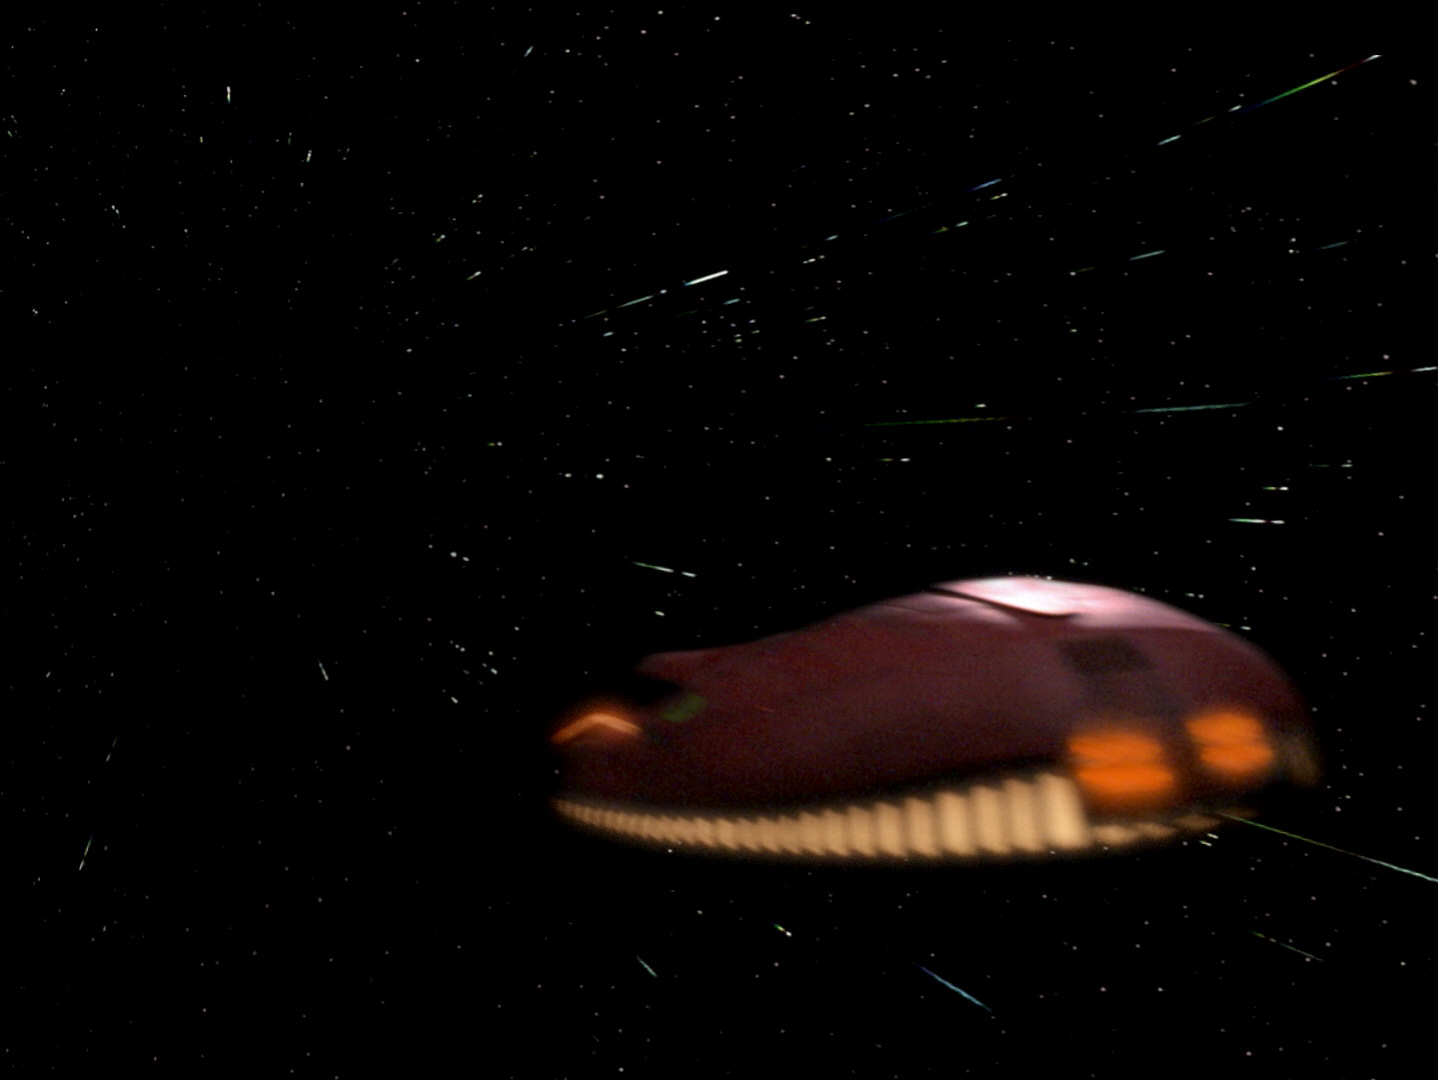
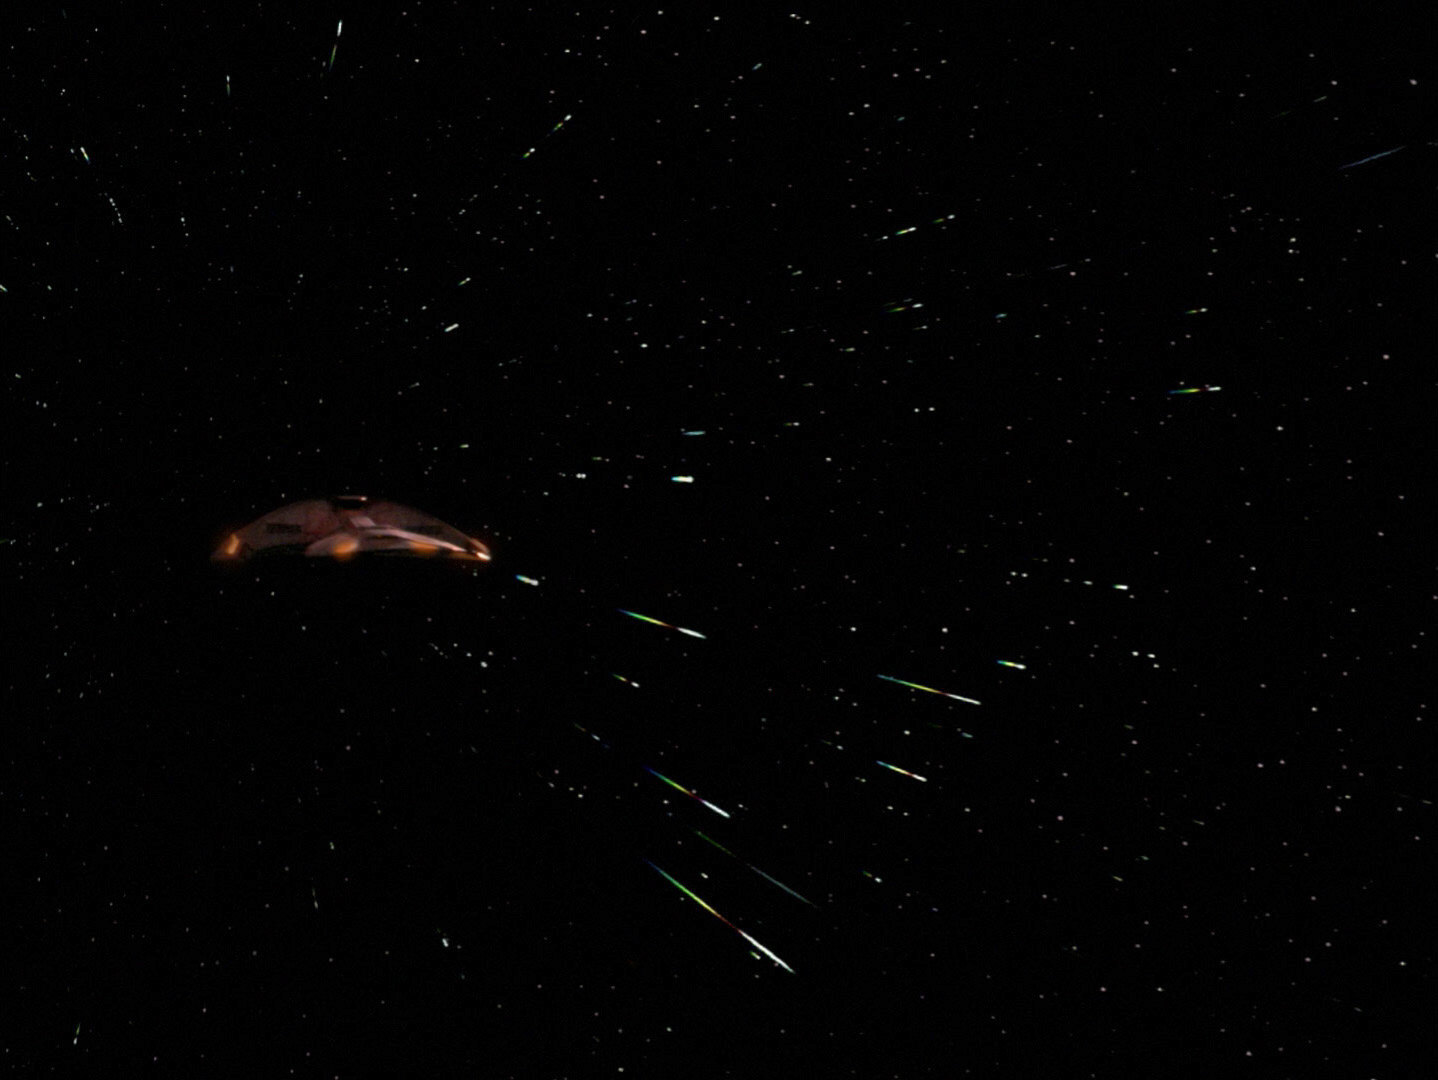
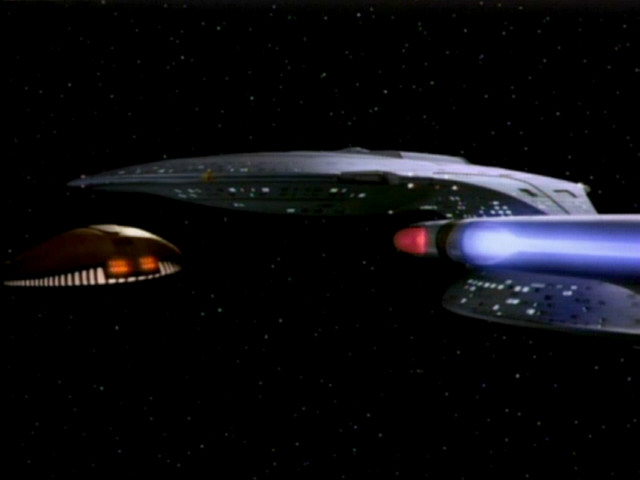
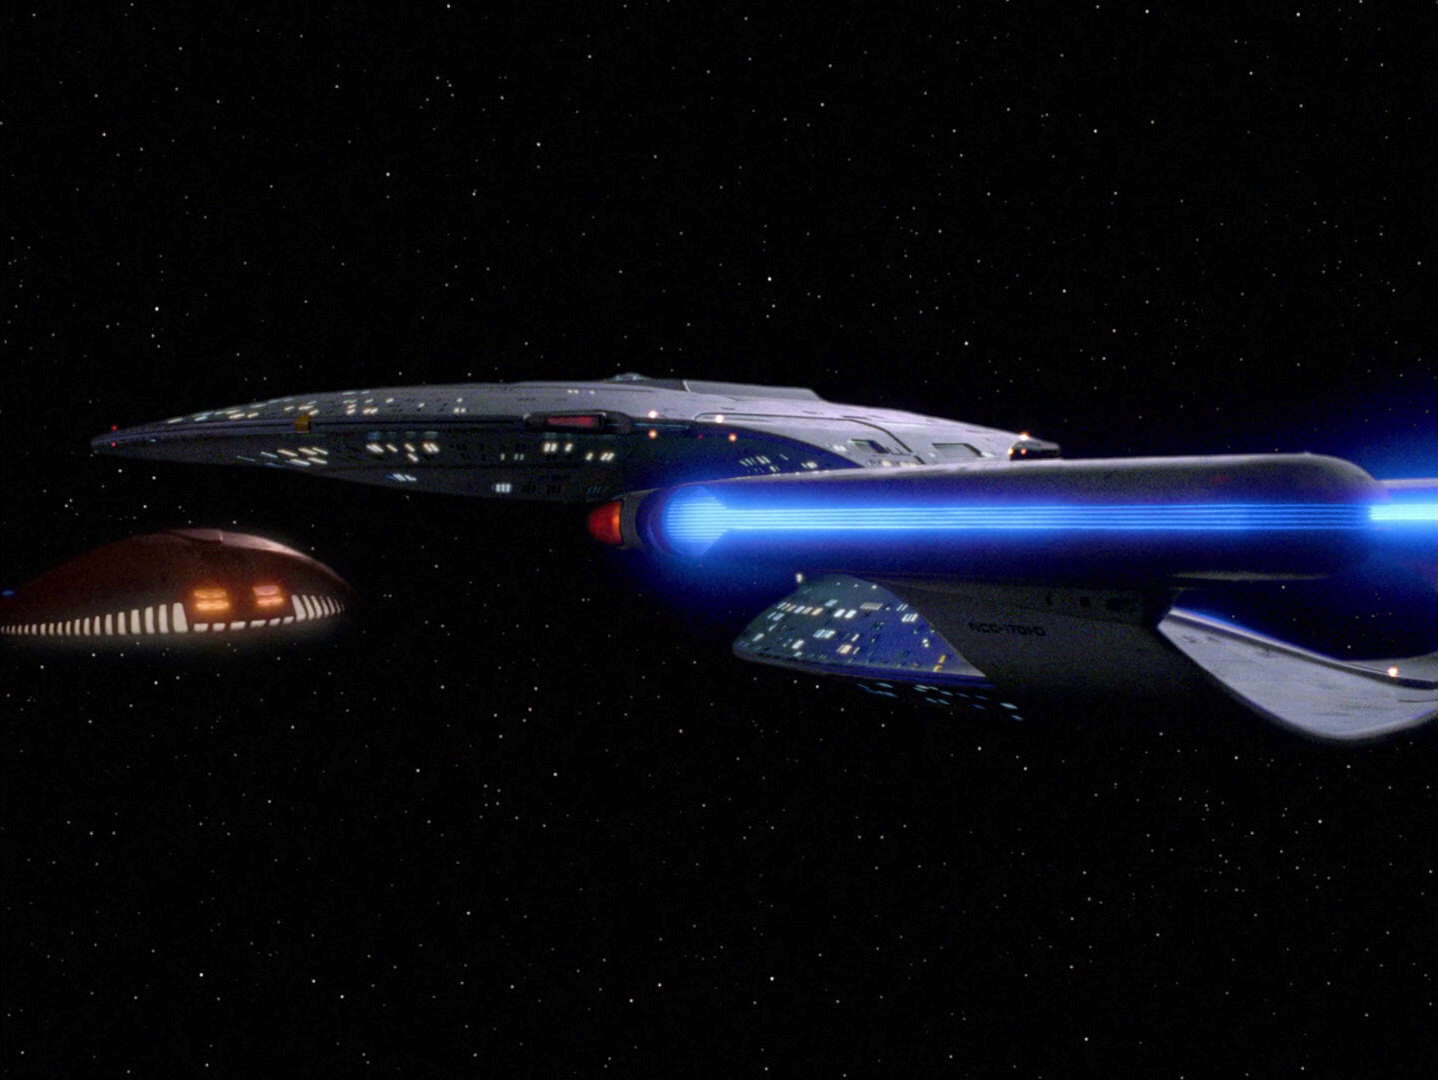
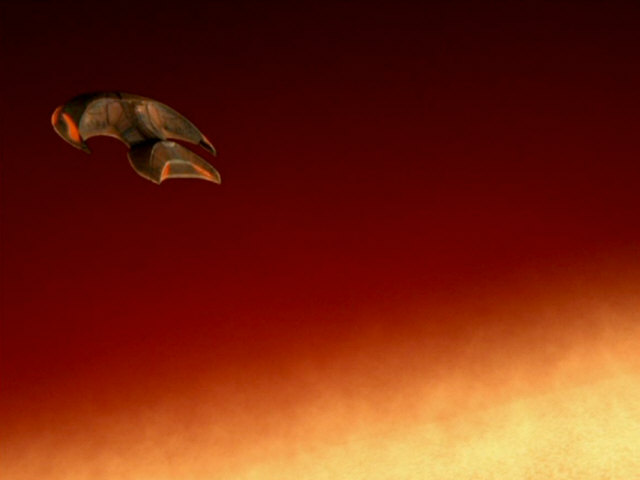
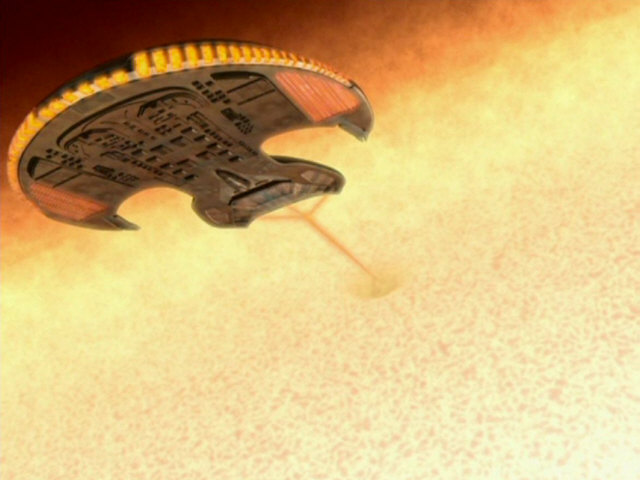
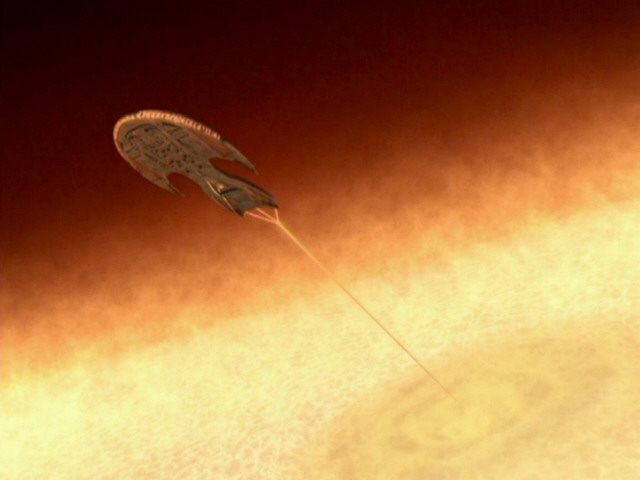
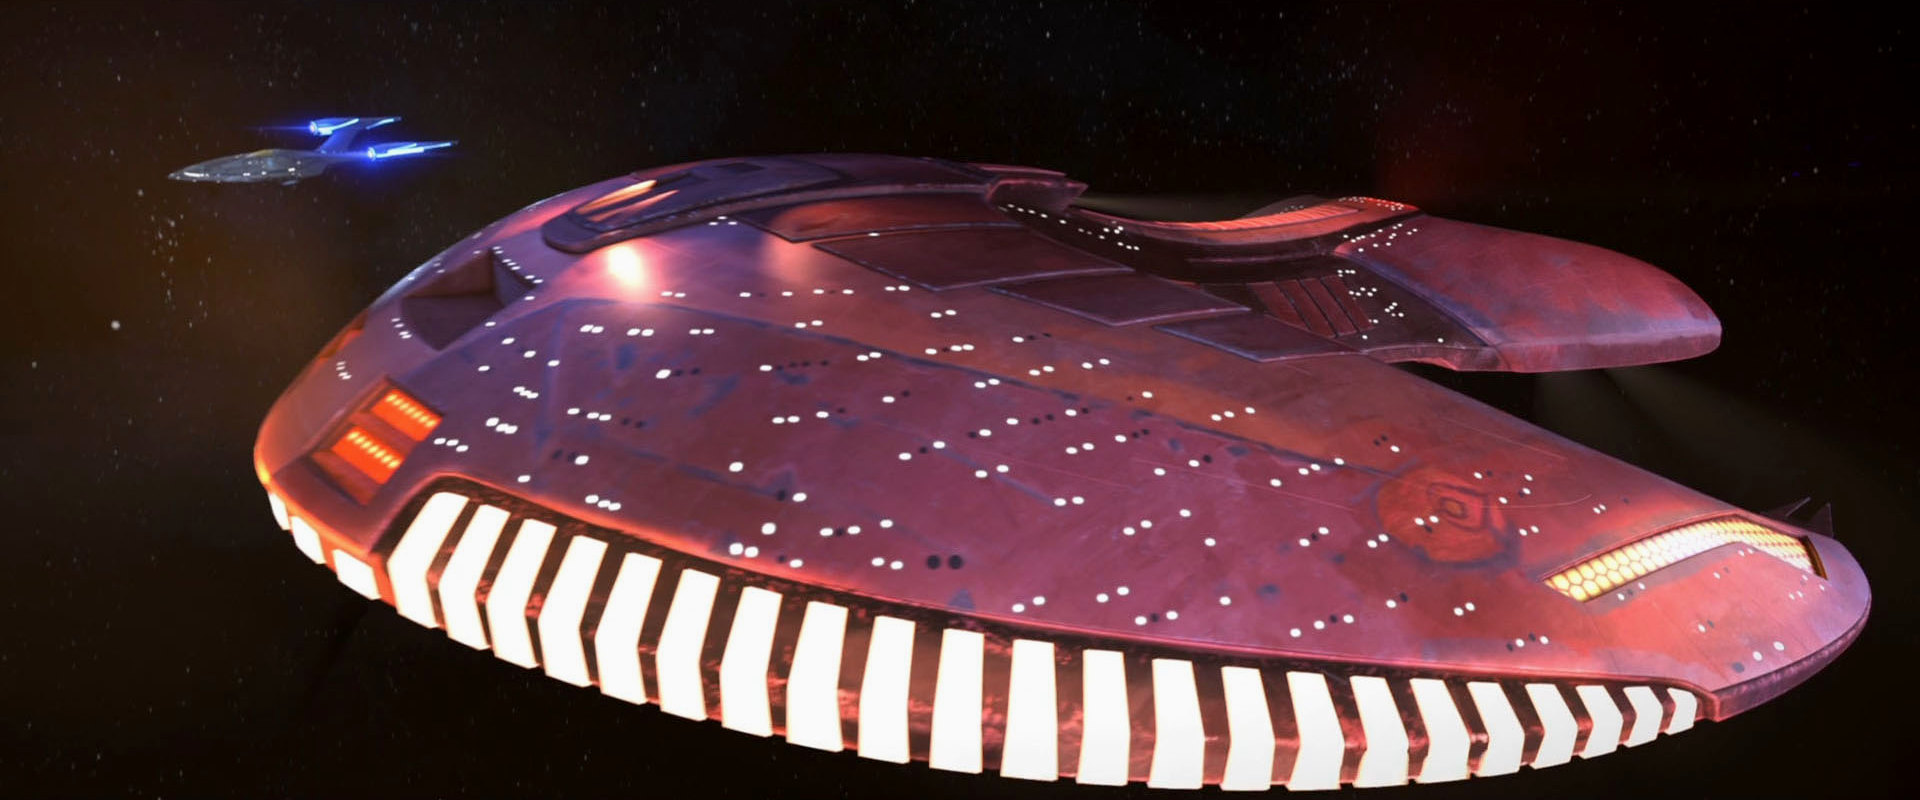
VOY: Inside Man
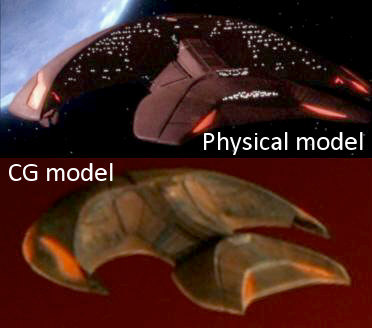
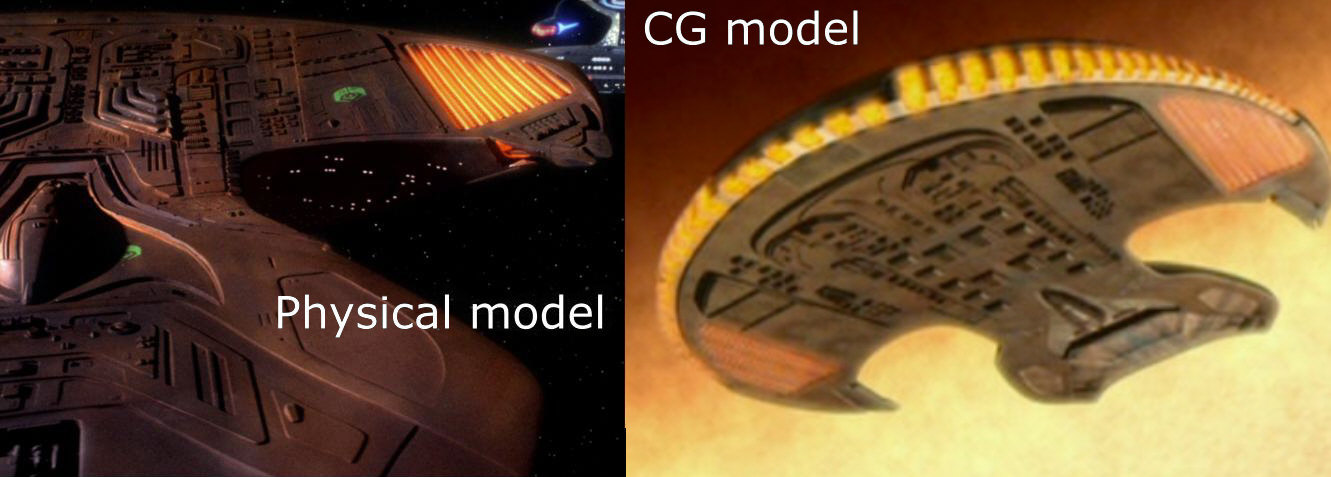
A CG model of the Ferengi Marauder was created for this episode. The ship appears in three shots, in two of these shots it's also seen firing an energy beam. The CG model is mostly seen from the underside. The dorsal side is only seen in one shot, from a distance. It seems the window lights are missing. This might also be because of the overexposure due to the proximity of the sun, however. (Comparison of physical and CG model, 1). Many of the features on the ventral side of the ship, including the integrated auxiliary craft, were accurately reproduced when the ship was turned into a CG model. Some features are different or missing, including the green Ferengi logos (Comparison of physical and CG model, 2).
One major departure from the original appearance of the Ferengi Marauder is the orange glow of the vertical warp engine slits at the back of the ship. Normally, these slits always glowed white, especially when the ship was stationary, like the Marauder is in this episode. Only in "Peak Performance", when the ship engaged its warp drive, and in "Ménage à Troi", when the ship was flying at warp, did the engines glow orange (ever so slightly in the latter episode). And when the ship was at warp in "The Last Outpost", these engine slits also glowed white instead of orange.
After this appearance, the Ferengi Marauder was never seen again.
Marauder Graphics and Parts
Ferengi Marauder graphics
Schematics of the Ferengi Marauder were seen in two Voyager episodes. In "Drone", a side view of the Ferengi Marauder, originally created for the Star Trek Encyclopedia, briefly flashes by on a monitor in main engineering aboard the USS Voyager.
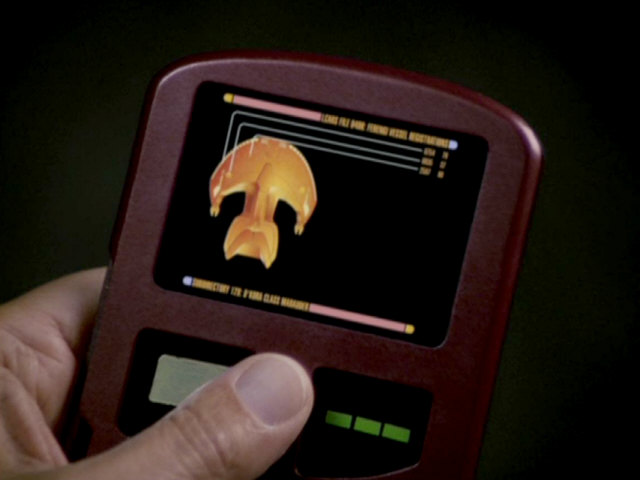
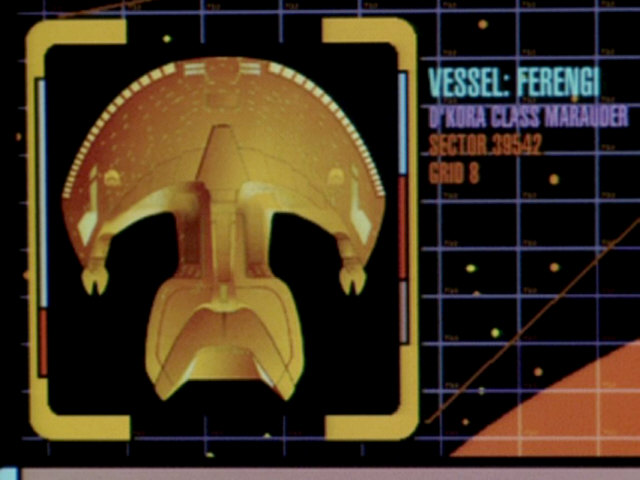
"Inside Man" additionally features a top view of the Ferengi Marauder, seen on a large screen and on a PADD. In both Voyager episodes, the graphics identify the ships as "D'Kora class Marauders", the only times the ship is ever officially designated as a "Marauder" on screen.

Summary
Here is a summary of all appearances of the Ferengi Marauder.
| Ship type |
Episode |
1st model |
2nd model |
CG model |
Stock footage |
 Ferengi D'Kora class |
"The Last Outpost" |
Yes |
No |
No |
No |
|
"The Battle" |
Yes |
No |
No |
No |
|
|
"Peak Performance" |
Yes |
No |
No |
No |
|
|
"The Price" |
Yes |
No |
No |
Yes, from "Peak Performance", though slightly different in HD |
|
|
"Ménage à Troi" |
Yes |
Yes? |
No |
Some, from "Peak Performance" |
|
|
"Force of Nature" |
Yes |
No |
No |
Yes, from "Peak Performance" |
|
|
"Inside Man" |
No |
No |
Yes |
No |
Addendum
 The Marauder named "Damsel" appears prominently in PRO: "First Con-tact". At least one D'Kora can be seen in the battle in PRO: "Supernova I".
See Also
Credits
Some information and quotes were taken from Memory Alpha's article on the ship.

Back to Starship Articles index


