


Scan Retouching Tutorial
 Whenever I want to turn a scan into a quality image for my website, a few more considerations are necessary than the effortless "scan and send" philosophy propagated by scanner hardware and software manufacturers. This tutorial shows some useful techniques to clean up an image scanned from a magazine and to make it web-ready. The tutorial describes the process for iGrafx Image (Micrografx Picture Publisher); most of it is applicable to Adobe Photoshop and Corel Photopaint too.
Notice You may notice that I made this tutorial based on the German language version of iGrafx Image, so some names of the tools and menus I translated back may not be the same as they are in the actual English version. If you find something that should be corrected, please contact me.
Some Notes on Scanning
Nominal and actual resolution
First of all, it may surprise that the true resolution of a scanned image, that is, the reproduction of image details, is generally not the same as, but lower than the so-called "optical resolution" of the scanner. Diffraction and aberration limits as well as the imperfection of the CCD pixel aperture usually don't allow more than 600ppi. This means that a very fine print or a photo with 600 black-and-white line pairs per inch will not be good, but just recognizable after scanning. The contrast will already be reduced to a degree that the original black becomes only a slightly darker gray than the original white. In this respect the pixel density of an image sensor is merely a measure of the spatial sampling rate of an image; it has been blurred already before this sampling takes place. If, for instance, a line sensor with a pixel density of 1200ppi is used, the image will be two times oversampled if we assume a 600ppi optical resolution limit prior to sampling. While oversampling is useful to remove noise, it can't provide a better resolution. With a suited resampling/interpolation algorithm, the image oversampled at 1200ppi may be reduced to 600ppi (with only a fourth of the original memory required), and the smaller version won't show any less details. The other way round, the 600ppi image can be blown up to 1200ppi any time, which quite obviously doesn't improve the resolution either.

Appropriate ppi number*
The appropriate sampling rate to be chosen for the scanner depends on the quality and size of the original image, rather than on the desired resolution the final result is supposed to have, be it 600ppi for print or typically 800*600 pixels for publication in the web. There are some people who honestly claim that 75ppi or 100ppi is sufficient when scanning images for web use. Agreed, depending on the original image size this may be just enough as a *final* size for web images, but it removes the option to improve the image quality after scanning. Such low-resolution images may be full of speckles, noise and, most annoyingly, a regular scanner pattern that can't be removed or toned down because it's not possible to reduce the size even more. The other extreme advice is oversampling images four or even more times (where oversampling refers to the above true resolution of 600ppi), especially if it's going to be printed. But as already mentioned, at some point the oversampling doesn't help any more, because the information gain useful to remove noise becomes marginal. In my experience 1200ppi is sufficient for almost any case. Considering that a 300ppi TIF RGB scan of a DIN-A4 or letter-size original is already about 25MB and may take up to a few minutes with a commercial scanner, higher resolutions of 600ppi or 1200ppi are only suited for smaller and better resolved original images like photos. 300ppi are sufficient for most magazine scans. If the image doesn't have too many details, I scan them at only 200ppi, so I can still reduce them to 100ppi at which they will appear on my website.
* ppi denotes the number of (true-) color pixels per inch whereas, strictly speaking, dpi refers to the black or white dots of print resolution.
Sharpness and contrast
Sharpness and contrast are two other image properties and have to be distinguished from resolution. They don't have to be perfect in the raw image as it comes from the scanner. After scanning, an existing image can be sharpened by enhancing high spatial frequencies and thereby making edges steeper. The contrast can be enhanced by steepening the gamma curve such that the grayscale range is narrowed - dark areas become darker and bright areas become brighter. Personally, I never use any special sharpening that come with the scanning software and are applied already while scanning, for I am sure I can better decide myself if and how strongly they should be applied afterwards. A filter to improve the contrast or to remove regular patterns (which actually blurs the image!) already while scanning may be useful, though. Anyway, sharpness and contrast enhancement, if deliberately and carefully applied, may improve the image quality while the resolution stays the same. As already mentioned, it is useful to scan an image with more pixels than the final image is supposed to have, especially if it's going to be published in the web. Aside from the nice effect that small speckles with low contrast will largely disappear in the resampled image, this may also blur some of the detrimental effects of sharpening and contrast enhancement which usually render parts of the image too rough.
Image alignment
There is one thing of utmost importance: I always turn the image or book on the scanner until horizontal and vertical lines are perfectly aligned to the borders of the scan area, at least when I'm scanning technical diagrams. This may seem a lot of work, but correcting this by turning the electronic image is even harder. Moreover, since the old, skewed pixels have to be re-calculated to new, upright pixels, this is always connected with a loss of resolution. Turning the image requires resampling, and this is about the same blurring effect as if two or more pixels in the original image would share their signals. Scanning a slightly sloped line may also lead to aliasing artifacts considering that it's not possible to catch it with a perfectly vertical pixel line. Finally, everyone who ever turned a 100MB image, at least on not-so-recent computers, will never try it again.
The Retouching Process
Original scan
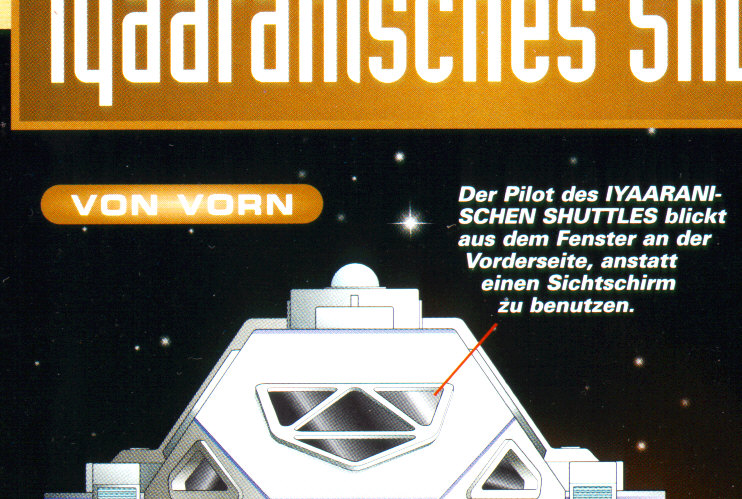
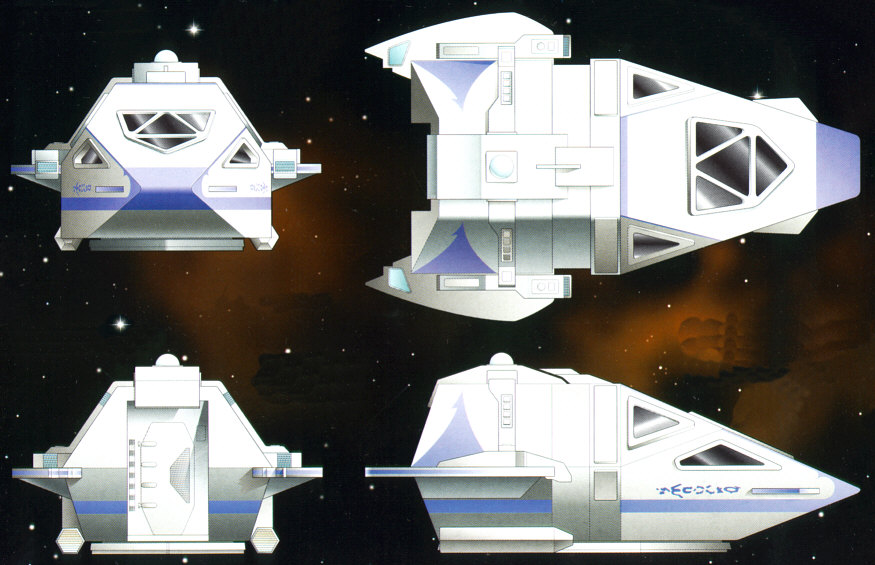
The image as it comes from the scanner has several small defects. Areas of equal color are not as homogeneous as they should be. There may be a gray haze in certain areas or throughout the image. There are often page folds or creases. Finally, the image may contain several comments that are not supposed to appear in the final version, such as those in the Star Trek Fact Files from which the following image is scanned.**
** You don't miss anything because most comments are like this: "This window allows visual inspection of the outside environment".
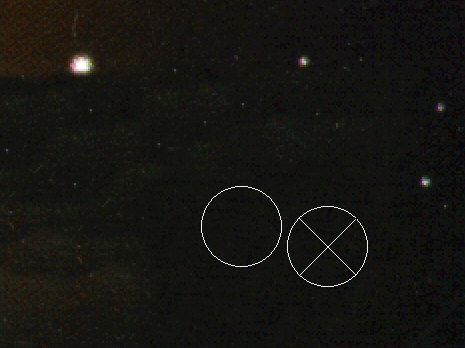
Removing lines and comments
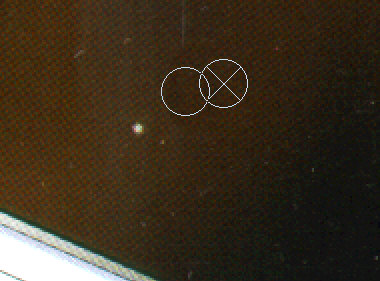
This is one of the tasks that requires the most precision and diligence, and I'm doing this first to save the easy work for last. Removing unwanted parts can all be done with the cloning tool. Basically, the cloning tool transfers a structure in the origin (the "x" in a circle) to a destination (the empty circle). So the "x" has to be moved to a suited undamaged area that shows exactly the structure (or a very similar one) to be reconstructed. It often requires several tries until the reconstruction is perfect, and unless it's only one edge, the "x" has to be moved several times. This is accomplished by holding down the "SHIFT" key in iGrafx Image, pressing the RMB in Corel Photopaint, and ALT+LMB in Adobe Photoshop (where it's called the pattern stamp). It is astonishing that the simple edge in the example image can be perfectly restored such that not the slightest transition is visible even in the original size image and even when looking very closely. It is obvious that more complex shapes can't be exactly restored, unless exactly these shapes appear somewhere else in the image which is never the case on a photo. A complete reconstruction of complex structures, however, is usually not necessary, since it's often sufficient to transfer something of similar colors and contrast. There is one reason why I always take iGrafx Image for technical diagrams: It's the only program that allows mirrored cloning, so if the right half of a partially symmetrical drawing is ruined, I can restore it by cloning it from the left half. The size of the cloning tool should be about eight pixels for a 200 or 300ppi scan. If the details are very small the size of the tool can be further decreased.

Retouching gray areas
Some scanners leave ugly gray areas on dark portions of the image because of their contrast correction. The haze film could be removed by masking the area and applying a filter, but even with smoothed edges the mask transitions would still be visible, and it takes some time to find the suited filter setting. I mostly use the cloning too instead. For this purpose I increase the size to 50 pixels or more, especially if parts of a star background are gray.
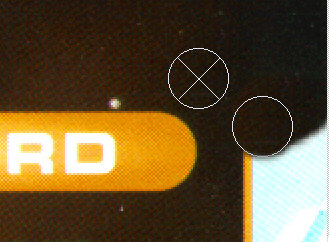
Restoring large areas
Sometimes the image is supposed to be larger than the scan area, or whole areas of the image have to be reconstructed. This is also the case on my Fact Files scans where there are large boxes with (mostly irrelevant) annotations I'd like to remove. Unless there is some important part of the image hidden beneath these boxes, I can easily apply the cloning tool and transfer the surrounding background to what was the box. It is important to change the distance and direction of cloning very often. Otherwise it would result in an unnatural regular pattern.
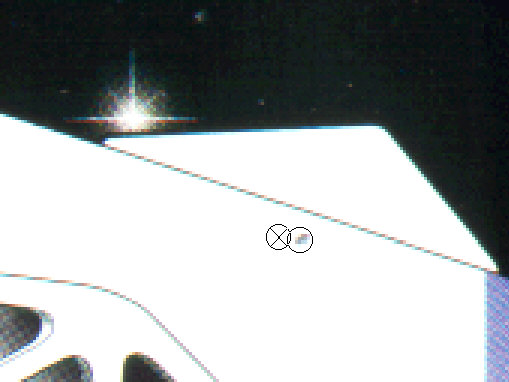
Removing small spots
Every scanned image has many small defects consisting of a pixel cluster (caused by dust or scratches on the glass) or of a single pixel (because of image capture or transmission errors). Each of them is usually removed in no time, using the cloning tool set to a width of about 6 pixels at 400% zoom. The hard thing is to find them all. I often spend several minutes inspecting the image at a zoom factor of 200%. If the spots are very small and have little contrast to the background, they may largely disappear when the image is resampled. On the other hand, if there is a remaining contrast, they may be visible again if the image is sharpened or if the contrast is corrected. This is why I remove as many of them as possible prior to resampling.
Intermediate result
This is what the image looks like after the background has been restored and most of the defects removed. While the important part of the image (the shuttle hull) is clean, the background still looks gray (albeit uniformly gray) and dirty, and there is still an unnatural pattern in the areas that have been cloned because I apparently was too lazy and didn't change the direction of cloning often enough.
Equalizing uniform areas
The remaining dirt is especially disturbing on a uniformly dark background and has to be completely removed. This can be done with a much larger size of the cloning tool. In this example I made the tool is 80 pixels wide and used it at a zoom factor of 100%. I set the transparency to 50% so that the original part of the image is merged with the cloned part. This blurs and equalizes the background, and after a while the spots disappear. It is obvious that this procedure is only applicable to backgrounds, which are largely but not exactly uniform and which don't have a smooth color gradient or pattern that would be ruined this way.
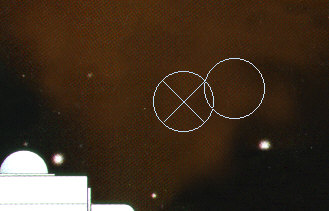
Restoring diffuse structures
Restoring diffuse or blurred areas (like the nebula in the example image, which I extended with the cloning tool) may be even harder than well-defined and sharp patterns. There is no standard setting for this task. I always try several different values for the transparency. Too little transparency will create ugly patterns like they were visible in the intermediate result. Too much transparency will blur the image too much and would be about the same as using a "smearing" brush.
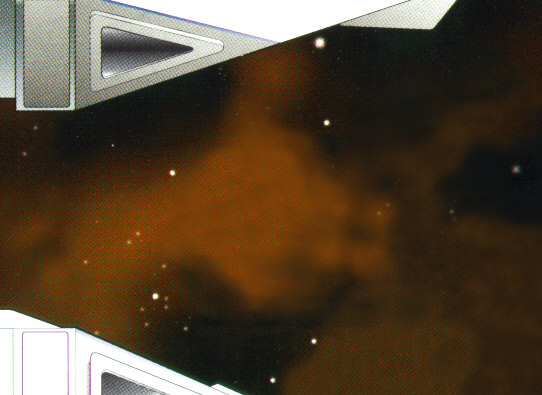
Restored nebula
This is what the nebula looks like after a few minutes of treatment with the cloning tool.
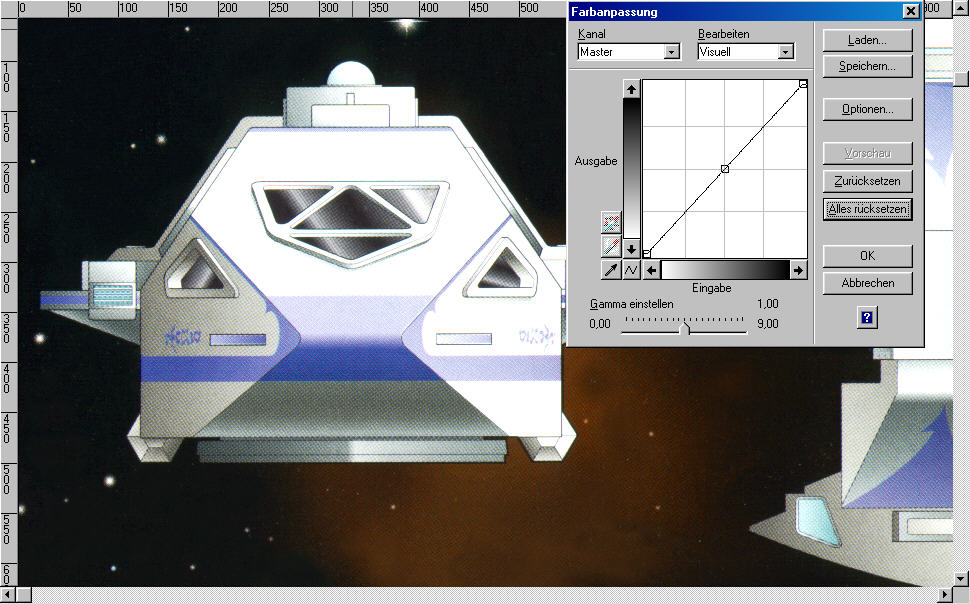
Original gamma curve
Gamma correction is a method of changing the brightness and contrast within an image whilst keeping the overall contrast the same. Gamma is visualized as a curve, which is fixed at its darkest (black) and brightest (white) end and which can be modified in between***. Gamma correction can be performed for single color channels of an RGB image. This may be necessary in case the scanner or digital camera has falsified the colors, but in many cases just the overall brightness needs to be corrected. The original image has gamma=1. Note that the dark background is dark gray, but would look much better if it were black (because open space is the darkest thing to exist and just has to be black unless we're dealing with lens reflections). The shuttle hull is a bit too bright and could need more contrast.
*** Here the color range is plotted from white on the left to black on the right. This is accidental, I would usually make the curve go the other way round.
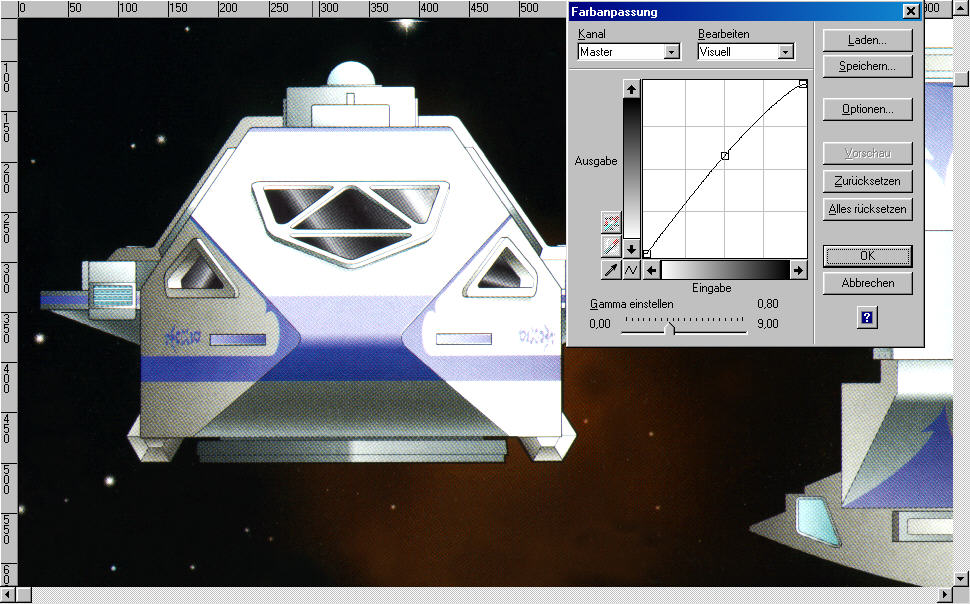
Reducing gamma
In most cases gamma has to be reduced after scanning. Reducing gamma to 0.8 is the first step to the overall improvement of the image. The contrast of the bright shuttle hull is better, and the gray areas are darker now - although not yet black. Making areas perfectly black, RGB (0,0,0), is not feasible with gamma correction, since the gamma curve will always have a certain minimum steepness that prevents gray areas from becoming black.
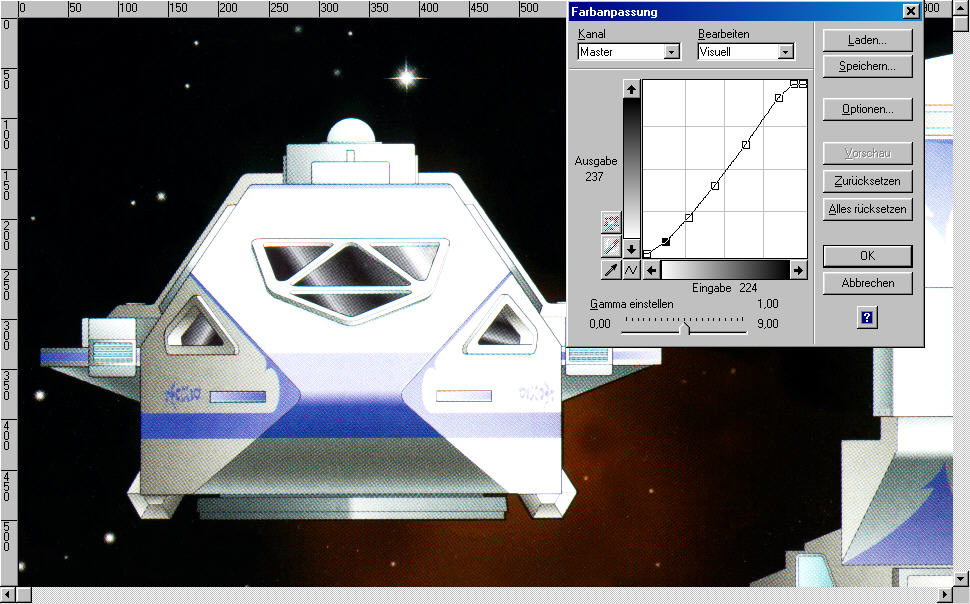
Applying an s-curve
A non-linear correction has to be applied to make the background black. For this purpose, I create a new point in the gamma curve near the black/black end and move it along the input axis (with the interactive preview enabled) until just the area in question and not more becomes black. In some cases other parts of the image, which don't belong to the background, are shaded and will become plain black too. In this case a mask has to be applied prior to color correction, or a compromise is necessary in that one has to be content with a dark gray background of RGB (2,2,2) or so. Basically the same procedure is necessary to render very bright areas plain white. This is why I routinely apply an s-shaped curve that enhances both the contrast to the upper and to the lower end of the grayscale range (which can be done together with the gamma correction in the preceding step).
Resampling the image
The image is now ready for resampling. Several resampling filters are available, but for most purposes the simple bilinear filter is the best. Depending on the reduction factor, several neighboring pixels are combined to one new pixel. It is worth mentioning that a reduction factor of exactly 50% usually yields a better result than an arbitrary factor. On the other hand, I reckoned that at exactly 50% there might be a problem with regular patterns from the scanner that persist in the smaller image, but I didn't notice something like that so far. The resampled image is smaller, of course, but there are two more differences to the original size. The smaller image is brighter and is less sharp, which are both consequences of the resampling. I deliberately corrected gamma already before resampling, but it was not sufficient in this case. As for the sharpness, this is an easy step to be performed at the very end of the process.
Sharpening
Sharpening is very easy if the right filter is chosen. I prefer "directional sharpen" in Corel Photopaint and "selective sharpen" in iGrafx Image. It is a matter of taste how strongly the image is sharpened. In any case the sharpening shouldn't go that far that tilted lines become stepped or that very colorful pixels become visible from an otherwise moderately colored edge transition.

JPG conversion
The image has to be converted to a JPG for web use, which is always a tradeoff between quality and file size. I am very grateful that all recent programs have previews. Usually technical images need a lower compression rate, since the artifacts at the edges are the more annoying the more regular the rest is. In some cases, if there are few colors and large uniformly colored areas, GIF or PNG compression may have both a better quality and a smaller size, even when applied to a scanned image. Anyway, as long as the background is not perfectly homogeneous and the image is overall complex, JPG is the better choice. I used a compression factor of 8% for the image.

Back to Technical Support index


